
Bicycles Buying Guide for Commuting
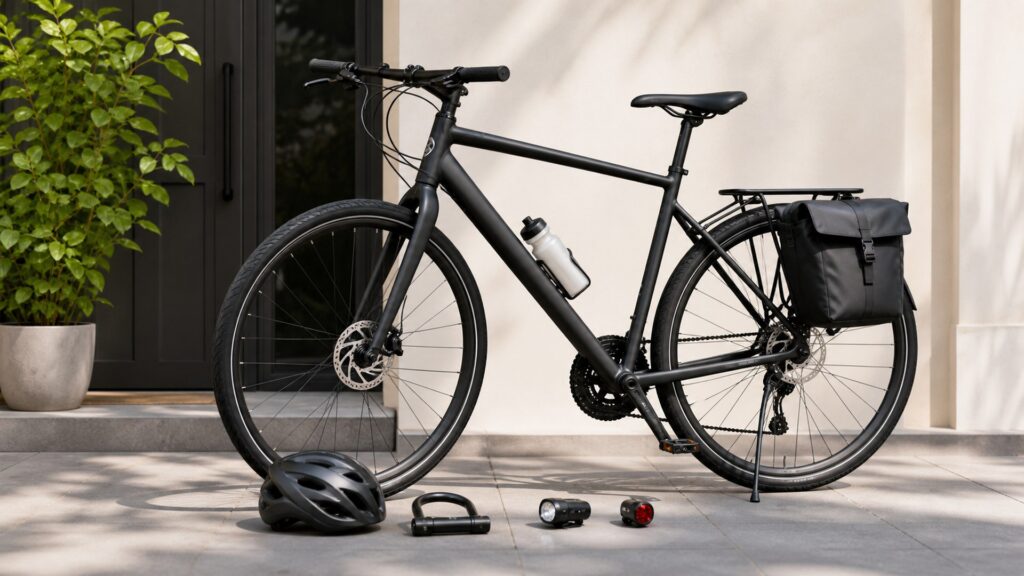
A commuting bicycle has to complete the whole trip: carrying your bag, coping with the route, fitting the parking space and getting through any stairs or transit connection. Start with an equipped hybrid or city bicycle if the journey is mainly practical urban riding. Consider drop bars, folding or electric assistance when distance, storage or hills create a specific reason to change that starting point.
The best choice is not necessarily the lightest bicycle or the one with the most gears. This guide focuses on loaded handling, weather equipment and everyday dependability. Work through the route and parking constraints before comparing upgrades, and price the lights, lock, luggage system and service needed to make the bicycle commute-ready.
Buying framework
Design the purchase around the complete commute
Map the trip from storage to destination before comparing bicycle styles. The difficult moments often happen away from steady riding.
Include stops and starts: Count frequent junctions, steep departures and rough sections, not just distance. The riding position and low gear should make repeated restarting manageable in the clothing and shoes you plan to use.
Decide how the bag travels: List the load carried on an ordinary workday and on occasional shopping trips. Compare a backpack with an approved rack and panniers before assuming the bicycle’s purchase price includes a suitable carrying system.
Resolve parking at both ends: Inspect the actual locking point or indoor storage area. Bicycle value, removable accessories and practical security need to suit that exposure; a premium build may be a poor match for unattended outdoor parking.
Measure the carry route: Check stairs, doors, lifts and any transit restrictions. Evaluate the bicycle as you will move it, including bags and accessories, rather than using the manufacturer’s bare weight as the whole answer.
Who this is for
Choose for the hardest part of the journey
Commuting patterns produce different priorities. Start with the constraint that would otherwise make you leave the bicycle at home.
Short urban trips with frequent stops: An upright or moderate-position hybrid can make controls easy to access and mounting straightforward. Check that bags, clothing and the chosen frame shape work together during repeated stops.
Longer trips on open paved roads: A drop-bar commuter or suitable road-oriented bicycle may provide useful hand-position choices. Verify luggage and fender compatibility before accepting a fast-looking frame that cannot carry the daily essentials.
A train connection or restricted office storage: A folding bicycle may turn storage into a manageable task. Try the folded package through the actual doorway and carry route; compact dimensions do not automatically make it easy to lift.
Hills, heavier loads or a demanding distance: Electric assistance or a utility bicycle may be worth considering. Include charging access, total load approval and lifting needs, because assistance on the road does not reduce the mass carried up stairs.
What to pay attention to
Inspect the bicycle with the commute equipment fitted
A useful demonstration includes luggage and ordinary clothing where practical. These details can matter more than a higher component tier.
Route and carried load
Check low gearing, brake access and luggage placement with the intended daily load.
Parking and daily reliability
Account for lighting, secure storage, lifting and service availability across the entire journey.
Lowest gear and control access: Try a controlled start on representative terrain and confirm brake access from the normal position. Compare the actual easiest ratio rather than total gear count, especially when a work bag adds load.
Rack approval and heel clearance: Match the rack, bag attachment and load rating to the bicycle. Check whether your heels strike the panniers while pedaling; a bag that clips onto a carrier can still occupy the wrong position.
Tire room with full fenders: Check clearance with the intended tires and guards together. Adequate room for the tire alone does not prove that a full fender can be fitted correctly, especially around brakes, fork crowns and frame bridges.
Lighting for the actual route: Distinguish a light that helps others notice you from a beam that illuminates an unlit path. Assess mounting, visibility around bags and the intended operating duration; do not compare lights by headline brightness alone.
Brakes in the delivered configuration: Assess lever reach and predictable braking with the planned load. Ask how pads and other wear parts are serviced, and confirm the accessories do not interfere with cables, hoses or normal control movement.
Loaded handling and total limits: Confirm the manufacturer’s definition of total permitted load and the limits of racks or other carrying components. An approved bicycle load does not override a lower carrier limit or make an unsuitable attachment acceptable.
Avoid these traps
Avoid equipment that solves only half the journey
A commuter needs more than a pleasant test lap. Look for these mismatches before committing to the final build.
Buying the bicycle before checking parking: A model that cannot be secured conveniently or taken indoors may become awkward every workday. Inspect the destination first and budget security as part of the transport purchase.
Assuming every rack fits every frame: Rack mounts, brake clearance, wheel size and load approval all matter. Have the actual carrier installed or confirmed before buying, rather than relying on a photograph of another bicycle with similar tubing.
Choosing a bright light without considering its beam: A narrow or poorly aimed beam may not suit the route even with a large lumen figure. Compare useful illumination and mounting stability, and follow the light’s aiming instructions rather than directing glare at other road users.
Buying puncture protection as a no-maintenance promise: Protective tire construction can be useful but does not remove pressure checks or the possibility of a flat. Choose a realistic repair or recovery plan instead of treating a tire label as guaranteed arrival.
Decision guidance
Select the bicycle that fits the whole trip
After a loaded fit check, use these route branches to decide which compromise is worthwhile. Avoid upgrading features unrelated to the limiting task.
If the trip is urban and luggage is routine: Compare equipped hybrids with the rack, fenders and lights already fitted. A complete build may weigh more than a bare sporting bicycle, but avoids discovering incompatible accessories after purchase.
If distance makes hand positions important: Try a drop-bar option with the intended carrying equipment. Accept the different brake and steering arrangement only if you can use it comfortably; familiar flat bars remain a valid choice for many longer journeys.
If transit or indoor storage sets a hard limit: Choose a folding design only after testing its fold, lift and stored shape. You trade some simplicity and potentially wheel or handling preferences for a package that can fit the off-bike part of the commute.
If hills or cargo justify assistance: Compare an approved electric or utility design with the real load, parking and charging arrangements. Pay for the capability that removes the trip barrier while accounting for battery support, extra mass and service access.
Ownership & compatibility
Make daily readiness easy to maintain
A transport bicycle needs a workable routine for wear and security. Choose equipment you can keep functioning during a normal workweek.
Check tires, brakes and fasteners: Follow the bicycle and accessory manuals for inspections, including carrier and fender attachments. Address looseness or rubbing promptly; commuting mileage can accumulate without the obvious milestone of a long recreational ride.
Keep wet-weather wear manageable: Clean and lubricate the drivetrain as specified for its parts and conditions. Arrange pad and chain checks with a shop if needed, and avoid assuming that a more expensive transmission removes routine care.
Plan charging and recovery: For powered equipment and lights, establish a charging routine using approved equipment. Keep an appropriate flat-repair option or another way home available so one puncture or depleted light does not leave the travel plan unresolved.
FAQ
Questions about the daily journey
Resolve the luggage, security and adaptation choices that affect everyday travel.
Can my current bicycle become a commuter?
Is a backpack better than panniers?
Does a belt drive eliminate maintenance?
Should I use a single-speed bicycle?
Are full fenders worth buying?
Can I rely on advertised e-bike range?
What if I have to leave the bicycle outside?
Do commuting equipment rules vary by location?
How should I test a commuter before ordering?
Bottom line
Choose the bicycle you can use on an ordinary workday
The commute-ready package is the meaningful purchase. Judge it against the route, load and storage rather than an isolated bicycle weight.
Solve the journey constraints: Approve parking, carrying and transit fit before selecting premium components.
Test the working bicycle: Assess controls and heel clearance with the accessories that will stay on it.
Budget dependable use: Include security, lighting and wear-part service before paying for optional refinements.
Reading Shortcuts
Follow the journey from route constraints to luggage and daily readiness.
Decision Reminders
Take these practical checks to the commuter test ride.
- 1: Inspect the real parking point first.
- 2: Check panniers against the pedaling heel path.
- 3: Specify tires and fenders together.
- 4: Compare the delivered, equipped weight.
Glossary Snippets
Terms that describe carrying and weather equipment.
When to Use a Top 10 Review
Use commuter lists after deciding how the bicycle will carry bags and be stored.
- Journey filter: Favor comparisons that include parking, cargo and weather equipment for the route.
- Equipped package: Check which lights, guards and carriers actually come with the quoted model.
References: Trek guide to adapting a commuter; Trek commuting preparation. Sources checked October 6, 2026. No hands-on product test or measured ranking is claimed. Compare finalists using the Comparison.
When to Use a Comparison
Compare bicycles with the lights, carrying system and security included.
- Resolve the specification: Specify tires and fenders together.
- Resolve the practical cost: Compare the delivered, equipped weight.
Need candidates first? See the Top 10. Confirm exact-model requirements before ordering.