
Brake Components Buying Guide for Brake Components Fitment and Compatibility
Brake fitment is not proven by year, make, and model alone. One vehicle line may use several rotor diameters, calipers, pad shapes, rear systems, wear sensors, or electronic parking-brake arrangements across production dates and options.
Treat every lookup as a claim to verify. Build data, original components, measurements, connectors, axle and side position, wheel clearance, and service procedures should agree before the part is installed.
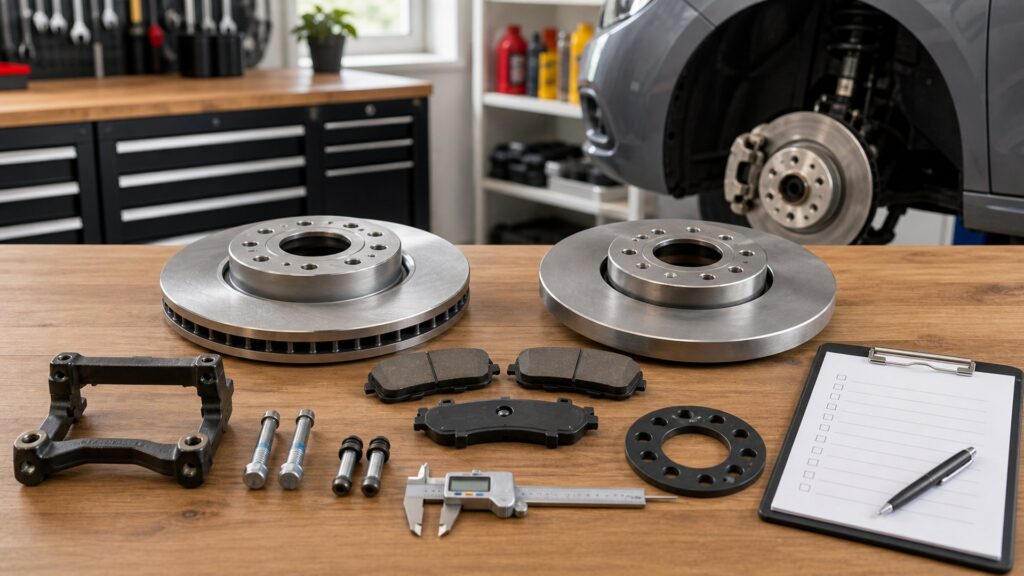
Buying framework
Prove fitment with independent clues
A catalogue result is a hypothesis until VIN/build data, axle position, original-part evidence, dimensions, and electrical or parking-brake interfaces agree.
Decode the exact vehicle: Capture the full VIN, production date, market, drivetrain, axle, wheel or brake option, and any heavy-duty package. Use manufacturer build data or reliable application resources rather than shortening the vehicle description to year and model.
Identify axle, side, and system: Separate front from rear, left from right where parts differ, service brake from parking brake, and disc from drum or drum-in-hat construction. Record electronic parking-brake and wear-sensor arrangements before removing anything.
Inspect the installed evidence: Photograph caliper castings, brackets, pad shape, sensor plugs, hose routing, rotor or drum, parking-brake mechanism, and original numbers. An incorrect previous repair is possible, so do not use one clue alone.
Measure controlling geometry: When the procedure permits, check rotor diameter, nominal thickness, height, center bore, bolt pattern, drum inside diameter and depth, pad or shoe dimensions, mounting spacing, hose fittings, and connector keys with suitable tools.
Resolve every mismatch: If VIN catalogue, build code, original number, image, or measurement conflicts, stop ordering. Ask the vehicle manufacturer, parts maker, or qualified supplier to document the application and return terms for the exact part.
Who this is for
Fitment risk rises with package variation
Production changes, optional brakes, electronic actuators, and incomplete vehicles create different evidence requirements.
Mainstream single-package vehicles: Even apparently simple applications need axle, position, VIN, and original-part confirmation. Check whether the catalogue splits by production date, wheel size, country, engine, or sensor and whether the kit includes the required clips or shims.
Performance and towing packages: Larger rotors, different calipers, thicker pads, vented rear discs, heavy-duty hoses, or unique wheels may accompany an option package. Verify the actual build code and do not infer brakes from exterior trim or wheel appearance.
Midyear and platform-transition vehicles: Suppliers may split by build date, plant, VIN sequence, casting, or measured dimensions. Use all specified breakpoints and retain photographs; a registration year does not identify when or where the vehicle was assembled.
Electronic parking-brake systems: Calipers, motors, connectors, harness routing, control modules, service mode, and calibration can differ. Match left and right position, electrical keys, piston method, and software procedure before choosing a mechanical-looking substitute.
Modified or incomplete-history vehicles: Brake swaps, salvage repairs, axle changes, wheel conversions, or prior mismatched parts weaken VIN-only lookup. Identify the installed system and determine whether it is an approved configuration before sourcing components or attempting service.
What to pay attention to
Fitment fields that should agree
The more interfaces a part has, the more independent checks should match before installation.
Mechanical Interface
VIN, codes, axle, side, rotor or drum geometry, pad or shoe shape, caliper, hose, and wheel clearance.
Electrical & Service
Sensors, actuators, connectors, parking brake, service mode, fasteners, torque, and verification.
VIN, build date, and option codes: Use the full identifier and manufacturer build record where available. Catalogue notes may depend on production range, brake sales code, axle, trim, engine, wheel, body, or market; record the exact qualifier used.
Rotor or drum geometry: Compare diameter, nominal thickness, minimum thickness or discard diameter, total height, offset, center bore, bolt holes, retaining screw, vane or solid construction, drum depth, parking surface, and directionality. Similar diameters can hide incompatible offsets.
Pad and shoe geometry: Match backing plate outline, ears, abutments, piston clip, friction thickness, chamfers, slots, shims, holes, wear indicator, shoe width, web, anchor, adjuster, and leading or trailing orientation. Do not trim or force friction parts.
Caliper and bracket mounting: Verify casting or engineering number, piston count and diameter, mount spacing, thread, bracket, slide design, hose and bleeder ports, parking lever or actuator, banjo sealing surfaces, and left/right placement. Bleeder orientation matters for air removal.
Hose, line, and fitting interfaces: Check end style, thread, seat, length, brackets, clips, protective sleeves, twist-free routing, and clearance through steering and suspension travel. A hose that screws in can still be too short, rub, kink, or use the wrong sealing form.
Electrical sensors and actuators: Match connector shell, keying, pin count, lead length, mounting clips, sensor location, wear logic, and electronic parking-brake motor or module. Never alter a safety connector to make an incompatible component appear to fit.
Wheel and service clearance: Confirm caliper-to-wheel clearance, rotor shield, fastener head, hose path, balance weight, and approved wheel diameter. Check whether the chosen part changes service tools, torque, electronic mode, or replacement hardware.
Avoid these traps
Fitment shortcuts that produce convincing wrong parts
Brake components can bolt partly into place while remaining dimensionally or functionally incompatible.
Using wheel size as the brake code: Wheel diameter may correlate with a package but rarely proves it. Different brakes can share wheels, and aftermarket wheels hide original equipment. Use build data, installed components, measurements, and documented catalogue qualifiers.
Trusting a product photograph: Images may be generic, mirrored, outdated, or show another kit revision. Compare published technical fields and part numbers, then inspect the received component against the original without assuming visual similarity proves sealing, offset, or electronics.
Mixing front, rear, left, and right: Some pads look similar across axles; calipers, hoses, sensors, and parking mechanisms may be side-specific. Label removed parts and verify position in both service information and the supplier application.
Forcing a connector or mounting ear: Grinding, slotting, bending, splicing, or forcing an incompatible brake part removes the evidence that the application is wrong and can create mechanical or electrical failure. Stop and resolve the mismatch before modification.
Discarding the old part too early: The original component provides casting, dimensions, connector, hardware, and wear-pattern evidence. Keep it clean and labeled until the repair is verified and return, core, or warranty requirements are understood.
Decision guidance
Choose the evidence path that resolves ambiguity
The part should not be installed until every controlling interface has an answer.
If the VIN lookup gives one unqualified result: Still verify axle, side, received dimensions, hardware, sensor, and original-part evidence. Catalogue errors and prior modifications are uncommon but possible; a quick comparison prevents forcing a wrong component.
If the catalogue lists two rotor sizes: Use the specified brake code, build date, caliper or bracket evidence, and measured diameter, thickness, and height. Do not select the smaller part from price or assume the larger option accompanies every large wheel.
If original numbers supersede: Confirm the replacement or service kit directly through manufacturer or supplier data, including companion bracket, hose, sensor, fastener, or software changes. A supersession may be correct without looking identical, but documentation should explain the difference.
If the vehicle has been modified: Identify the donor or approved kit, installation documentation, wheel clearance, hydraulic balance, electronics, and service parts. If system identity or engineering approval is uncertain, use a qualified specialist instead of guessing from individual components.
If the received part conflicts with one measurement: Stop installation, repeat the measurement with the prescribed method, verify units and reference points, and contact the supplier. Do not assume the old part is correct or the new catalogue is correct without resolving the third evidence source.
Ownership & compatibility
Create a fitment record for the next service
A verified application should not need to be rediscovered after the old parts are discarded.
Save identifying evidence: Record VIN, build date, option codes, axle, side, original casting and part numbers, measurements, connectors, photographs, supplier application, installed brand and number, lot information, and any documented supersession.
Label cores and returns: Keep removed calipers or other core parts protected, drained and packaged as instructed, with side and axle labels. Photograph the core and received replacement before transfer so disputes about identity, damage, or missing hardware can be evaluated.
Note package-specific procedures: Store service-mode steps, scan requirements, fastener replacement, torque sources, fluid specification, bleeding sequence, parking-brake adjustment, wheel clearance, road-test, and bedding instructions with the installed part record.
Recheck after later modifications: Wheel, axle, hub, knuckle, suspension, parking-brake, electronic-module, or brake upgrades can invalidate the record. Update the application file and verify system-level compatibility rather than reordering the last number automatically.
FAQ
Brake fitment and compatibility FAQ
Answers about VINs, brake codes, dimensions, supersessions, sensors, calipers, and returns.
Why can one vehicle model have multiple brake sizes?
Is the VIN enough to guarantee brake fitment?
Which rotor measurements matter most?
How do I identify left and right calipers?
Can I splice a different brake wear-sensor connector?
What does a brake option code tell me?
Should a superseded brake part look identical?
What if the original brake part is already wrong?
When should I stop a brake fitment attempt?
Bottom line
Fitment is a chain of matching evidence
VIN and catalogue start the process; codes, original parts, dimensions, connectors, axle, side, and service requirements finish it.
Decode the build: Record VIN, date, market, option code, axle, and package.
Inspect the installed system: Use castings, numbers, geometry, parking brake, sensors, and hoses.
Compare the received part: Verify every mounting, sealing, electrical, and clearance interface.
Save the record: Keep measurements, photos, supersessions, part numbers, and procedures.
Reading Shortcuts
Confirm measurements before ordering.
Decision Reminders
Checks to complete before committing.
- Confirm application: Cross-check vehicle and installed-system evidence.
- Diagnose first: Let abnormal wear guide inspection.
- Keep axle consistency: Use the specified paired-service scope.
- Follow procedures: Respect torque, fluid, electronics, and bedding.
- Protect friction: Prevent unsuitable chemical or fluid contact.
- Verify release: Confirm pedal, leaks, warnings, and operation.
Glossary Snippets
Terms used in this decision.
When to Use a Top 10 Review
Use rankings after fitment and repair scope are documented.
- Fitment confirmed: Filter with codes and measurements.
- Scope identified: Compare the complete required repair.
- Evidence visible: Rank construction, hardware, and support.
- Procedure covered: Include tools, fluid, testing, and records.
Already down to 2–3 options? A Comparison is usually faster.
When to Use a Comparison
Compare finalists for the same verified application.
- Application data: Match each dimension and interface.
- Included content: List hardware, sensors, and companion parts.
- Service evidence: Review instructions, traceability, and warranty.
- Installed outcome: Price labor, consumables, testing, and downtime.
Still building a shortlist? Start with a Top 10.