
Brake Components Buying Guide: How to Choose the Right One
Brake components should be selected after the system is inspected, not from noise alone. Pads, rotors, drums, shoes, calipers, hoses, hardware, sensors, fluid, hubs, and parking brakes interact, and abnormal wear often points to the real fault.
Identify the exact brake package, measure the old system, and build a complete axle or hydraulic service plan. Then verify tools, procedures, torque, electronic functions, road testing, and bedding before normal use.
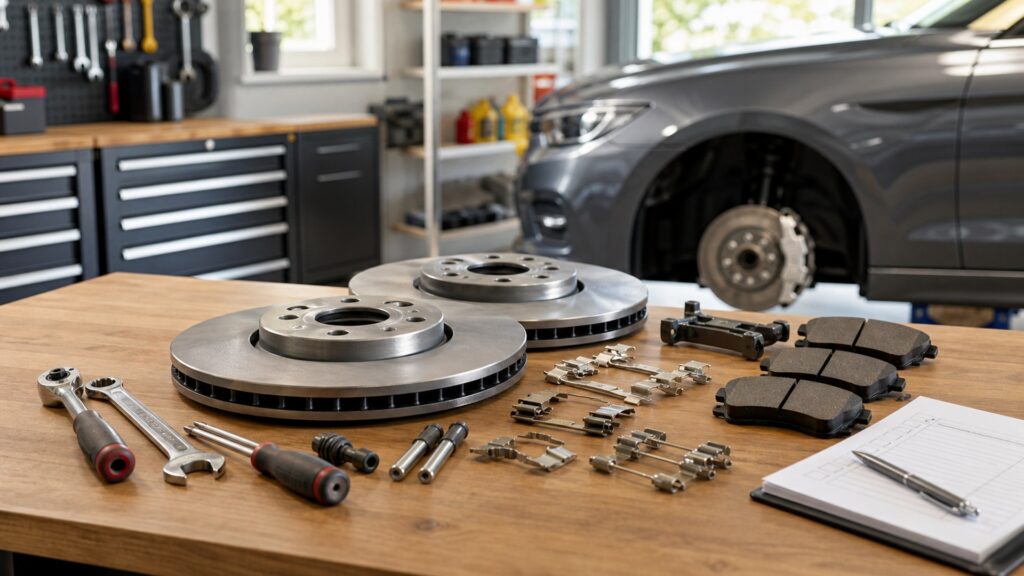
Buying framework
Diagnose the system before selecting parts
Brake components work as an axle and hydraulic system. Noise, vibration, pull, pedal change, warning lights, leaks, and wear patterns should determine the inspection—not a predetermined shopping list.
Define the complaint and urgency: Record when noise, vibration, pull, odor, warning, fluid loss, parking-brake fault, or pedal change occurs. Stop driving and seek qualified help for reduced braking, leaks, severe pull, metal contact, overheating, or an unsafe pedal.
Identify the exact brake package: Use VIN, build or option codes, axle position, original part numbers, caliper casting, rotor or drum measurements, parking-brake design, wear-sensor connector, and service information. One model can use multiple systems.
Inspect related components: Measure pads or shoes, rotors or drums, and runout where specified; inspect calipers, slides, boots, hoses, lines, hardware, hubs, bearings, parking brake, fluid, sensors, and mounting surfaces. Uneven wear is diagnostic evidence.
Choose the complete axle scope: Follow manufacturer requirements for axle-pair friction work, rotor or drum limits, hardware, sensors, fasteners, fluid, and companion components. Correct seized or restricted hardware before new friction material is installed.
Plan installation and verification: Confirm lifting, electronic service mode, torque, piston retraction, fluid handling, bleeding, parking-brake adjustment, scan functions, road test, and bedding. Use qualified service when the tools or procedure exceed the repair setting.
Who this is for
Match parts to system and use
Commuter, towing, corrosion, drum, and electronically controlled systems emphasize different inspection and service needs.
Routine commuter repairs: Prioritize exact fit, predictable pedal feel, low noise under normal temperature, corrosion resistance, included hardware, and local support. Daily short trips can leave surface rust or prevent brakes from reaching conditions that clear moisture.
Heavy-load and mountain drivers: Heat capacity, correct friction pairing, fluid specification, rotor or drum condition, tire grip, and manufacturer service guidance matter. Do not claim shorter stops from a pad label or use track-oriented parts without evaluating cold behavior and system compatibility.
Rust-belt and coastal vehicles: Coated non-friction surfaces, intact boots, free slides, serviceable bleeders, clean mounting faces, parking-brake hardware, and correct lubricants can matter as much as friction material. Corrosion can make the repair scope larger than the original estimate.
Rear drum and parking-brake systems: Shoe width, drum diameter and discard limit, wheel cylinders, springs, adjusters, backing-plate pads, cables, and installation orientation must match. Photograph disassembly and service one side as a reference only when procedures permit.
Electronic parking-brake vehicles: Confirm scan-tool or control procedure, service mode, actuator type, battery support, piston method, calibration, fault clearing, and emergency-release guidance. Forcing a piston can damage an actuator or create a system fault.
What to pay attention to
Specifications that make brake parts interchangeable—or not
Dimensions, interfaces, friction design, and service instructions matter more than a similar photograph.
Fit & Friction
VIN, package, axle, pad or shoe geometry, rotor or drum dimensions, caliper interfaces, and compound.
Service & Hydraulics
Hardware, sensors, fluid, hoses, torque, electronic mode, bedding, road test, and records.
Pad or shoe geometry: Compare backing-plate shape, ears, abutments, piston clips, chamfers, slots, shims, friction thickness, shoe width, anchor points, and sensor provisions. Minor differences can prevent movement, create noise, or defeat wear indication.
Rotor or drum dimensions: Verify diameter, nominal and minimum thickness or discard diameter, height, centering bore, bolt pattern, vane or solid design, drum depth, parking-brake surface, balance, and directionality where specified. Measure the original only after confirming it is correct.
Caliper and bracket interfaces: Match piston count and diameter, mounting ears, bracket, hose thread and orientation, bleeder location, slide design, parking-brake lever or motor, casting code, and left or right position. A bleeder must end at the intended high point.
Friction pairing and use: Choose a documented compound for the vehicle and operating environment, considering cold response, temperature range, noise, dust, rotor wear, pedal behavior, and bedding. Marketing names do not replace application data or testing.
Hardware and sensors: List abutment clips, anti-rattle springs, pad shims, retaining pins, boots, slide parts, wear sensors, one-time bolts, washers, banjo fittings, and caps. Reusing damaged or prohibited hardware can compromise movement or sealing.
Hydraulic fluid and hose compatibility: Use the exact fluid standard and procedure; prevent contamination. Match hose length, fittings, brackets, routing, protective sleeves, and steering or suspension travel. Hydraulic work may require bleeding sequences, scan functions, or pressure equipment.
Wear limits and verification: Use the controlling pad, shoe, rotor, drum, runout, and fluid specifications. Complete pedal checks, leak inspection, wheel torque, parking-brake function, warning checks, safe road test, and prescribed bedding before normal service.
Avoid these traps
Brake-part shortcuts that hide the root cause
New pads cannot correct every worn, seized, contaminated, misaligned, or hydraulically restricted component.
Ordering by year and model only: Different engines, wheels, axles, production dates, option codes, or regions may use different brakes. Confirm VIN and build data, then cross-check original parts, measurements, connectors, and service information.
Replacing pads on unusable rotors: Rotors must meet thickness, condition, runout, and machining or replacement rules. Deep scoring, cracking, heat damage, corrosion, or a hub problem can make new pads ineffective or short-lived even when the rotor looks thick.
Ignoring uneven wear: Inner-versus-outer or side-to-side differences can identify stuck slides, piston faults, hose restriction, hardware binding, mounting corrosion, runout, or other problems. Record the pattern and correct the cause before installing new friction material.
Using lubricant or cleaner indiscriminately: Friction surfaces, rubber materials, sliding points, threads, and fasteners have different product requirements. Follow the exact procedure and component instructions; contamination or unsuitable chemistry can damage seals, alter torque, or reduce friction.
Skipping final verification: Pumping the pedal, checking fluid and leaks, torqueing wheels, operating the parking brake, clearing warnings, road testing safely, and completing bedding are part of the repair. A vehicle should not move until a firm expected pedal is established.
Decision guidance
Select the repair from the diagnosed failure
The right parts list restores the complete brake corner or axle without concealing a hydraulic, mechanical, or mounting fault.
If wear is even and rotors pass: A vehicle-approved pad replacement may be appropriate when rotor thickness, surface, runout, hardware, caliper motion, hoses, fluid, and service procedure all pass. Follow axle-pair, machining, bedding, and reuse requirements.
If wear is tapered or unequal: Investigate slides, abutments, piston movement, hose restriction, bracket corrosion, hub runout, and installation history. Replace or service the failed components and verify free movement before judging the new pad or rotor.
If vibration is the complaint: Measure rotor or drum condition and runout using the specified procedure; inspect hub cleanliness, bearing play, wheel torque, tire issues, and friction deposits. Do not assume every pedal pulsation is solved by premium rotors.
If a leak or soft pedal exists: Stop normal driving and diagnose the hydraulic system. Inspect lines, hoses, calipers, wheel cylinders, master cylinder, fluid contamination, and required bleeding or electronic procedures; friction parts alone cannot repair lost hydraulic integrity.
If corrosion dominates: Plan extra hardware, fasteners, hoses or lines, parking-brake parts, time, and possible professional extraction or fabrication. Preserve structural and sealing surfaces and replace components whose identity, movement, or integrity is uncertain.
Ownership & compatibility
Use removed parts as evidence
Wear surfaces and hardware explain how the old system operated and whether the repair addressed the cause.
Photograph and measure the old parts: Record pad or shoe thickness by position, rotor or drum measurements, wear pattern, cracks, heat marks, corrosion, fluid leaks, boot condition, slide movement, sensor state, and part numbers before disposal.
Keep the installation record: Save VIN, brake code, brands and numbers, lot or serial data, included hardware, fluid, torque references, technician, date, mileage, road-test result, bedding instructions, and receipts. These support future diagnosis and warranty questions.
Monitor the bedding period: Follow vehicle and component instructions, preserve extra stopping margin, and watch for warning lights, leaks, odor, heat, pull, noise, vibration, or pedal change. Stop and inspect when behavior is unexpected rather than driving through a fault.
Inspect on condition, not folklore: Use the vehicle's maintenance guidance and measured trends. Driving, climate, corrosion, load, wheel design, and component condition change service life, so universal mileage intervals should not replace inspection.
FAQ
Brake component selection FAQ
Answers about fitment, pads, rotors, calipers, hardware, fluid, bedding, and replacement scope.
Can I identify brake parts from year, make, and model?
Should brake pads always be replaced with rotors?
Why are my inner and outer pads worn differently?
What hardware should be replaced during brake service?
How do I know whether a rotor is too thin?
Can I mix brake pad compounds on one axle?
Does replacing a caliper require bleeding the brakes?
Why is brake bedding important?
When should brake work go to a professional?
Bottom line
Buy the system correction, not the visible wear item
Exact fit, root-cause diagnosis, complete hardware, proper procedure, and verification determine whether replacement components restore reliable braking.
Identify the package: Use VIN, codes, original parts, dimensions, connectors, axle, and side.
Measure the system: Inspect friction, rotors or drums, calipers, hydraulics, hubs, and parking brake.
Plan the full scope: Include hardware, sensors, fasteners, fluid, tools, procedures, and downtime.
Verify the repair: Establish pedal, inspect leaks and warnings, road test safely, and follow bedding.
Reading Shortcuts
Use measurements and system clues for overall brake-component selection.
Decision Reminders
Checks to complete before committing.
- Confirm the application: Exact vehicle evidence controls overall brake-component selection.
- Diagnose before ordering: Abnormal wear can identify a fault outside the replaced part.
- Keep axle work consistent: Follow the controlling procedure for paired friction service.
- Use specified procedures: Lifting, torque, fluid, electronics, and bedding are vehicle-specific.
- Do not contaminate friction: Protect pads, shoes, rotors, drums, and fluid from unsuitable products.
- Verify before release: Pedal, leaks, warnings, parking brake, road test, and bedding all matter.
Glossary Snippets
Terms used in this decision.
When to Use a Top 10 Review
Use rankings only after the application and overall brake-component selection requirements are documented.
- Fitment is confirmed: Filter by VIN, codes, dimensions, and original-part evidence.
- The repair scope is known: Compare complete axle or hydraulic needs.
- Quality evidence is visible: Rank traceability, construction, hardware, and support.
- Installation needs are covered: Include tools, procedures, fluid, and verification.
Already down to 2–3 options? A Comparison is usually faster.
When to Use a Comparison
Compare finalists for the same vehicle and overall brake-component selection scenario.
- Compare application data: Match every dimension, connector, axle, and side.
- Compare included content: List hardware, sensors, fasteners, and companion parts.
- Compare service evidence: Review instructions, traceability, warranty, and support.
- Compare installed outcome: Price complete labor, consumables, testing, and downtime.
Still building a shortlist? Start with a Top 10.