
Car Phone Mounts Buying Guide: How to Choose the Right One
Car phone mounts solve three different problems at once: attaching to the vehicle, holding the phone, and placing the screen where it can be glanced at without covering the road or important controls. A strong clamp cannot rescue a weak vent slat, and a stable dashboard base is still a poor choice if the arm blocks the infotainment screen.
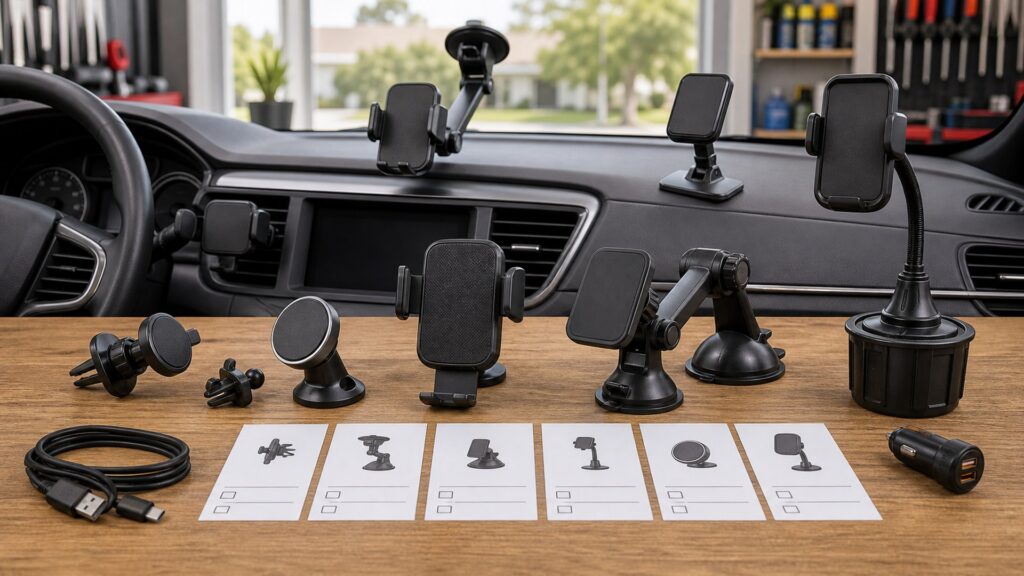
Start by choosing a safe location in your own cabin, then match the base, holder, and charging method to that location. This guide explains how vent clips, suction cups, adhesive pads, cupholder bases, mechanical cradles, and magnetic charging faces behave once a phone case, cable, road vibration, and summer heat enter the picture.
Buying framework
Choose the vehicle interface before the phone holder
A mount is a chain of interfaces. Work from the car toward the phone so a polished charging face does not distract from an unsuitable base or unsafe screen position.
Locate the screen first: Sit in your normal driving position and mock up the phone in portrait and landscape orientation. It should not cover the road, mirrors, gauges, warning lights, infotainment display, climate controls, or an airbag cover; also check local restrictions before using windshield glass.
Match the base to the cabin: Vent clips need slats that can carry the loaded mount without twisting. Suction cups favor clean, smooth glass or a compatible dash disk, adhesive pads need an approved surface and removal plan, and cupholder bases trade easy installation for a lower glance angle.
Match retention to the assembled phone: Measure the phone with its everyday case. Clamp arms need enough width and jaw depth without pressing side buttons, while magnetic faces need compatible hardware, sound alignment, and clearance around a raised camera module.
Design the power path: A passive holder only needs access to the phone port. A charging mount also depends on phone compatibility, the case, coil alignment, cable rating, and the vehicle adapter; wireless charging can slow when the handset becomes hot.
Who this is for
Different driving routines stress different parts of the mount
Frequency and road conditions determine whether quick docking, charging, compact storage, or maximum restraint deserves the most weight.
Occasional navigation: A simple mechanical cradle or compatible magnetic holder can be enough when the phone is mounted only for unfamiliar routes. Prioritize straightforward installation, an unobstructed sightline, and easy removal over powered features.
Daily commuter: Repeated insertion exposes awkward release buttons and joints that drift. Look for one-hand docking while parked, a short stable arm, and a cable or certified wireless-charging path that can support navigation without becoming a daily tangle.
Rough-road driver: Potholes and washboard surfaces magnify leverage at the base and ball joint. A mechanically supported cradle, short arm, positive joint lock, and firm vehicle attachment usually matter more than wide articulation.
Shared vehicle or shared mount: Households with different phones should compare case-on dimensions, camera bumps, magnetic compatibility, and driver seating positions. Tool-free angle adjustment is useful only if the joint can return to a stable position afterward.
What to pay attention to
Specifications that predict fit, movement, and charging
The useful numbers describe interfaces and ranges, not a vague claim of universal compatibility. Compare them with measurements from the actual cabin and assembled phone.
Vehicle Attachment
Base footprint, vent engagement, suction diameter, adhesive requirements, arm length, and joint leverage determine whether the cabin can support the mount.
Phone Interface
Jaw range, cradle depth, magnet and coil alignment, camera clearance, cable access, and orientation determine whether the phone can be held as used.
Arm length and joint leverage: Long arms can clear a deep dashboard, but they place more leverage on the base and amplify vibration. Use only as much extension as the sightline and reach require.
Clamp range and cradle geometry: Published width should cover the case-on phone, yet width alone is insufficient. Inspect jaw depth, lower support feet, side-button location, and whether a charging plug can enter without bending.
Magnetic and case compatibility: Magnetic retention depends on alignment and the complete case arrangement, not merely the presence of metal. For charging models, prefer a genuinely compatible MagSafe or Qi2 setup and confirm the camera bump does not tilt the phone away from the face.
Rotation and joint locking: A ball joint should hold the phone's weight at the intended angle after repeated rotation. Friction-only joints that are easy to reposition may also droop more readily on broken pavement.
Charging chain: The mount's advertised wattage is only one link. The phone, case, coil position, cable, vehicle adapter, active navigation load, and cabin temperature can all change actual charging behavior.
Avoid these traps
Four shortcuts that commonly create a bad installation
Most failures can be predicted in a parked vehicle before a liner is removed or a long drive begins.
Treating universal fit as a measurement: A universal label cannot describe every vent slat, dashboard texture, windshield rake, phone case, or camera bump. Measure the specific interfaces and verify them against the maker's stated range.
Choosing the longest arm for flexibility: Extra reach appears useful in a product photo, but it increases leverage and vibration. Start with the shortest geometry that keeps the display visible and reachable from the normal seat position.
Assuming a metal plate solves magnetic compatibility: Plate placement can interfere with wireless charging, and a thick or poorly aligned case can reduce useful attraction. Test retention and charging as separate requirements with the full phone assembly.
Committing before checking the movement envelope: Move the shifter, steering wheel, vents, screen controls, console lid, and passenger seat through normal use. A mount that works in one static photo may collide with the cabin during an ordinary trip.
Decision guidance
Select a mount style from the location's constraints
No mounting method wins in every car. Use these conditional choices after ruling out positions that obstruct visibility, controls, or safety equipment.
Choose a vent mount when the slats are suitable: Vent mounting can keep the phone compact and close to eye level without adhesive. Avoid it when the clip cannot match the slat shape, the loaded phone rotates the vent, or blocking heated and cooled airflow is unacceptable.
Choose suction or adhesive for independent positioning: A suction arm can work well on lawful, unobstructed glass or a compatible smooth disk. An adhesive base can be steadier on an approved flat surface, but only after checking finish compatibility, heat exposure, cure instructions, and removal consequences.
Choose a cupholder base when surface attachment is unsuitable: This style avoids vents, glass, and bonded pads and can move between vehicles. Confirm that the lower screen position does not demand a long glance and that the expanded base leaves the shifter, console controls, and useful cupholders accessible.
Choose charging only when the full power chain is compatible: A powered magnetic face is convenient for frequent navigation, while a passive clamp accepts more phone and case combinations. Pay for wireless charging only after confirming certification or stated compatibility, adapter requirements, alignment, and heat behavior.
Ownership & compatibility
Small maintenance checks prevent gradual loosening and surface wear
Heat, dust, road vibration, and device changes can alter an installation that initially appeared secure.
Clean the attachment interface: Dust and skin oils reduce suction and joint friction, while grit trapped under pads can mark trim. Follow the maker's cleaning method and never add household adhesive to compensate for a failing base.
Reinspect joints and contact pads: Check for drooping ball joints, hardened rubber, torn jaw liners, loose vent engagement, or an arm that rebounds into the display. Remove the phone until the affected part can be tightened correctly or replaced.
Retest after any setup change: A new case, phone, cable, power adapter, driver position, or vehicle can change retention and clearance. Repeat the parked sightline, control-movement, docking, and charging checks rather than assuming the previous result transfers.
FAQ
Car phone mount questions worth resolving before installation
These details often decide whether a seemingly compatible mount remains useful after the first trip.
Are vent mounts safe for every style of air vent?
Is a windshield phone mount legal in every state?
Will a magnetic mount work through any phone case?
Does a higher wireless-charging wattage guarantee faster charging in the car?
How can I reduce vibration from an extended mounting arm?
Can an adhesive dashboard mount be removed without leaving damage?
Should the phone sit at eye level while driving?
Is a clamp cradle more secure than a magnetic face?
What should I check before moving one mount between vehicles?
Bottom line
A good mount fits the car, the phone, and the driving routine
Begin with an unobstructed location, select the base that genuinely suits that surface, and evaluate retention with the case installed. Charging, articulation, and quick release are useful only after those interfaces work.
Vehicle first: Mock up the screen and move every nearby control before choosing the attachment method.
Phone assembled: Measure and test the handset with its normal case, camera bump, orientation, and charging connection.
Least complicated fit: Prefer the shortest, simplest configuration that remains stable, visible, reachable, and reversible enough for the cabin.
Reading Shortcuts
Move from cabin placement to the interface that still needs a decision.
Decision Reminders
Run these checks in the parked vehicle with the real phone installed.
- View: Keep the road, gauges, mirrors, and warning areas visible.
- Controls: Move the shifter, vents, screen, wheel, and console hardware.
- Case: Measure width, depth, buttons, camera bump, and charging port.
- Leverage: Use only the arm extension needed for reach and sightline.
- Power: Match phone, standard, cable, adapter, alignment, and temperature.
- Removal: Understand the release or adhesive-removal method before installation.
Glossary Snippets
Five terms that clarify how mount claims translate to the cabin.
When to Use a Top 10 Review
Use ranked picks after identifying the attachment style and holder type that fit your vehicle.
- Known mounting zone: You have ruled out obstructed and incompatible locations.
- Measured phone: Case-on dimensions and camera clearance are recorded.
- Defined power need: Passive, wired, MagSafe, or Qi2 charging is decided.
- Shortlist ready: You can compare products within one suitable design family.
Already down to 2–3 options? A Comparison is usually the faster next step.
When to Use a Comparison
Compare finalists only after both satisfy the same parked fit and safety checks.
- Same attachment class: Both bases suit the chosen vent, glass, dash, or cupholder.
- Same phone assembly: Retention is judged with one case and orientation.
- Same power chain: Charging claims use the required cable and adapter.
- One real tradeoff: The remaining difference affects reach, stability, release, or reversibility.
Still exploring? Start with a Top 10 to build a shortlist first.