
Cycling Accessories Buying Guide for Road Riding
For road riding, build a compact accessory kit around visibility, a workable puncture response and access to water. Fit those items without crowding the brakes or hiding the rear light behind a saddle bag. Add a navigation device when the route requires guidance, and training sensors when you have a clear use for their data.
The strongest purchase is a set of parts that works together on your particular road bicycle. This guide explains valve length, inflation choices, cockpit mounts and operating time so you can avoid a lightweight kit that fails at the roadside. It also separates useful upgrades from gadgets that duplicate equipment already on the bars.
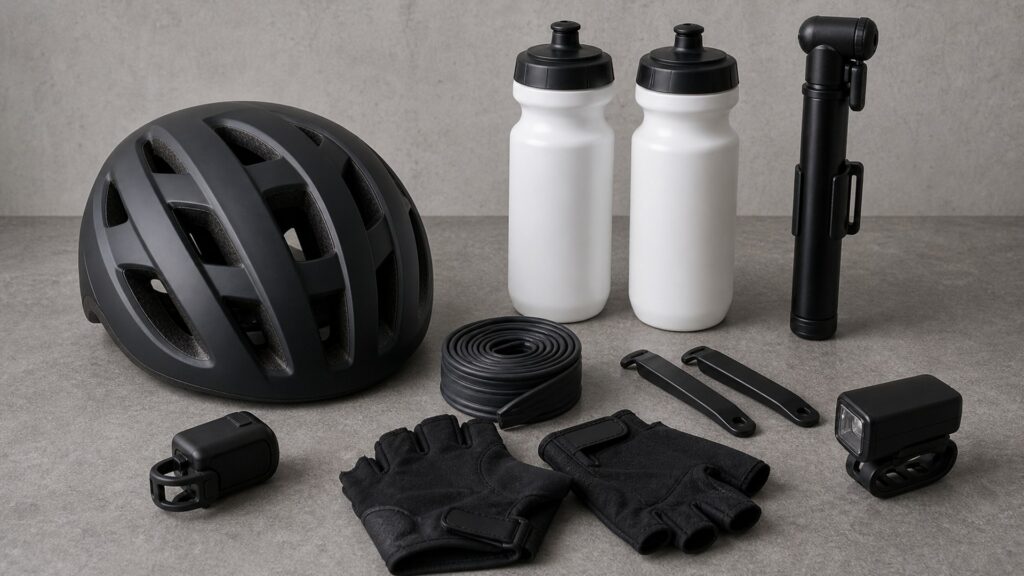
Buying framework
Equip the road bicycle as one system
Road accessories compete for limited space around the bars, saddle and bottle mounts. Plan their positions before choosing individual products.
Start with the actual wheel setup: Record tire dimensions, valve type and exposed valve length. Build the puncture kit for that configuration rather than buying a generic road pack by appearance.
Keep the controls clear: Reserve the normal hand positions and full steering movement before adding screens or lights. Check hoses and cables with the proposed mounts in place.
Plan for the return time: Allow for a delayed finish when selecting lights and route information. A daytime loop that occasionally ends after sunset needs a different lighting plan from one always completed in daylight.
Separate guidance from measurement: A map helps you find the route; cadence and power describe different aspects of riding. Decide which information changes your actions before buying another device.
Who this is for
Select the kit for the road session
The same road bicycle can serve several outings. Add equipment when the ride creates a specific need.
Familiar local loops: A small retained kit may cover tools, inflation and the appropriate visibility equipment. Keep access to bottles simple rather than filling every available mount.
Club rides in mixed weather: Ask about the organizer's guard and lighting expectations. Make sure rear spray protection, saddle luggage and lamps can coexist on the chosen frame.
Solo routes through unfamiliar areas: Give navigation and a practical recovery plan more weight. A stable display with downloaded route information may be more valuable than additional training measurements.
Early starts and evening finishes: Prioritize a front beam suitable for the surface and rear visibility for the whole outing. Mounting security and useful runtime deserve more attention than the smallest possible lamp.
What to pay attention to
Inspect the road-specific details
Small interface mismatches can defeat an otherwise sensible kit. Check these points with the bicycle fully equipped.
Compact equipment that works together
Check whether a small carried kit can reach the fasteners, inflate the valves and remain secured on the road bicycle.
Visibility and information on the road
Evaluate lighting and displays in their fitted positions, with enough operating time for the intended outing.
Valve access beyond the rim: Confirm the spare's valve projects far enough for the pump head to engage. Deep rims may require a compatible longer valve or extension arrangement; check this before packing the spare.
Inflation method: A mini-pump offers repeat use but requires effort, while a cartridge inflator has a finite gas supply. Choose a device you can operate and verify compatibility with the tire system and any sealant.
Tool reach and coverage: Match tool sizes to the roadside adjustments you can perform. A folding tool may contain the right bit yet be unable to reach a recessed fastener on an integrated cockpit.
Computer and lamp mounting: Check the exact locking interface, load allowance and approved bar contact. A combined mount saves space but may require a specific underside adapter for the lamp.
Rear lamp visibility with luggage: Inspect the bicycle from behind with the saddle bag loaded and the saddle at riding height. Place the lamp where its intended beam is not obscured by the bag, straps or clothing.
Bottle retention and access: Test the actual bottle and cage pairing, including removal within the frame. A very tight cage can be awkward to use, while a loose combination needs attention before a rough-road outing.
Avoid these traps
Avoid a tidy kit that cannot do its job
Minimal equipment is useful when it still covers the ride. These shortcuts sacrifice function without necessarily saving much space.
Packing a short valve for a deep rim: The tube may match tire diameter and width while leaving too little valve to inflate. Check the complete specification instead of treating all road spares as interchangeable.
Choosing an inflator without practicing: A first puncture is a poor time to learn a cartridge valve or unfamiliar pump head. Rehearse the manufacturer's procedure before relying on a single-use supply.
Stacking devices ahead of the bars: Screens, lamps and batteries can overload or crowd one mounting arrangement. Check the approved combination rather than adding another adapter simply because it attaches.
Treating radar as a substitute for observation: A compatible radar display may add information, but it does not justify ignoring surroundings or making unverified maneuvers. Buy it for a defined information preference, with its operating limits understood.
Decision guidance
Choose the road kit in this order
Resolve the repair and visibility functions before adding information devices. Keep each addition tied to a recurring need.
You want repeatable roadside inflation: Choose a suitable hand pump and a matched spare or repair system. Accept the pumping effort in exchange for avoiding reliance on a fixed number of cartridges.
Compact rapid inflation is a priority: Consider a compatible cartridge inflator after practicing with it and defining a backup. Include replacement cartridges in the ownership cost rather than treating the inflator body as the whole purchase.
Navigation regularly interrupts the ride: Compare a securely mounted existing phone with a dedicated computer. Assess readability, route handling and battery use before paying for advanced training features unrelated to finding your way.
The basic kit already performs reliably: Upgrade the specific weak point, such as a slipping bracket or inadequate light duration. Keep accessories that work instead of rebuilding the entire system to match a new device.
Ownership & compatibility
Keep the carried equipment ready
Small road kits are easy to leave untouched between outings. Check their contents after use and after changes to the bicycle.
Restore the puncture kit: Replace consumed supplies and inspect the spare's storage condition. Confirm the kit again when changing rim depth, tire size or inflation system.
Inspect quick-release attachments: Check cages, saddle-bag straps and computer or lamp mounts as their makers specify. Stop using a damaged retention part rather than relying on a secondary tether as its replacement.
Maintain electronics deliberately: Charge lights and navigation devices for the planned outing and keep the relevant route available. Review changes to pairing or software before a ride where you depend on the information.
FAQ
Questions about fitting a road accessory kit
Resolve the smaller details before relying on the packed setup.
Is a spare tube useful with tubeless tires?
Do all quarter-turn computers share a mount?
Can I use a phone instead of a computer?
Should a road pump prioritize pressure or volume?
Do I need a saddle bag?
Are aerodynamic accessories worth buying first?
Can I fit lights to an integrated handlebar?
Should I bring a chain tool?
What should I test on a shakedown ride?
Bottom line
Favor a coherent kit over the smallest collection
Road accessories should remain secure and usable when the ride changes. Finish the practical interfaces before optimizing weight or display features.
Make the wheel repairable: Match valve access, tools and inflation to the delivered wheels.
Preserve visibility and control: Fit luggage and electronics without hiding lamps or crowding hands.
Add information selectively: Pay for navigation or measurements that have a clear role in your riding.
Reading Shortcuts
Move from wheel details to cockpit fit and a practical road-kit choice.
Decision Reminders
Check the bicycle with every carried item in place.
- 1: Check exposed valve length with the intended pump head.
- 2: View the rear lamp behind the loaded saddle bag.
- 3: Leave normal hand positions clear.
- 4: Practice the selected inflation method before relying on it.
Glossary Snippets
Road-kit terms that can hide small compatibility problems.
When to Use a Top 10 Review
Find accessory candidates suited to the actual wheel and handlebar configuration.
- Road interfaces: Look for explicit rim, valve and bar compatibility details.
- Real capacity: Favor evidence of usable inflation and runtime over minimum dimensions alone.
References: Park Tool: tube and valve requirements; Park Tool: tire and tube repair options; Trek light selection guide. Checked October 6, 2026. This guide does not claim original product measurements. Use the Comparison to assess finalists.
When to Use a Comparison
Compare the packed kit, not isolated weight claims.
- Complete mounting: Add any approved light adapter or computer insert to the price.
- Roadside readiness: Count the spares and consumables required to make the chosen tool system work.
For a selection of candidates, visit the Top 10.