
Cycling Accessories Buying Guide: How to Choose the Right One
Buy cycling accessories by the job they need to do: equip the rider, make the bicycle visible, recover from a puncture, carry a load or secure it while parked. Start with gaps in your current setup, then prove that each item fits the bicycle. A bundle offers little value when its pump, brackets or bag cannot be used together.
This guide helps you build a useful kit in stages instead of treating every accessory as essential. It explains the interfaces to check, the specifications that affect a normal ride and the recurring costs behind connected gadgets. Navigation and performance data belong on the list when they solve a task you actually have.
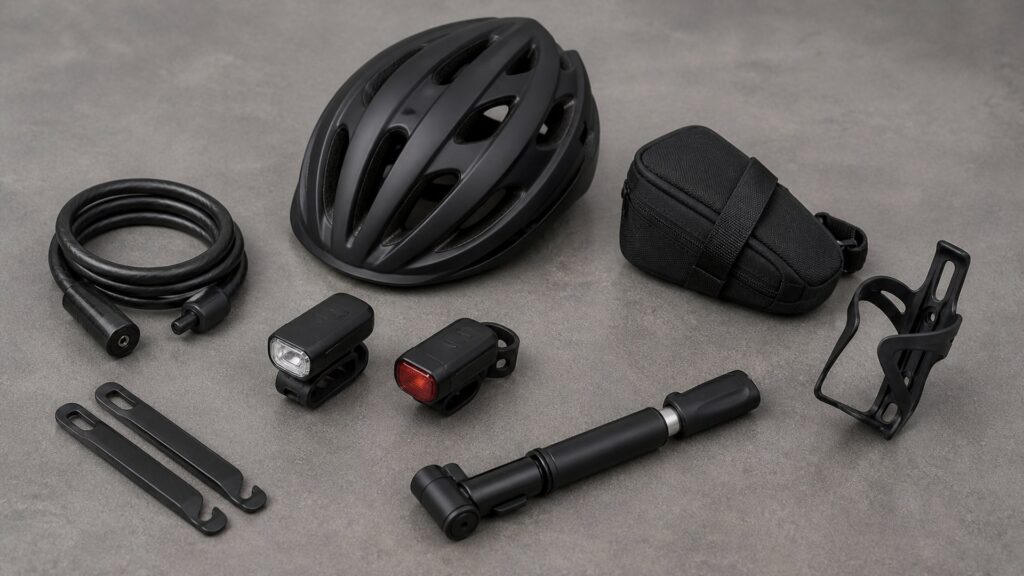
Buying framework
Give every purchase a specific job
Lay out what you already own before shopping. Choose the missing function first and the product within that function second.
Cover the rider and route: Check suitable rider equipment, including a properly fitted bicycle helmet, before decorative upgrades. For visibility and lighting, account for the actual route and riding times rather than copying a racing photograph.
Plan one workable puncture response: Decide how you would inflate and repair the tire system fitted to the bicycle, or obtain help when repair is impractical. A collection of tools is not a plan until the parts match and you know their use.
Add carrying and parking equipment when needed: A grocery trip may justify a carrier and lock that a nonstop training loop does not. Specify the objects and parking situation before choosing bag capacity or lock shape.
Delay overlapping electronics: Check what the existing phone, computer or trainer already provides. Add a sensor for a missing measurement, not simply because it appears in an accessory bundle.
Who this is for
Build the kit around a normal outing
Different rides need different accessory groups. Begin with the closest pattern and add only the functions it leaves uncovered.
Short recreational loops: Concentrate on rider equipment, appropriate visibility, water carrying and a realistic puncture or recovery option. A modest kit that stays on the bicycle can be more useful than a bag of gadgets left at home.
Daily transport and errands: Security, luggage and lighting across both directions become central. Evaluate the time needed to remove and carry accessories at each stop as well as their performance while riding.
Unfamiliar routes: Navigation earns its place when wrong turns or missing information regularly interrupt the ride. Decide whether a securely mounted phone meets the task before adding another screen and battery.
Structured training: Choose sensors according to the measurements the training system can use. Confirm the receiving device and application support before buying separate speed, cadence or power accessories.
What to pay attention to
Check six interfaces before ordering
Accessory descriptions often hide the decisive dimensions in compatibility notes. Inspect those notes against the actual bicycle and carried objects.
Bicycle interfaces and usable capacity
Check the physical fit of brackets, pump heads, bags and locks on the bicycle you own.
Ride coverage and continuing cost
Evaluate whether the kit covers the planned ride and whether its batteries, consumables and fittings can be maintained.
Mount shape and fastening: Confirm bar diameter and shape, saddle-rail clearance or rack geometry as appropriate. A bracket that appears close in a photo is not evidence that its clamp is approved for the contact surface.
Valve, spare and pump: Match the pump head to the valve, and the spare tube to tire size and usable valve length. Have the seller demonstrate the connection if the valve sits deep inside the rim.
Beam and selected-mode runtime: Compare how the light spreads illumination and how long the intended mode lasts. The highest output and longest battery duration may come from different settings.
Bag shape and usable opening: Try the actual load, including rigid items, with the closure fully fastened. Check that the loaded bag leaves knees, heels, steering and lamps unobstructed.
Lock reach and carrying position: Check that the lock can reach around the intended bicycle parts and parking fixture. Then find a secure transport position that does not strike the frame or interfere with riding.
Replacement and connection support: Look for available straps, brackets, charging leads and applicable device support. Losing a small proprietary mount can make an otherwise functioning accessory unusable.
Avoid these traps
Avoid comparisons across the wrong specification
More pieces or larger numbers do not necessarily cover more of the ride. Check the task behind each claim.
Buying a kit for its item count: A bundle can contain duplicate functions and incompatible spares. List which pieces you will actually use, then compare their combined price with a smaller, matched purchase.
Equating lumens with route suitability: Total light output does not describe distribution or aim. Distinguish being noticeable from illuminating an unlit surface, and assess the beam needed for your route.
Treating liters as a fit guarantee: A narrow bag can hold its claimed volume while excluding a laptop, shoe or rigid tool. Dimensions and opening shape matter when the contents cannot bend.
Assuming a wireless label settles compatibility: Bluetooth or ANT+ support alone does not establish every data field or control function. Check the specific accessory, receiver and application combination before paying for integration.
Decision guidance
Buy the smallest kit that covers the ride
Work through the practical functions before optional conveniences. A successful choice removes a defined gap without making the bicycle harder to use.
The current kit cannot handle a puncture: Prioritize a compatible inflation and repair arrangement, or a dependable recovery option. Practice with the actual wheel rather than buying a smaller version of a tool you have never used.
The route includes darkness: Choose the required front and rear lighting functions and a usable operating duration first. Resolve mounting and aiming before spending on wireless switching or matching finishes.
Luggage or parking is the limiting task: Fit the bag or lock to real objects and stopping points. A carrier-mounted load trades fitting work for taking weight off the rider; a backpack avoids that fitting but stays on your body.
The essentials already work: Add navigation, sensors or convenience items only for an identified benefit. Keep the existing equipment when the proposed upgrade merely reproduces a function you already use successfully.
Ownership & compatibility
Keep the kit complete between rides
Accessories create small maintenance jobs that are easy to overlook. Make those jobs part of the purchase decision.
Replenish the repair supplies: Replace used tubes, patches or cartridges and inspect stored rubber parts. A pouch can look complete even when its only spare was used on the previous ride.
Check the attachments: Follow the makers' installation and inspection instructions for straps, clamps and carriers. Recheck clearance after changing bags, lights or other nearby equipment rather than assuming the old arrangement still works.
Maintain powered and washable items: Use the specified charging and cleaning methods, and dry equipment as directed. Keep a simple charging routine so an accessory is ready when its function is actually needed.
FAQ
Questions before assembling an accessory kit
Resolve these details before buying a bundle or replacing equipment that still works.
Are universal accessories truly universal?
Should I buy everything from the bicycle's brand?
Is a floor pump enough?
Do I need both a phone and a cycling computer?
How should I choose a helmet?
Can accessories move between bicycles?
Is an expensive multitool always more useful?
Should I replace a working accessory to save weight?
What should I ask about returns?
Bottom line
Choose by coverage, fit and upkeep
The useful accessory is the one that works on your bicycle on an ordinary ride. Finish the essential system before decorating it with extras.
Name the missing function: Identify the route, repair, carrying or parking problem first.
Prove the interface: Match mounts, valves, load shape and electronic support before checkout.
Price continued use: Include replacement fittings and any ongoing service cost in the comparison.
Reading Shortcuts
Find the missing function, then check its physical and electronic interfaces.
Decision Reminders
Bring the existing equipment list when comparing kits.
- 1: Match the spare tube and pump to the fitted wheel.
- 2: Compare runtime at the mode you intend to use.
- 3: Try rigid contents inside the closed bag.
- 4: Identify replacement brackets before buying proprietary mounts.
Glossary Snippets
Terms behind accessory capacity and compatibility claims.
When to Use a Top 10 Review
Use shortlists to find options within a needed function, rather than a universal accessory winner.
- Function first: Separate lighting, repair, carrying and data products into relevant candidate groups.
- Useful detail: Favor clear interface dimensions and included parts over a long list of features.
References: Park Tool: tire and tube interfaces; Trek cycling light guidance; NHTSA: bicycle helmet fit. Checked October 6, 2026. This guide does not claim original product measurements. Use the Comparison to assess finalists.
When to Use a Comparison
Compare complete usable setups instead of bundle item counts.
- Ready to fit: Include any adapter or additional bracket required for the bicycle.
- Existing overlap: Remove duplicate functions from the shopping list before comparing total prices.
For a selection of candidates, visit the Top 10.