
Cycling Apparel Buying Guide for Beginner Cyclists
You do not need a complete cycling wardrobe to begin. Start with clothes that let you pedal and reach comfortably, with loose hems and ties secured clear of moving parts. After a few suitable local rides, buy the garment that solves an observed problem, whether that is shifting fabric, awkward coverage, missing storage or a need to try padded shorts.
This guide explains the first clothing choices without assuming that beginners should dress like racers. You will learn how to compare ordinary clothing, waist shorts, padded liners and bibs, check the fit in riding posture, and build a small wardrobe that can be washed and ready for the next outing.
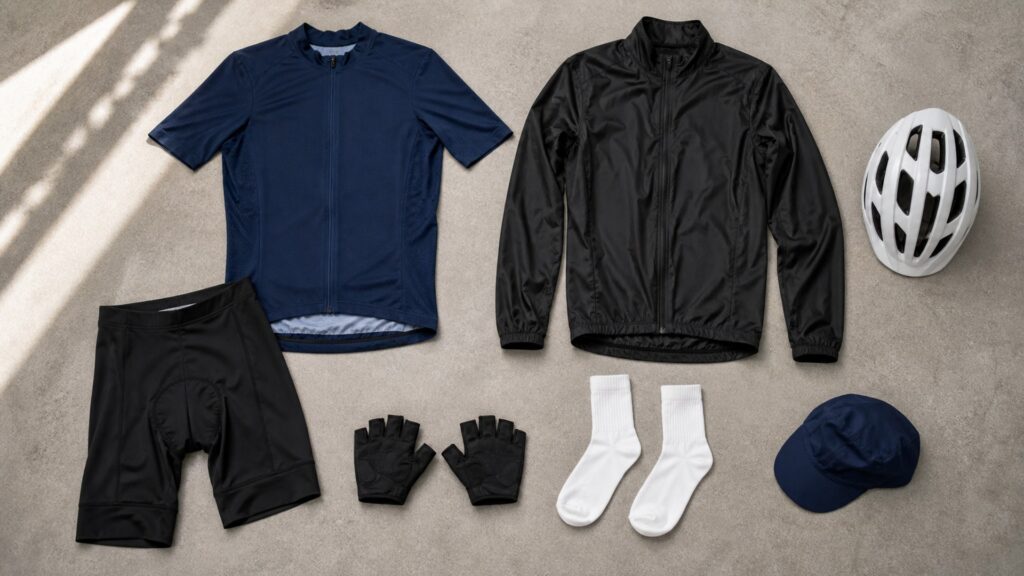
Buying framework
Make the first purchase solve one problem
Beginner clothing is most useful when it removes a barrier you have actually noticed. Start with a short assessment rather than a full-kit shopping list.
Try the usable clothes you own: Choose pieces that allow knee and hip movement while reaching for the bars. Check loose trouser legs and long tops against the bicycle before deciding that specialist clothing is necessary.
Name the clothing limitation: Separate a waistband that rolls, a top that rides up and a need for pockets. One targeted purchase is easier to judge than replacing the entire outfit at once.
Plan for the ride, not just the departure: A cool start can become a warm return. Before buying an insulated jersey, decide whether you need warmth throughout or coverage you can remove; a removable layer also needs somewhere to go.
Leave room to change your preference: Try one suitable garment before buying multiple colors or a large bundle. Early rides will tell you more about preferred cut, coverage and care than a category label can.
Who this is for
Which riding situation describes your first outings?
Choose the closest pattern below, then check the details for the garment it points toward. Ride conditions matter more than whether a shop labels an outfit beginner or performance.
Local errands with frequent stops: You ride short stretches, get off the bike often and want clothes that work at your destination. Movement, trouser-leg control and off-bike practicality take priority; padding is a separate trial rather than a compulsory first purchase.
Longer outings with sustained saddle time: You are extending rides and spending more of each outing seated. A well-positioned padded short becomes worth comparing, while waist pressure, shoulder straps and toilet access help separate waist shorts from bibs.
Rides with casual off-bike stops: You want padding but prefer loose outer shorts at a cafe, park or shop. A liner system preserves that coverage; allow room for both layers and include the outer short in the fitting trial.
Cool departures with warmer returns: Your main clothing problem is changing coverage during the same ride. A removable outer layer may be more useful than new shorts, and a pocket or bag must accommodate it once you warm up.
What to pay attention to
Six checks for the first cycling garment
You can make a useful fitting decision without understanding every fabric technology. Focus on the details you can observe in your own riding posture.
Contact and retention
Read pad placement, stretch panels and holding details together: the garment must stay settled while hips and knees move, without using restrictive pressure to hide a poor cut.
Coverage and carrying
Check what the garment covers in forward reach and where your essentials go. A liner, outer short and jersey should work as an outfit rather than three separate product photographs.
Measurements and size chart: Use the maker's measurement guidance rather than copying your everyday trouser size. If you fall between sizes, compare the actual cut and return options instead of guessing that tighter is more professional.
Seated reach and coverage: Bend as you do on the bicycle and move the legs. Check that the waistband, back hem and sleeves remain suitably placed without restricting the motion.
Pad position: A padded short should hold its insert smoothly rather than letting it fold or slide. Try a different size or cut if the garment cannot retain the pad without uncomfortable edges.
Waist or shoulder retention: Waist shorts rely on elastic around the middle; bibs use shoulder straps and avoid that waistband. Bend and lift each knee to check for rolling elastic, pulling straps or leg grippers that dig in; the retention method should not restrict the pedal stroke.
Outer-layer compatibility: When buying a liner, try the intended outer shorts too. Confirm whether the liner needs that coverage and whether the combined layers leave adequate room through the pedal stroke.
Jersey hem, zipper and pockets: Reach forward and check the back hem, then try opening the zipper with the garment on. Where a fitting trial permits, load rear pockets with the items you carry and look for sagging; pockets add little if a bag already handles those items.
Avoid these traps
Skip the beginner shopping traps
More specialist-looking clothing is not always a useful next step. These assumptions can turn a simple purchase into an expensive experiment.
Buying the whole matching outfit first: Matching graphics do not establish that both garments fit. Choose shorts and tops independently, even if that means different sizes or collections.
Treating pad thickness as a comfort rating: A product photograph shows bulk, not how the insert lines up with your saddle contact. Do not rank shorts by the thickest-looking pad or accept a poor-fitting short because its foam looks substantial.
Stacking two padded garments: A liner under already padded shorts creates two inserts instead of improving the fit of either one. If you want loose outer coverage, pair the padded inner garment with an unpadded outer short.
Assuming discomfort means a more expensive garment: Clothing fit is one possible issue, but riding position and the bicycle setup also matter. Avoid buying successive premium shorts without identifying what changed and where the problem occurs.
Decision guidance
Choose one useful next step
Buy for the problem that matters on your next rides. These branches identify the garment to try and the practical cost of choosing it.
If existing clothing passes the checks, keep it: When your sports top covers your back and your trousers allow pedaling with loose edges secured, there is no clothing purchase to force. Continue with that outfit until you can name a missing function; matching graphics alone do not create one.
If you want one padded garment, compare waist shorts and bibs: Waist shorts are simpler to pull down at a stop and make a straightforward first trial. Choose bibs instead when you prefer strap support to a waistband, accepting the extra dressing and toilet-access steps; rehearse those steps with your intended top.
If casual outer coverage matters, choose a liner system: Try a padded liner beneath roomy, unpadded shorts. You keep the outer appearance you want, but accept another layer to buy if necessary, fit and wash; standalone padded shorts are the simpler alternative when that coverage is unimportant.
If temperature or carrying is the problem, buy for that first: A cool-to-warm outing points toward removable coverage; missing on-body storage points toward a jersey with usable pockets. A shell needs storage after removal and a jersey adds cost, so keep your existing top or bag when it already performs the job.
Ownership & compatibility
Make a small wardrobe easy to reuse
Padded shorts combine stretch fabric, seams and an insert that all need care. Before ordering a second pair, learn how quickly the first can be washed and fully dried between your actual rides.
Wash the stretch fabric and pad as instructed: Read the label for detergent, temperature and drying permissions; shorts-makers may specify gentle washing, no softener and air drying. Close fastenings on other garments before washing them together so hooks and rough edges cannot snag the short fabric.
Let the whole insert dry before reuse: Check the padded area rather than assuming dry outer fabric means the garment is ready. If it is still damp when the next ride arrives, laundry turnaround gives you a concrete reason for a second pair after the first has proved suitable.
Inspect the parts that hold the short in place: Look for loose pad stitching, damaged leg-gripper sections, stretched straps or waistband elastic that no longer returns to shape. Note whether the pad has started shifting; a change in garment retention deserves attention before simply buying a thicker insert.
FAQ
First cycling-clothing questions
The main choices above leave a few practical wearing questions. These answers cover the extra layers, accessories and checkout details that can otherwise turn into unnecessary purchases.
Do I need a base layer under every cycling jersey?
Can I wear unpadded shorts over padded cycling shorts?
Should underwear go under padded cycling shorts?
Are removable arm warmers a necessary first purchase?
Should my first cycling gloves be fingerless or full-finger?
How do I check whether tight shorts provide enough coverage?
Do I need cycling shoes at the same time?
Does beginner status determine whether I buy a race-cut jersey?
Can I return shorts after a test ride?
Bottom line
Use fit as the veto, then choose the clothing system
Decide in this order so a premium pad or matching jersey cannot distract from an unsuitable garment. A successful first outfit is the starting point for later purchases, not a promise that you need every specialist piece.
First, rule out the wrong fit: Reject restricted pedaling, displaced padding or lost coverage before considering price and appearance. Those failures cannot be solved by choosing a more impressive product description.
Next, choose the route that matches the limitation: Keep workable clothes, select a waist or bib short for a padding trial, or use a liner for casual coverage. If warmth or carrying is the unresolved need, put that purchase ahead of another padded piece.
Finally, approve one trial rather than a wardrobe: Check the intended layers, care instructions and seller fitting conditions for the chosen garment. Buy one suitable piece first; a second copy earns its place through successful use and the need for laundry rotation.
Reading Shortcuts
Start with existing clothing and identify the first useful purchase.
Decision Reminders
Separate a useful first purchase from a bigger shopping basket.
- 1: Describe the clothing issue in one sentence.
- 2: Compare a padded garment with its intended layers.
- 3: Practise putting bibs on and managing a stop.
- 4: Confirm fitting permission before an outdoor trial.
Glossary Snippets
Plain-language terms for first-time clothing shoppers.
When to Use a Top 10 Review
Use a shortlist when you know the garment type but have not identified candidates.
- Start with one category: Look for waist shorts, bibs, liners or jerseys that meet the function you have chosen.
- Keep the list relevant: Exclude entries without your size or intended clothing system before comparing features.
References: Cycling UK clothing advice for new riders; PEARL iZUMi shorts, liners and bib fitting. Checked October 7, 2026. This guide does not claim original product measurements. Use the Comparison to assess finalists.
When to Use a Comparison
Use a head-to-head comparison after narrowing the shortlist to a few actual garments.
- Compare the same job: Put the finalists side by side on pad layout, retention method, coverage and size guidance.
- Include the complete purchase: Count a required outer short and check each seller's fitting conditions before treating one price as better value.
For a selection of candidates, visit the Top 10.