
Cycling Apparel Buying Guide: How to Choose the Right One
Choose cycling apparel in the position you ride, with the layers and pocket load you intend to use. Start with shorts or a liner that hold the chamois securely, then add a jersey and weather layers for your normal conditions. Bib straps, a thick pad or a race-fit label do not guarantee that a garment will suit your body.
The useful comparison is between complete outfits: waist shorts and a jersey, bib shorts, a liner under outer shorts, or a layered setup for cooler rides. This guide explains what to try, which garment details change daily use, and where spending more adds a function rather than simply a premium label.
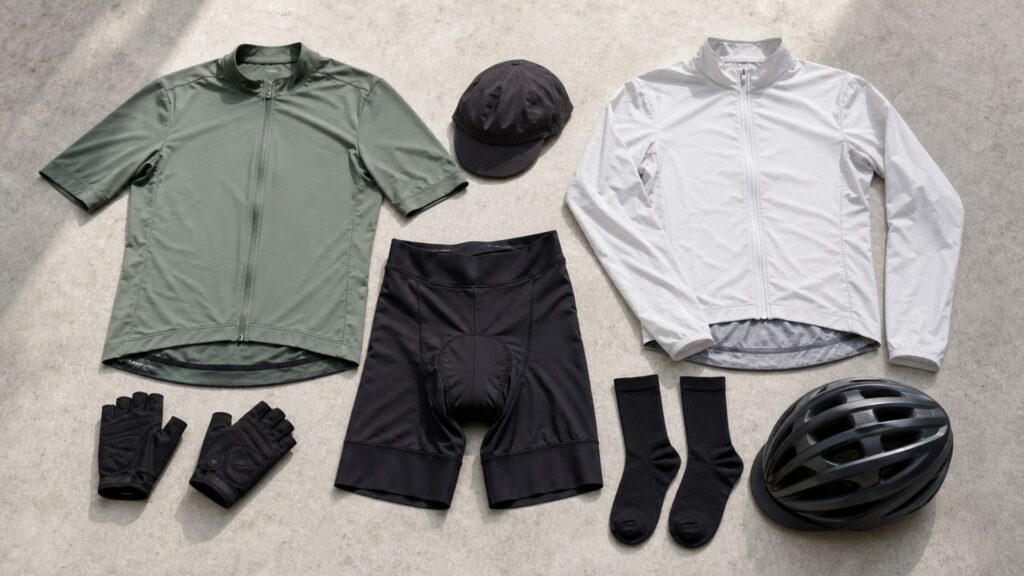
Buying framework
Build the outfit from contact outward
Clothing works as a system when each garment has a clear role. Settle the pieces that touch and move with you before adding weather protection.
Start at the saddle contact: Try the shorts or liner in riding posture and check that the chamois stays positioned without folding. Choose pad shape and garment fit together instead of ranking shorts by visible pad thickness.
Match the cut to your posture: Reach forward as you do on the bicycle and bend at the hips. The jersey back, sleeves and waistband should remain useful in that position, even if their standing appearance differs from casual clothing.
Assign each layer a job: Separate insulation, wind reduction and rain protection when planning an outfit. One shell may serve several conditions, but no label removes the need to check ventilation and room for the layers underneath.
Plan stops as well as pedaling: Try pocket access, zipper operation and the process for a toilet stop. These ordinary tasks can decide between equally plausible waist shorts, bibs and outer-layer systems.
Who this is for
Choose for the rides and stops you make
A close road outfit and a loose outer short solve different preferences. Select the scenario that describes your use rather than treating one style as the advanced choice.
Regular paved-road rider: You spend sustained periods seated and carry small items in jersey pockets. Stable pad placement, a suitable forward-reaching cut and pockets that stay settled deserve more attention than decorative features.
Casual rider with frequent off-bike stops: You want clothing that transitions comfortably into errands or cafés. Waist shorts or a padded liner under suitable outer shorts may fit the routine, provided the extra fabric does not interfere with pedaling.
Trail or mixed-surface rider: You prefer outer coverage and may use separate protective equipment. Check liner retention and the outer short's movement with the rest of the outfit rather than assuming a loose cut automatically clears everything.
Rider facing cool starts and warmer finishes: Your clothing needs to change during the outing. Favor compatible layers, usable ventilation and a place to pack the removed shell instead of buying one heavily insulated garment for every ride.
What to pay attention to
Judge the garment while moving
Use the size chart as a starting point, then inspect the fit in riding posture. Compare the same intended outfit and pocket load across candidates.
Fit while pedaling
Look at the points that move or carry load: pad, straps, waistband, hems and pockets. A size label cannot settle how these behave in your riding position.
A clothing system for the conditions
Build around the expected conditions and the ability to add or remove clothing. Layer compatibility and ventilation matter alongside the fabric's stated weather function.
Chamois shape and position: The pad should lie smoothly where the garment is designed to support you, without migrating as you pedal. A more elaborate foam construction is not useful if its shape or placement fails the fit check.
Waistband or bib-strap retention: Waist shorts should stay up without rolling or uncomfortable pressure; bib straps need an appropriate torso length. Try both in the bent position rather than interpreting firm standing strap tension alone.
Seams, hems and leg grippers: Look for folds, rubbing points and restrictive edges through the pedaling movement. Grippers should retain the leg opening without requiring a smaller overall size that distorts the rest of the garment.
Jersey reach and loaded pockets: Lean forward and place representative items in the pockets. Check back coverage, sleeve reach, zipper comfort and whether the load pulls the jersey down or bounces away from the body.
Shell function and ventilation: Identify whether the garment is primarily a wind shell, an insulating layer or rain protection. Inspect closures, coverage and ventilation; a water-repellent treatment alone does not establish a fully waterproof garment.
Layer allowance and packed size: Try the shell over the base and midlayers you expect to use, then pack it into its intended bag or pocket. A jacket that fits only over a thin jersey may not serve the cooler outfit you are buying it for.
Avoid these traps
Avoid buying comfort from a headline claim
Fabric names and performance language can hide a poor fit. Reject these shortcuts before they fill your wardrobe with rarely worn pieces.
Choosing the thickest chamois: Thickness does not establish where the pad sits or whether it stays flat. Compare the complete short in riding posture and treat claimed ride-duration categories as guidance, not a personal comfort guarantee.
Sizing down for a race appearance: Excess tension can pull seams, restrict movement or shift the pad. If one size is loose in one area and restrictive elsewhere, try a different cut rather than forcing that garment to work.
Treating wind resistance as rain protection: A light shell can be useful against wind yet provide limited protection during sustained rain. Buy for the stated function and construction instead of assuming all shiny outer fabrics do the same job.
Buying every layer at once: Several individually attractive garments may overlap in function or fit poorly together. Establish the everyday outfit first, then fill a specific weather gap with a layer that works over it.
Decision guidance
Choose the clothing system that fits your routine
There is no compulsory progression from waist shorts to bibs. Select by secure fit, stops, outer coverage and the weather function you need.
Choose waist shorts for straightforward dressing: Use them when the waistband remains comfortable and the pad stays positioned while riding. They simplify many clothing changes, but reject a pair that rolls or needs repeated adjustment.
Choose bib shorts when their retention suits you: Bibs can avoid relying solely on a waistband, provided the straps fit your torso in riding posture. Try the toilet-access design before buying, since convenience differs between constructions.
Choose a liner and outer short for separate coverage: This arrangement lets the liner hold the pad while the outer garment provides the appearance or coverage you prefer. Check that the layers move together without bunching or creating unnecessary bulk.
Choose layers for a changing forecast: Combine the needed insulation with a suitable wind or rain layer rather than buying warmth by thickness alone. Leave room for movement and decide where removed clothing will go during the ride.
Ownership & compatibility
Buy for the laundry cycle too
Apparel is repeatedly worn, washed and dried. Care requirements and turnaround time affect how much clothing you actually need.
Follow the garment care label: Use the specified washing and drying method rather than one routine for every fabric. Chamois, stretch panels and technical shells can have different care requirements; check any restrictions on softeners, heat and cleaning products.
Rotate enough to start with dry clothing: Plan around how often you ride and how long the chosen garments take to dry under their permitted care method. A second dependable pair of shorts may be more useful than an unused specialist layer.
Inspect wear and repair options: Check seams, grippers, straps, zippers and pad attachment for damage or loss of function. Ask about supported repairs and any shell-treatment care before assuming that a cosmetic refresh restores the original performance.
FAQ
Cycling-apparel buying questions
These choices often remain after the fitting-room comparison. Garment-specific instructions and your actual riding posture should guide the final decision.
Should I wear underwear under padded cycling shorts?
Can I wear two padded layers for extra comfort?
Are bib shorts always better for long rides?
How should I choose between two sizes?
Do I need a cycling jersey for every ride?
Will a rain jacket also keep me warm?
Can I wear a padded liner on its own?
Are gender labels enough to select the right pad?
How much cycling clothing should I buy first?
Bottom line
Choose fit first, then the missing function
A useful cycling wardrobe begins with an outfit you can ride and manage comfortably. Add weather capability without disturbing that foundation.
Keep the pad stable: Choose shorts or a liner whose cut holds the chamois properly through the riding movement.
Test the whole outfit: Check reach, hems, loaded pockets and layers together rather than judging garments only while standing.
Buy the layer with a clear job: Use insulation, wind protection or rain protection to address a real condition, with a care routine you can sustain.
Reading Shortcuts
Work from saddle contact to fit and weather layers.
Decision Reminders
Use these checks during a complete-outfit try-on.
- 1: Bend into riding posture.
- 2: Check the chamois during movement.
- 3: Load jersey pockets realistically.
- 4: Read the care label before buying.
Glossary Snippets
Terms that describe the clothing's actual function.
When to Use a Top 10 Review
Use the list to find garments in the system you have chosen.
- Select the garment family: Decide between waist shorts, bibs or a liner system before comparing models.
- Find the missing weather role: Choose insulation, wind protection or rain protection for the gap in your outfit.
References: PEARL iZUMi shorts and bibs fitting guide; PEARL iZUMi cycling-jacket guide. Checked October 6, 2026. This guide does not claim original product measurements. Use the Comparison to assess finalists.
When to Use a Comparison
Compare fit and layer compatibility across finalists.
- Compare like-for-like outfits: Wear the same underlying layers and use a representative pocket load.
- Include ownership: Check drying, washing and supported repairs alongside the initial fit.
For a selection of candidates, visit the Top 10.