
Cycling Gear Buying Guide for Beginners
Beginner cycling gear should make the next few rides safer, simpler, and more comfortable without burying the rider in unfamiliar equipment. Start with a stable helmet fit and appropriate visibility, then solve water, contact discomfort, carrying, and basic mechanical interruptions as those needs become real.
The bicycle and route determine the details. A short park loop needs a different lock, light, and repair plan from a traffic-heavy commute or longer fitness ride. Buy in a deliberate order, check every mount and size on the actual rider and bike, and learn how each item works before adding another layer of gear.
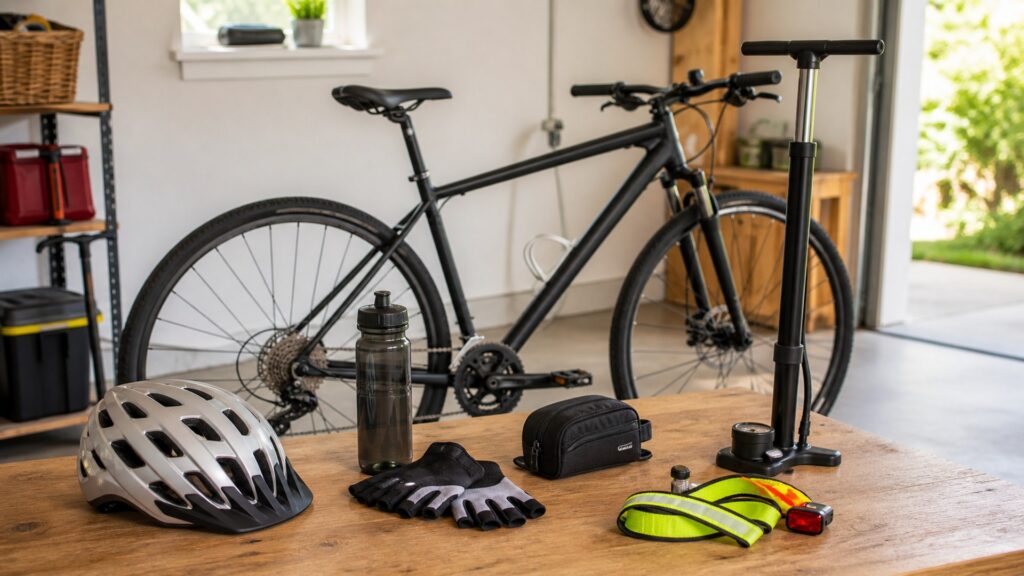
Buying framework
Build a first kit one solved problem at a time
The goal is not to own every cycling accessory. It is to cover fit, visibility, hydration, comfort, and likely interruptions with equipment the rider can use confidently.
Fit the helmet before shopping further: Check size, level position, retention adjustment, and strap routing according to the manufacturer's instructions. Eyewear, hair, and cold-weather layers should not destabilize the fit.
Make the rider visible on the planned route: Identify traffic, shade, dusk, rain, and crossing angles, then choose lights or reflective elements that mount securely and remain simple to operate.
Carry water and essentials securely: Decide where a bottle, phone, identification, keys, and small repair items will go. Nothing should swing, fall, block a light, or interfere with pedaling and steering.
Address discomfort after identifying it: Hands, seat, feet, and clothing can create pressure or rubbing. Check bicycle setup and technique before assuming a heavily padded replacement is the only answer.
Learn the basic roadside plan: Match inflation, a tube or tire-repair method, and relevant tools to the bicycle. The rider should know when to attempt a repair and when to call for help.
Who this is for
First rides do not all need the same kit
Route, bicycle, distance, confidence, and storage change the sensible starting point. Choose the closest pattern and add only what its conditions require.
The neighborhood learner: Prioritize helmet fit, easy-to-use visibility, water, and secure storage for identification and a phone. Keep clothing comfortable and avoid specialized upgrades until handling feels familiar.
The path and fitness beginner: As distance grows, add contact comfort, bottle access, weather layers, and a tested repair fallback. Make one fit change at a time so its effect is clear.
The new commuter: Traffic visibility, a lock that fits destination parking, stable cargo, and weather planning become essential. Rehearse the full trip, including arrival storage and the return ride.
The shared-bike household: Helmet sizing remains individual, while lights, bags, pumps, and tools may be shared only if mounts and compatibility work. Recheck attachment and aim whenever accessories move.
The cautious mechanical beginner: Carry a simple kit that matches the bicycle and the repairs the rider can perform. Pair it with communication, identification, and a realistic pickup or transit plan.
What to pay attention to
Beginner gear details worth understanding
Useful specifications explain fit, visibility, attachment, access, or bicycle compatibility in plain language. Avoid paying for complexity before the basic function is clear.
Helmet size and retention: Use the stated head-size range as a starting point, then check level position, even pressure, strap routing, and stability during head movement. Follow the fitting guide for the model.
Light mount and controls: A light should attach securely, aim correctly, and remain visible around bags or clothing. Buttons, charge indication, runtime, and removal should be understandable before riding in low light.
Bottle and bag clearance: Confirm a bottle can enter and leave its cage within the frame. Bags should avoid heels, wheels, cables, steering movement, and any front or rear light.
Glove and clothing contact: Check seams, grip, closures, stretch, and pressure while holding controls and pedaling. Padding should not reduce brake or shifter feel, bunch under the rider, or trap excessive heat.
Tube, valve, and pump compatibility: Record tire or tube size and valve type, then verify the inflation connection and any wheel-removal needs. A repair item is useful only when it matches the bicycle.
Adjustment simplicity: Straps, buckles, mounts, zippers, and tools should be operable without guesswork. Practice at home and keep instructions for any item whose correct setup is easy to forget.
Avoid these traps
Beginner purchases that create confusion
Overbuying is not the only risk. Poor fit, incompatible repair items, hidden lights, and unfamiliar controls can make a large starter kit less useful than a small tested one.
Copying another rider's kit: Experienced cyclists choose around their own bicycle, routes, preferences, and skills. Use their setup as a source of questions, not a ready-made shopping list.
Buying every comfort item at once: Simultaneous changes to saddle, shorts, gloves, grips, and shoes make discomfort difficult to diagnose. Confirm bicycle adjustment and change one major contact variable at a time.
Trusting an untested repair bundle: Included tubes, pump heads, tools, or patches may not fit the bicycle. Verify compatibility and practice the steps before treating the bundle as roadside support.
Mounting lights wherever space remains: A light can be blocked by a bag, jacket, or body and still appear bright nearby. Check aim and visibility from road-relevant angles after loading the bicycle.
Adding technology before mastering basics: Computers and apps can be enjoyable, but they do not replace helmet fit, visibility, water, control, or a repair plan. Add electronics when they answer a real riding question.
Decision guidance
A practical buying order for new cyclists
Build the first kit in stages and learn each item before expanding it. The route may change the order, but every purchase should solve a problem already identified.
First: fit a helmet correctly: Choose a size and shape that can sit level and stable without painful pressure, then adjust retention and straps according to the instructions. Confirm compatibility with eyewear and seasonal head layers.
Second: cover route visibility: Add front and rear lights or reflective elements appropriate to traffic, shade, dusk, and weather. Check mounting, aim, side visibility, controls, charging, and obstruction on the loaded bicycle.
Third: secure water and essentials: Provide reachable water and a stable place for identification, phone, keys, and any necessary medication or personal item. Choose capacity around the ride rather than filling the largest available bag.
Fourth: solve observed contact problems: Evaluate hands, seat, feet, and clothing after representative rides. Adjust the bicycle first where appropriate, then compare gloves, shorts, grips, socks, or footwear against the specific pressure or rubbing.
Fifth: assemble a compatible fallback: Match inflation, tube or tire repair, and basic tools to the bicycle, and practice using them. Add communication and a pickup, transit, or walking plan for problems beyond the rider's ability.
Ownership & compatibility
Turn the first kit into a reliable routine
Beginner gear is easier to use when it has fixed storage, simple checks, and a clear reset after each ride. Familiarity matters as much as ownership.
Store the core items together: Keep helmet, lights, water bottle, bag, repair supplies, and keys near the bicycle without exposing them to damaging heat, moisture, or impact. A consistent location reduces forgotten equipment.
Use a short pre-ride check: Confirm helmet condition and fit, light charge and mounting, secure bags and bottles, appropriate tire inflation, and working bicycle controls. Follow bicycle and product guidance rather than improvising adjustments.
Clean and dry after riding: Wash clothing and wipe equipment according to care instructions, empty bottles, open damp bags, and dry wet layers. Inspect straps, mounts, seams, and tools while everything is accessible.
Review needs after several rides: Distance, route, weather, carrying, and comfort priorities become clearer with experience. Add or replace gear because a repeated need appeared, not because another cyclist owns it.
FAQ
Beginner cycling gear FAQ
These answers establish a sensible first kit and explain the compatibility checks new riders commonly miss.
Which cycling essentials belong in a beginner's first kit?
How can a beginner check helmet fit?
Do beginners need bicycle lights during the day?
Should a beginner buy cycling gloves?
Are padded cycling shorts necessary for beginners?
What should a beginner carry on a short ride?
How does a beginner choose a bike repair kit?
How can new cyclists avoid buying too much gear?
When should beginner cycling gear be upgraded?
Bottom line
Start small, fit it properly, and learn it
A strong beginner kit covers the next rides with equipment the rider understands. Secure helmet fit and visibility first, then add water, comfort, carrying, weather, security, and repairs as the route proves they are needed.
Buy in priority order: Do not let optional electronics or performance clothing delay fit, visibility, and a basic fallback.
Test on the actual bike: Check every size, mount, clearance, control, bottle, bag, and repair item before relying on it.
Let experience guide additions: Review repeated discomforts and route problems after several rides, then solve one clearly defined need.
Reading Shortcuts
Move to first-kit priorities, new-rider profiles, compatibility checks, or beginner questions.
Decision Reminders
Keep the next several rides, the actual bicycle, and the rider's current skills in view.
- Fit: Set helmet stability and contact comfort on the intended rider.
- Visibility: Mount and aim lights with bags and clothing already in place.
- Compatibility: Match bottles, bags, inflation, tubes, valves, and tools to the bicycle.
- Learning: Practice every adjustment and repair item before depending on it away from home.
Glossary Snippets
Beginner terms for fitting, mounting, and matching essential gear.
When a Top 10 Helps
Use beginner rankings after deciding which single fit, visibility, carrying, or repair need comes next.
- Need filter: Reject products that do not solve a problem already observed on the intended route.
- Ease filter: Compare fit, mounting, controls, compatibility, care, and the rider's ability to use the item.
A Top 10 helps when the beginner knows the gear category needed and the exact job it must perform.
When a Comparison Helps
Compare two beginner options by fit, clarity, and compatibility rather than advanced features.
- Setup: Compare sizing, adjustment, mounting, instructions, controls, and interaction with existing gear.
- Real use: Compare visibility, comfort, access, reliability, cleaning, storage, and repair fit on the route.
The better first purchase is the option the rider can fit, understand, and use correctly without unnecessary complexity.