
Engine Filters Buying Guide for Engine Filters Fitment and Compatibility
Engine-filter fitment is not proved by year, make, and model alone. One vehicle line can use different air boxes, oil-filter housings, fuel modules, threads, standpipes, valves, sensors, and service kits across engines, production dates, and regions.
Build the application from VIN and engine data, then compare the installed housing and original assembly with current catalog notes, OE cross-references, dimensions, sealing geometry, flow-control features, fittings, and service procedure before the system is opened.
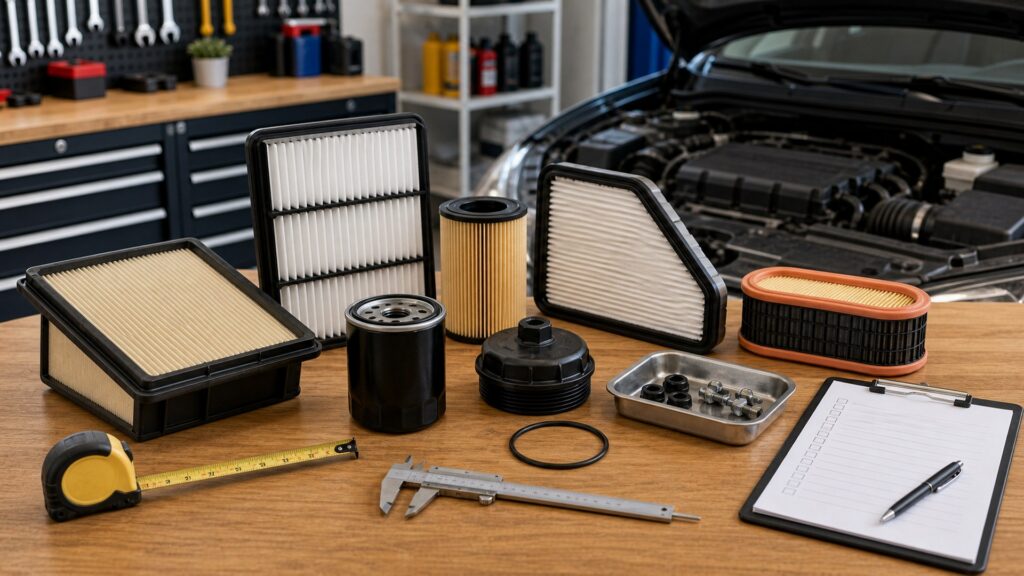
Buying framework
Prove fitment at every interface
Filter compatibility requires more than a shared outside dimension. The engine, housing, flow path, seal, valves, fittings, sensors, and service procedure must all agree.
Start with vehicle identity: Record VIN, engine family or code, displacement, fuel type, emissions package, production date, region, and relevant option or build data. Resolve catalog notes before comparing brands.
Identify the service position: Distinguish engine air from cabin air, primary from safety elements, engine oil from another cartridge, and primary from secondary diesel fuel filters. Similar parts can occupy different circuits or stages.
Inspect the original assembly: Record part number, manufacturer marks, element profile, dimensions, locating features, gasket or O-ring, thread, standpipe, ports, arrows, sensor, heater, drain, and housing-cap number. Confirm the removed part was itself correct.
Cross-check current numbers: Compare OE numbers, supersessions, reputable catalog applications, technical notes, production breakpoints, and component instructions. A cross-reference is a lead, not proof, when interfaces or valve functions are undocumented.
Dry-verify before contamination: Compare new and old parts away from open air, oil, or fuel circuits. Confirm seals, orientation, cover closure, fitting protection, and included hardware before coating, filling, or installing anything that would prevent return.
Who this is for
Fitment failures differ by filter architecture
Panel air elements, spin-on cans, cartridges, inline fuel filters, and diesel modules each hide different compatibility traps.
Panel and radial air elements: Check perimeter seal profile, length, width, height, corners, locating tabs, pleat support, airflow direction, and cover compression. A slightly short seal can admit unmetered and unfiltered air even when the lid latches.
Spin-on oil filters: Match thread diameter and pitch, gasket inside and outside diameter, can clearance, mounting-seat geometry, bypass arrangement, anti-drainback need, flow, burst strength, and application. Never force a can that begins threading incorrectly.
Cartridge oil-filter systems: Verify element length and end geometry, standpipe or cage, center seals, cap compatibility, drain mechanism, large O-ring profile and groove, small stem seals, orientation, and whether the cap or drain plug has a replacement interval.
Inline gasoline fuel filters: Confirm pressure rating, flow arrow, fitting type and size, clip or washer design, bracket, diameter, shielding, and fuel-system pressure-relief procedure. Similar barbs or quick-connects do not prove pressure or material compatibility.
Diesel fuel modules: Identify primary or secondary position, efficiency requirement, water separation, bowl, drain, heater, water sensor, seals, thread, ports, vent, priming pump, and bleeding method. Swapping positions can defeat the intended staged filtration.
What to pay attention to
Fitment data that deserves an exact match
Measure and compare the features that locate, seal, route flow, and communicate with the vehicle.
Vehicle identity
VIN, engine code, build date, fuel and emissions configuration, OE number, supersession, and service position.
Physical interface
Envelope, tabs, seals, thread, standpipe, valves, fittings, electronics, orientation, and cover closure.
Engine and production breakpoint: Treat engine code and build date as application fields, not footnotes. A housing, filter supplier, emissions package, or fuel module can change during a model year without changing the marketing name.
Element envelope and locating geometry: Compare overall length, width, height, diameter, end shape, center bore, tabs, notches, standpipe depth, cage, and cover clearance. Measurement helps resolve uncertainty but should not replace a verified catalog application.
Seal profile and compression: Match O-ring cross-section, molded gasket contour, radial or face seal, material guidance, groove position, and compression path. A seal placed on cap threads instead of its groove can cut, extrude, or leak.
Spin-on thread and gasket land: Verify thread pitch and engagement, gasket dimensions, baseplate holes, seating surface, can clearance, and installation turns or torque. A common thread does not establish the correct valves, flow, or gasket contact.
Valve and standpipe arrangement: Confirm bypass location and calibration where specified, anti-drainback requirement, drainback standpipe, cartridge end seals, and housing flow path. An apparently interchangeable element can leave a port open or block intended flow.
Fuel fittings, ports, and electronics: Match inlet and outlet orientation, quick-connect geometry, banjo or threaded fittings, sensor connector, heater, water bowl, drain, vent, bracket, protective sleeve, and priming interface. Do not adapt high-pressure fuel parts casually.
Supersessions and kit contents: A current service number may include revised element, cap, drain, O-rings, sensor seal, clip, or installation note. Compare every kit item and read the supersession instructions rather than reusing the old arrangement automatically.
Avoid these traps
Fitment assumptions that create leaks or bypass
A part can resemble the original, close inside the housing, or appear in a cross-reference and still route air, oil, or fuel incorrectly.
Treating dimensions as the whole application: Matching length and width cannot prove media duty, seal compression, bypass calibration, anti-drainback function, pressure rating, fuel compatibility, or sensor interface. Use dimensions to confirm a cataloged application, not invent one.
Assuming the old filter is correct: Previous service may have installed a short cartridge, wrong O-ring, universal fuel filter, or incorrect oil can. Verify the housing and current service data independently before using the removed part as the master.
Discarding the box before trial comparison: Packaging contains application, lot, instructions, warranty, and return evidence. Keep the new part clean and uninstalled until every interface and included seal has been reconciled.
Stacking seals: An oil-filter gasket or cartridge O-ring can remain on the mounting face or in the groove. Adding the new seal can produce a severe leak. Inspect and clean the exact sealing location before assembly.
Forcing a cover, thread, or connector: Resistance can signal a misplaced element, wrong height, cross-thread, trapped O-ring, incorrect fitting, or unseated clip. Stop, reopen, and identify the interference instead of using extra fastener or latch force.
Decision guidance
Resolve uncertainty before opening the system
Fitment questions are cheapest while the vehicle still runs and the new part remains returnable.
If two applications share the same dimensions: Compare engine and production notes, OE cross-references, seals, valves, standpipe, media specification, fittings, and sensors. Choose only after a current source supports the exact configuration.
If the original number is discontinued: Trace the official supersession and read whether caps, seals, brackets, housings, or procedures changed. Do not rely on a marketplace listing that presents the old and new numbers as visually equivalent.
If the housing has been replaced: Identify the installed housing manufacturer and part number, then reconcile it with the vehicle and service parts. An aftermarket or revised housing may require its own cap, element, or seal while still needing the vehicle's fluid and procedure.
If the new filter will not seat normally: Remove it without forcing, protect the open circuit, compare end geometry and seals, inspect for retained parts or debris, and confirm orientation. Obtain the correct component before resuming service.
If a leak or warning follows installation: Shut down when oil or fuel leakage or pressure indication is abnormal. Preserve the installation, inspect seal placement, cap or can seating, fittings, level, priming, and exact part identity under the service procedure.
Ownership & compatibility
Create a verified application record
A short record prevents the same catalog overlap from being rediscovered at every service.
Save the complete identifier set: Record VIN, engine code, build date, installed housing or module, OE number, current replacement number, filter brand and number, seal part numbers, and photographs of locating and electronic features.
Note the installed orientation: Document airflow arrow, primary or secondary position, cartridge end direction, seal groove, fuel-flow arrow, connector, drain, and fitting clip. Do not rely on a generic service-memory shortcut later.
Retain packaging and lot data: Keep the label, lot or date code, receipt, instructions, and unused alternate seals through the first operating checks. These support returns, warranty, counterfeit questions, and investigation of a revised application.
Verify after the next heat cycle: Follow any specified recheck for oil level, leaks, cap or drain, fuel seepage, water warning, intake noise, and starting. Record the result so later problems can be separated from the filter service.
FAQ
Engine-filter fitment FAQ
Answers about VIN data, measurements, seals, cross-references, valves, and filter housings.
Why can one model year use several engine filters?
Can I choose an air filter by measuring the old one?
What proves a spin-on oil filter fits?
Why did the cartridge filter kit include several O-rings?
Can an OE cross-reference be wrong?
Does a fuel-filter arrow always point toward the engine?
What if an aftermarket housing uses a different filter?
Should the air-box lid need force after a filter change?
When should I stop a filter installation?
Bottom line
Compatibility is a chain of matching interfaces
Confirm the exact engine and service position, then prove the housing, element, seal, flow-control features, fittings, and procedure before installation.
Resolve identity: Use VIN, engine code, build date, position, and current OE data.
Match the housing: Check envelope, tabs, standpipe, cap, thread, and clearance.
Match the functions: Verify seals, valves, media duty, fittings, sensors, and flow.
Do not force uncertainty: Keep the system closed until the correct part is proven.
Reading Shortcuts
Confirm application and condition first.
Decision Reminders
Checks to complete before committing.
- Confirm the exact application: Cross-check vehicle, engine, housing, and original part.
- Preserve removed-part clues: Contamination and damage can identify another fault.
- Keep the work clean: Keep downstream openings protected.
- Follow the procedure: Respect pressure, fluids, torque, priming, and resets.
- Inspect interfaces: Seals, caps, connectors, threads, and fittings must agree.
- Verify before release: Check leaks, warnings, starting, idle, and road behavior.
Glossary Snippets
Terms used in this decision.
When to Use a Top 10 Review
Use rankings after application and service scope are documented.
- Application confirmed: Filter with exact engine and interface evidence.
- Duty identified: Compare parts for the real interval and environment.
- Evidence published: Rank construction, testing, traceability, and support.
- Job scope complete: Include seals, fluids, tools, and verification.
Already down to 2–3 options? A Comparison is usually faster.
When to Use a Comparison
Compare finalists for the same verified application.
- Interfaces: Match dimensions, seals, valves, fittings, and connectors.
- Performance evidence: Compare documented efficiency, capacity, and service claims.
- Included content: List every seal, cap, sensor, boot, and fitting.
- Installed outcome: Price fluids, labor, priming, disposal, and downtime.
Still building a shortlist? Start with a Top 10.