
Engine Filters Buying Guide: How to Choose the Right One
An engine filter is not one generic product category. Combustion air, lubricating oil, gasoline or diesel fuel, crankcase ventilation, and secondary filtration each carry different contaminants through different housings, pressures, valves, seals, and service procedures.
Identify the circuit and exact engine first. Then compare the application, interfaces, documented filtration behavior, included seals, interval authority, installation risks, and verification steps that determine whether the filter protects the system rather than opening a bypass around it.
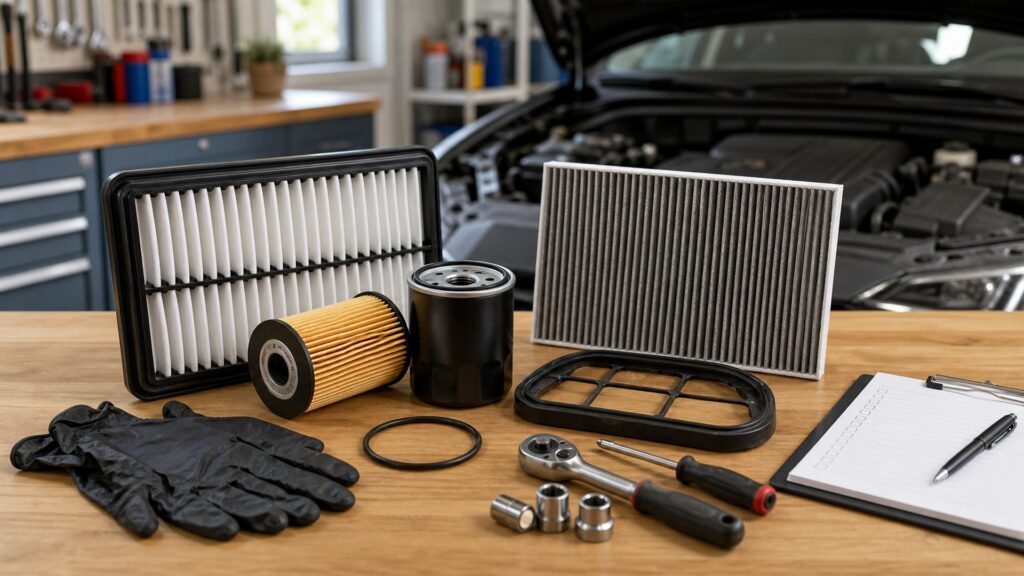
Buying framework
Identify the circuit before choosing the filter
An engine can use several filters with different jobs, pressures, contaminants, bypass paths, and installation risks. Start with the service point and exact engine, not a box labeled premium.
Name the filtered circuit: Determine whether the service point protects the intake stream, lubrication circuit, fuel delivery, crankcase breathing, or a secondary stage. Cabin-air and transmission elements belong to other systems with their own applications and schedules.
Confirm why service is due: Use the maintenance schedule, oil-life system, restriction indicator, water warning, diagnostic findings, contamination event, or documented inspection. A noise, warning, or performance complaint requires diagnosis before a filter is treated as the cure.
Resolve the exact application: Record VIN, engine code, production date, emissions or fuel configuration, housing style, original number, dimensions, seals, fittings, sensors, and current service information. Catalog notes and breakpoints can matter within one model year.
Compare function-specific design: For air filters examine sealing, media, support, dust capacity, and pressure loss. For oil filters include bypass and anti-drainback arrangements where used. Fuel filtration can add water separation, heating, sensing, priming, and strict cleanliness.
Plan installation and release: Gather the correct element, seals, fluids, tools, pressure-relief or priming steps, torque references, cleanup, disposal, warning reset, and leak or running checks before opening the system.
Who this is for
Filter priorities change with engine and duty
A dusty-road truck, short-trip gasoline car, diesel tow vehicle, extended-drain fleet, and stored machine expose different parts of the filtration system.
Ordinary gasoline commuters: Follow the exact air, oil, and fuel service arrangement. Short trips can affect oil condition and crankcase moisture, while an in-tank fuel filter may not be a routine external service item. Do not invent replacement work from a generic tune-up list.
Diesel owners: Fuel cleanliness and water control can dominate. Identify primary and secondary elements, separator bowl, drain, heater, sensor, seals, priming method, high-pressure-system precautions, and fuel-quality history before disturbing the circuit.
Dusty-road and work vehicles: Inspect intake ducting, housing latches, sealing faces, precleaners, restriction indicators, and the clean side of the air box. More frequent inspection may be required, but blowing or washing a disposable element can damage media or move dirt downstream.
Extended-service users: A longer oil interval requires approval from the vehicle, lubricant, and filter instructions together. Oil capacity, duty, fuel dilution, idling, contamination, analysis, warranty terms, and filter capacity matter; an extended-service label alone does not set the interval.
Seasonal and stored equipment: Rodent damage, nesting, moisture, corrosion, stale fuel, swollen seals, and aged fluids may outweigh mileage. Recommission the complete intake, lubrication, and fuel systems under manufacturer guidance rather than replacing filters and immediately starting.
What to pay attention to
Specifications that control filtration and sealing
A filter must fit the housing, maintain the intended flow path, and manage contaminants without defeating valves, sensors, or service procedures.
Filtration performance
Application, efficiency method, pressure loss, capacity, valves, water separation, media support, and seal integrity.
Installation system
Housing, threads, O-rings, fittings, fluids, torque, priming, warnings, leak checks, and interval authority.
Application and housing interface: Match element shape, height, end-cap geometry, locating tabs, cover clearance, standpipe, center tube, thread, gasket diameter, sealing land, fuel fittings, ports, and sensor provisions. A part can screw on or close in the box and still be wrong.
Media efficiency and test context: Look for documented performance tied to a recognized method and stated particle, flow, dust, fluid, and endpoint conditions. A micron number without efficiency, test method, and operating context cannot compare two filters reliably.
Dirt-holding capacity and restriction: Capacity describes retained contaminant under defined testing; pressure loss describes resistance at a stated flow. More media area, stable pleats, support, and good seals can preserve performance, but appearance alone cannot prove the values.
Oil-filter valve functions: Where the engine design uses them, verify bypass calibration, anti-drainback behavior, center-tube and end-cap integrity, gasket, thread, can strength, and standpipe compatibility. Do not assume every engine locates every valve inside the filter.
Fuel filtration and water handling: Confirm media type, nominal or absolute efficiency terms, flow, pressure, water separation, drain, bowl, heater, sensor, seals, inlet and outlet orientation, and priming compatibility. High-pressure fuel systems are intolerant of dirt and air introduced during service.
Seal materials and included parts: Count every O-ring, molded gasket, drain seal, cap seal, plug, washer, and protective cap. Compare material, profile, diameter, and placement with the instructions; the old seal can remain hidden in a groove or stuck to the mounting pad.
Service interval authority: Use the vehicle schedule and condition systems, then check component limits and severe-service definitions. A product claim may cap warranty or describe tested capability, but it does not automatically extend the engine maker's required service interval.
Avoid these traps
Filter shortcuts that open an unfiltered path
Many failures come from wrong interfaces, misplaced seals, dirt introduced during service, or a complaint incorrectly blamed on normal filter restriction.
Buying all filters by vehicle year: Engines, emissions packages, production dates, housings, fuel systems, and service revisions can differ. Verify the exact powertrain and removed part rather than assuming one maintenance kit covers every configuration.
Judging media by color or pleat count: Visible pleats do not reveal fiber distribution, bonding, efficiency curve, loading behavior, wet strength, pressure loss, or bypass leakage. Use documented application and test evidence instead of appearance-based rankings.
Reusing the old O-ring: A flattened, cut, swollen, hardened, or incorrectly located seal can leak oil, admit air, bypass media, or draw fuel-system air. Remove the old seal, clean the groove, and install the specified new part exactly as directed.
Pre-filling or lubricating by habit: Some filters and engines specify particular oiling or priming; others prohibit methods that can introduce contamination or conflict with mounting orientation. Follow the vehicle and filter procedure rather than transferring a shop habit between systems.
Assuming a new filter fixes the warning: Low oil pressure, lean mixture, fuel-pressure faults, water warnings, and restriction messages can involve sensors, pumps, leaks, wiring, housings, fluids, or internal wear. Diagnose and verify; do not erase evidence with random parts replacement.
Decision guidance
Choose the filter from the verified service need
The right purchase restores the intended filtered path and supports the complete service without adding an unsupported interval claim.
If routine service is due with no complaint: Use the exact schedule, current application listing, correct quality specification, and complete seals. Coordinate oil filters with the required oil; perform the prescribed reset, leak, level, and operational checks.
If the removed filter is damaged: Preserve photographs and examine housing contact, collapse, tears, end caps, center tube, gasket, bypass evidence, contamination, installation, and interval. Diagnose the cause before fitting another element of the same design.
If operating conditions are unusually dusty: Favor documented efficiency, capacity, sealing, robust pleat support, and a suitable inspection strategy. Maintain the housing and ducting, and follow severe-duty guidance without using visual darkness alone as a replacement rule.
If fuel contamination or water is present: Stop treating the job as ordinary maintenance. Identify the contaminant source and affected system, follow containment and sampling procedures, protect the high-pressure side, and obtain qualified help where flushing or component inspection is required.
If an extended interval is proposed: Require agreement among the vehicle schedule, oil or fuel requirements, filter application, duty, monitoring, and warranty. Calculate the downside of restriction, bypass, degraded fluid, or lost records before accepting a longer interval.
Ownership & compatibility
Turn each filter change into condition evidence
The removed element, housing, fluid, and warning history can show whether the engine's environment or service plan has changed.
Label the service record: Save VIN, engine, filter brand and number, lot code, fluid brand and specification, quantity, seals, date, mileage or hours, interval basis, torque source, priming, reset, leak result, and receipt.
Inspect the clean and dirty sides: Before cleaning away evidence, note dust tracks, oil film, water, debris, sludge, metal, collapsed media, torn seals, loose pleats, housing cracks, duct damage, cap threads, and sensor condition. Escalate suspicious contamination.
Watch the first operating cycle: Confirm oil pressure indication, fuel priming, starting, idle, warning lamps, leaks, oil or fuel level, intake noise, and any specified recheck. Shut down promptly when pressure, leakage, or running behavior is abnormal.
Adjust only from documented evidence: A route change, construction dust, poor fuel, towing, idling, short trips, storage, or oil analysis may justify a different inspection plan. Record the reason instead of creating a permanent shorter or longer interval from one dirty filter.
FAQ
Engine filter selection FAQ
Answers about air, oil, and fuel filters, efficiency claims, valves, intervals, and installation.
Are engine air, oil, and fuel filters interchangeable categories?
Does a higher micron rating mean better filtration?
Do all oil filters contain a bypass valve?
Can a darker air filter still be serviceable?
Should I pre-fill a new oil filter?
Why did two catalogs list different fuel filters?
Can a premium filter extend my maintenance interval?
What should I inspect after installing a filter?
When should filter service go to a professional?
Bottom line
Buy the verified filtered path
Choose the circuit, exact application, documented function, and complete service procedure before comparing brand or interval claims.
Name the system: Separate air, oil, fuel, crankcase, and other filtration jobs.
Match every interface: Verify housing, dimensions, valves, seals, fittings, and sensors.
Read evidence in context: Compare efficiency, capacity, pressure loss, and testing honestly.
Release the engine carefully: Complete fluids, priming, warnings, leak checks, and records.
Reading Shortcuts
Confirm application and condition first.
Decision Reminders
Checks to complete before committing.
- Confirm the exact application: Cross-check vehicle, engine, housing, and original part.
- Preserve removed-part clues: Contamination and damage can identify another fault.
- Keep the work clean: Prevent debris from entering air, oil, fuel, or plug openings.
- Follow the procedure: Respect pressure, fluids, torque, priming, and resets.
- Inspect interfaces: Seals, caps, connectors, threads, and fittings must agree.
- Verify before release: Check leaks, warnings, starting, idle, and road behavior.
Glossary Snippets
Terms used in this decision.
When to Use a Top 10 Review
Use rankings after application and service scope are documented.
- Application confirmed: Filter with exact engine and interface evidence.
- Duty identified: Compare parts for the real interval and environment.
- Evidence published: Rank construction, testing, traceability, and support.
- Job scope complete: Include seals, fluids, tools, and verification.
Already down to 2–3 options? A Comparison is usually faster.
When to Use a Comparison
Compare finalists for the same verified application.
- Interfaces: Match dimensions, seals, valves, fittings, and connectors.
- Performance evidence: Compare documented efficiency, capacity, and service claims.
- Included content: List every seal, cap, sensor, boot, and fitting.
- Installed outcome: Price fluids, labor, priming, disposal, and downtime.
Still building a shortlist? Start with a Top 10.