
Exercise Bikes Buying Guide for Low-Impact Training
Low impact describes reduced landing force; it does not guarantee comfort, safety, or suitability for every body. Exercise bikes still load the feet, knees, hips, spine, hands, and cardiovascular system through a repeated fixed path. Entry, joint angles, resistance, cadence, and duration all matter.
Choose between an upright, recumbent, indoor cycle, or other bike only after defining the user's mobility and support needs. A recumbent such as Schwinn's 230 or 290 offers a backrest and lower side entry, while an upright or indoor cycle may use less room and allow a different posture. Product guidance cannot replace individualized medical or rehabilitation advice.
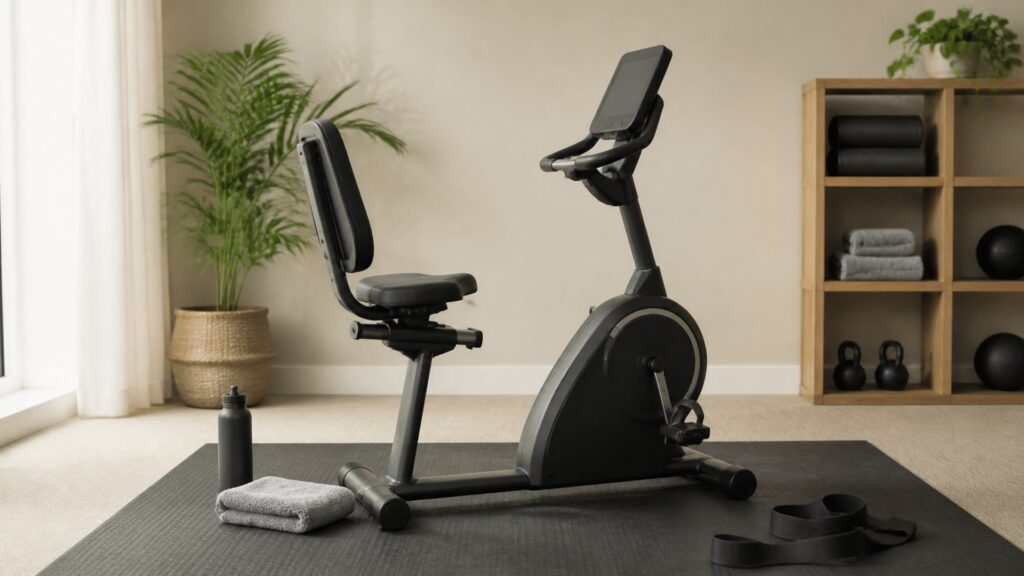
Buying framework
Start with access and symptom-free motion
Low-impact bike selection requires a controlled entry, supported position, smooth pedal path, and appropriately bounded health guidance.
1. Define the support need: Record why lower-impact exercise-bike activity is preferred, current mobility, balance, relevant symptoms, footwear, session duration, and any guidance from a qualified health professional. Do not let a marketing label define readiness.
2. Choose entry geometry: Compare step-over height, side approach, seat height, fixed handles, pedal starting position, and the space needed for an assistive device or helper when relevant. Rehearse mounting before resistance testing.
3. Set the contact points: Adjust saddle distance and height, backrest where fitted, handle reach, pedal straps, and foot position within manual limits. Observe hips, knees, ankles, spine, shoulders, hands, and pressure areas.
4. Test the easiest useful load: Begin with minimal resistance and controlled cadence. Confirm the drivetrain turns smoothly without a dead spot, sudden increase, excessive pedal momentum, or a starting force that defeats the intended access benefit.
5. Build an exit rule: Identify symptoms that require stopping, the method for slowing or stopping the bike, foot release, dismount sequence, and when professional guidance is appropriate. Keep the surrounding floor and route clear.
Who this is for
Bike formats for different access priorities
A low-impact claim becomes useful only when the specific rider can enter, align, pedal, stop, and leave the exercise bike comfortably.
Recumbent bike: A backrest, larger seat, and lower side entry may help selected users. Test the forward pedal distance, hip angle, lumbar contact, seat-rail adjustment, handle location, and ability to stand afterward.
Upright bike: A familiar high-saddle position occupies less floor length and may support general aerobic work. The higher mount, narrower saddle, handle pressure, and required balance can be limiting for some riders.
Indoor cycle: Fine saddle and handlebar adjustment can improve fit for experienced riders, but a narrow seat, clipped pedals, forward posture, and high step-over may conflict with access or pressure-management needs.
Air bike: Resistance rises with effort and moving arms can distribute work, yet coordinated limb movement, fan momentum, noise, and limited low-load precision may not suit every low-impact user.
Rehabilitation-oriented commercial bike: Commercial and medical-fitness models may offer lower entry, robust support, or specialized adjustments. Confirm intended setting, supervision, service, and actual clinical suitability rather than assuming a higher price provides medical approval.
What to pay attention to
Low-impact specifications as body consequences
Entry, support, alignment, and controllable starting resistance matter more than a program labeled recovery or rehabilitation.
Step-through access: Measure the highest obstacle and observe the complete mount. A low frame is helpful only when the saddle, pedal, and fixed handles allow a stable transfer without twisting or stepping across moving parts.
Seat and back support: Compare width, contour, firmness, ventilation, edge pressure, backrest angle, and adjustment. A larger recumbent seat can still create thigh pressure or place the pelvis poorly for a particular rider.
Pedal alignment: Secure the foot without excessive strap pressure, then observe knee tracking and ankle position through repeated revolutions. Capacity, rider-height charts, and large pedals cannot prove comfortable joint geometry.
Starting resistance: Test the first pedal movement, not only steady pedaling. Magnetic and electronic systems vary in minimum load, step size, power-up behavior, and whether the prior user's setting returns at startup.
Coast and stopping: Learn whether pedals coast when effort ends, how quickly resistance settles, and how the user releases the feet. An emergency stop should be reachable without an unsafe forward lean.
Control reach: Time, resistance, pause, and stop controls should remain visible and reachable from the supported position. Touchscreens or small keys can be difficult for users with limited vision, dexterity, or confidence.
Capacity and warranty: Stay within the published user limit, but separately verify fit. Ask whether the warranty covers the intended residence, rehabilitation facility, senior community, or other setting and whether local labor is included.
Avoid these traps
Low-impact exercise-bike assumptions to reject
A bike can reduce landing forces while still producing poor alignment, pressure, access, or inappropriate exercise demands.
Treating recumbent as automatically safe: A backrest does not resolve every hip, knee, circulation, balance, or cardiovascular concern. Fit and suitability remain individual and may require qualified guidance.
Raising the saddle to chase a formula: Generic knee-angle rules do not account for every condition or body proportion. Adjust within the manual and use professional recommendations when the bike supports rehabilitation.
Starting at the previous load: Shared consoles may remember resistance or incline. Establish a neutral startup and verify the easiest setting before the rider begins moving the pedals.
Tightening straps excessively: Pedal retention should not create numbness, pressure, or circulation concerns. Confirm shoe fit, strap range, release, and whether an alternative pedal interface is approved.
Exercising through warning symptoms: Concerning pain, lightheadedness, chest discomfort, unexpected breathing difficulty, loss of strength, or other physical changes require an appropriate stop and response, not a tougher program or seat adjustment.
Decision guidance
Perform an access-to-exit evaluation
Judge the complete low-impact cycling sequence rather than only the minutes spent pedaling.
Approach the bike: Use normal footwear and any usual mobility aid. Confirm the path, fixed hand support, lighting, pedal position, and room for a controlled side approach.
Mount without momentum: Enter while the bike is stopped and stable. Avoid using a moving handle, screen, or nearby furniture for support unless the manufacturer specifically intends that contact.
Pedal at easy load: Begin at the lowest useful resistance and observe smoothness, alignment, pressure, breathing, and confidence. Increase only within the rider's appropriate plan.
Reach essential controls: Change resistance modestly, read time, pause or stop, and access water without leaving the supported position or placing hands near moving components.
Dismount after activity: Allow pedals to stop as directed, release feet, stand or transfer, and follow the clear exit path. Evaluate balance after pedaling, not only before the session.
Ownership & compatibility
Preserve access, support, and predictable motion
A low-impact setup loses value when adjustment rails stick, straps fray, pedals loosen, or household clutter blocks the safe approach.
Keep the transfer zone clear: Remove shoes, cords, bottles, walkers, furniture, and cleaning supplies from the approach and exit path. Restore fixed handles and pedals to the agreed neutral position.
Clean support surfaces: Use approved products on the saddle, backrest, handles, straps, and controls, then dry them. Residue can change grip or irritate skin during repeated contact.
Inspect retention: Check pedal straps, cages, cleats, adjustment pins, seat rail, and handle fasteners. Stop use when a foot cannot stay positioned or an adjustment no longer locks positively.
Monitor drive changes: Document new surging, dead spots, resistance lag, grinding, heat, odor, or coast behavior. Changes at easy load deserve attention because they directly affect controlled starting and stopping.
Revisit fit: Body needs, footwear, mobility, symptoms, and professional recommendations can change. Repeat the moving fit and access trial instead of assuming last year's settings remain appropriate.
FAQ
Low-Impact Exercise Bike FAQ
Evidence-bounded answers about access, joint comfort, recumbent support, starting load, and symptoms.
Are exercise bikes low impact?
Is a recumbent bike easier on the knees?
Which bike is easiest to get on?
How should I adjust the seat for knee comfort?
Should my feet be strapped into the pedals?
What resistance should a beginner start with?
Can an exercise bike be used for rehabilitation?
When should I stop cycling?
Does a higher weight capacity mean better support?
Bottom line
Approve access, motion, and exit
Low-impact exercise-bike value comes from controlled use that respects individual fit, symptoms, and professional boundaries.
Entry: The rider reaches a stable position without an unsafe step or twist.
Alignment: Feet, knees, hips, spine, and hands remain controlled at easy load.
Control: Starting, resistance, stopping, and foot release are predictable.
Boundary: Symptoms and health questions have an appropriate response outside the product claim.
Low-Impact Bike Route
Use these checkpoints before comparing low-impact bike products.
Low-Impact Bike Boundaries
Low impact does not mean symptom-free, risk-free, or medically appropriate for everyone.
- Landing force is one factor: Check repeated joint paths.
- Back support is not treatment: Fit remains individual.
- Easy numbers differ: Test actual resistance.
- Symptoms outrank the session: Stop and respond appropriately.
Low-Impact Bike Terms
Terms used in this low-impact bike guide.
When a Low-Impact Bike Ranking Helps
Low-impact bike rankings need access and moving-fit evidence.
- Best suited for: Prefer measured bike step-through, saddle or back support, easy resistance, control reach, pedal retention, stopping, and qualified health boundaries.
- Known drawback: Lists that label every recumbent therapeutic or every magnetic bike joint-friendly overstate what equipment specifications can prove.
Method: access and movement analysis using current bike specifications and public-health boundaries; no Review Streets hands-on or clinical test. Verified September 18, 2026. Sources: Schwinn format specifications and CDC adult activity guidance.
Compare Low-Impact Bike Finalists
Compare low-impact finalists through the complete access-to-exit sequence.
- Evidence check: Use current manuals, moving alignment trials, easy-load tests, and appropriate professional input.
- Ownership check: Include delivery, assembly, support accessories, pedal options, maintenance, service, and setting-specific warranty coverage.
Choose only when the intended rider can enter, pedal, control, stop, and leave without concerning symptoms or unsafe improvisation.