
Exterior Accessories & Protection Buying Guide for Truck and SUV Utility Builds
A truck or SUV can accept racks, steps, skid plates, carriers, protective bumpers, and recovery hardware, but it cannot ignore their combined weight and geometry. Every permanent part consumes payload, occupies a mounting zone, and may change clearance, airflow, or sensor coverage before cargo is loaded.
Plan the build on paper first. Record GVWR, front and rear axle limits, roof and hitch limits, bed or rail ratings, and the weight and location of each accessory. Then map doors, tailgate, spare tire, cameras, radar, lamps, exhaust, tow points, and service access. The best utility build performs its real tasks without turning routine loading or repair into a puzzle.
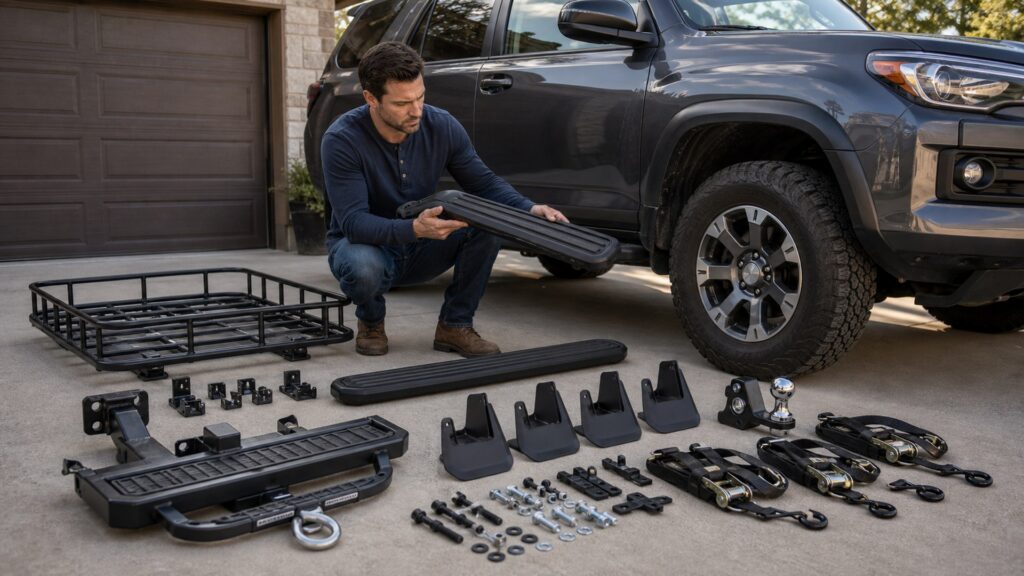
Buying framework
Budget weight, space, and interfaces together
A utility build succeeds when every component fits the same vehicle plan. The first decisions are numerical and geometric, not cosmetic.
Create a mass ledger: Subtract permanent accessories from available payload, then reserve capacity for occupants, cargo, fluids, pets, and trailer tongue weight. Use actual component weights where possible.
Place weight deliberately: Record whether each item sits ahead of, over, or behind an axle. Rear carriers add leverage and can consume rear-axle capacity faster than their scale weight suggests.
Map the operating envelope: Measure roof height, hatch and tailgate swing, bed access, ground clearance, approach and departure zones, and the space needed for loading or recovery.
Resolve shared interfaces: Confirm that rack feet, tonneau rails, bed caps, bumpers, hitches, skid plates, steps, and recovery brackets can share holes and structure without stacked improvised spacers.
Who this is for
Build around the hardest recurring task
Utility means different things to a family traveler, tradesperson, and trail driver. The dominant task determines where weight and access should be spent.
Daily-use family SUVs: Prioritize quiet racks, manageable loading height, hatch access, camera visibility, and easily removed carriers. Full-time heavy armor often consumes payload without serving the vehicle's weekly routine.
Work and trade vehicles: Bed access, ladder support, rated tiedowns, tool security, and repeatable loading matter most. Ensure racks and boxes do not block stake pockets, tonneau operation, or rear visibility.
Long-distance travel builds: Weight distribution, wind noise, fuel or energy use, weather sealing, spare access, and roadside serviceability shape the package. A modular system can keep unnecessary hardware off the vehicle between trips.
Trail and recovery users: Underbody coverage, true rock sliders, rated recovery points, tire clearance, and approach or departure geometry outrank appearance. Confirm the chassis load path and practice using recovery hardware before remote travel.
What to pay attention to
Ratings and geometry that govern a build
The useful specifications are the ones that remain valid after accessories and cargo are combined. A high component rating cannot override a lower vehicle limit.
Capacity & Load Path
Payload, axle, roof, hitch, bed, bracket, tiedown, and recovery ratings.
Clearance & Integration
Angles, height, moving-panel access, sensors, cooling, exhaust, and shared mounts.
Installed weight: Use the complete mass of brackets, platforms, boxes, guards, winches, and carriers. Published capacity does not include this penalty unless the instructions explicitly say so.
Dynamic rating: Roof and rack limits while moving can be much lower than parked capacity. Off-pavement shock and vibration may require an additional reduction specified by the vehicle or rack maker.
Hitch leverage: A carrier places its center of mass behind the receiver, producing leverage and motion different from trailer tongue weight. Follow carrier, receiver, and vehicle limits for that application.
Recovery rating: Look for a documented frame-connected point and intended recovery direction. Shipping tie-downs, generic tow balls, and unrated decorative loops should not be treated as recovery anchors.
Interface compatibility: Check cross-section, slot size, clamp location, rail height, hatch swing, and fastener access between adjacent systems. Shared marketing compatibility is less useful than a complete installation drawing.
Avoid these traps
Build decisions that compound risk
One accessory may be acceptable alone and problematic in combination. Recalculate after every permanent addition.
Counting only cargo weight: Racks, armor, bumpers, steps, boxes, spare carriers, and recovery gear all consume payload. Ignoring permanent mass leaves less capacity than the trip plan assumes.
Treating GVWR as the only limit: A vehicle can stay below total weight while exceeding a rear axle, roof, hitch, tire, or rail rating. Check each applicable subsystem separately.
Using styling as evidence of strength: A guard shaped like armor may attach only to thin brackets. Demand material, mounting, and rating information for steps, sliders, recovery points, and protective bumpers.
Blocking emergency or service access: A full carrier can hide the spare, tow eye, jack, hatch release, or recovery point. Test access with the vehicle loaded, not only during an empty garage installation.
Decision guidance
Choose modules by duty and consequence
Spend payload and complexity where the vehicle earns it. Removable equipment is often the better answer for occasional needs.
If cargo is light but bulky: Use roof or hitch equipment within the relevant limits, favoring removable modules. Place dense items low and inside the vehicle when possible, and secure all external loads independently.
If work access is frequent: Choose steps, bed racks, and boxes that preserve door, tailgate, tonneau, and stake-pocket functions. A lower loading height may deliver more utility than maximum rack height.
If trail contact is expected: Use frame- or structure-mounted sliders, shields, and recovery points designed for that load. Confirm clearance at full steering and suspension travel and keep cooling and drain paths open.
If the weight ledger no longer works: Remove low-value permanent accessories, move occasional gear to a trailer within tow limits, or reduce cargo. Do not solve an overloaded build with stiffer springs or a higher-rated component alone.
Ownership & compatibility
Reweigh and remeasure as the build evolves
A utility build changes with every module and loadout. Inspection should include fasteners, structure, and the assumptions in the original ledger.
Audit the loaded vehicle: Use axle weights when the build becomes substantial, then compare them with GVWR, GAWR, tire, roof, and hitch limits. Update the ledger after changes.
Inspect after harsh use: Check brackets, welds, receiver play, tiedowns, locks, coatings, and witness marks after trails, rough roads, or heavy loads. Retighten only by the specified method.
Control corrosion and debris: Rinse mud and salt from layered brackets, skid-plate pockets, bed rails, and receiver hardware. Keep drains and service fasteners visible rather than sealing contamination behind accessories.
FAQ
Truck and SUV build questions
These answers address the weight, mounting, and integration issues that emerge across a complete build.
Does an accessory's weight rating increase vehicle capacity?
Why should I track front and rear axle weights?
Can roof-rack static capacity be used while driving?
Is a factory shipping tie-down a recovery point?
How do hitch carriers affect departure angle?
Should heavy tools go on the roof or in the bed?
Can a protective bumper interfere with safety systems?
How often should utility-build fasteners be inspected?
When is a trailer better than another carrier?
Bottom line
Utility is the work completed within every limit
A build is not more capable simply because it carries more hardware. It is useful when weight, geometry, mounting, and access remain controlled together.
Keep a mass ledger: Count permanent accessories, occupants, cargo, fluids, and tongue weight against total and axle limits.
Protect the operating envelope: Preserve clearance, sensor fields, cooling, lamps, doors, tailgate, and service access in the loaded condition.
Use real load paths: Choose documented mounts, securement points, and recovery anchors rather than appearance-driven substitutes.
Reading Shortcuts
Move from the build ledger to an integrated accessory package.
Decision Reminders
Every permanent part spends capacity.
- Payload: Count all installed accessory mass.
- Axles: Check front and rear distribution.
- Roof: Separate static and dynamic limits.
- Hitch: Account for leverage and access.
- Clearance: Measure loaded angles and height.
- Recovery: Use documented structural points.
Glossary Snippets
Ratings and geometry used in utility planning.
When to Use a Top 10 Review
Use a roundup after the build ledger identifies one accessory module.
- Module chosen: Rack, step, shield, or carrier.
- Budget set: Weight and axle capacity remain.
- Interfaces mapped: Adjacent systems can coexist.
- Need options: Several valid modules remain.
Have finalists already? Open a Comparison for a closer tradeoff.
When to Use a Comparison
Compare two modules by installed mass, load path, and operational clearance.
- Mass: Payload penalties differ.
- Mount: Structure and hardware differ.
- Geometry: Access and angles differ.
- Service: Removal and inspection differ.
Need a broader field? Use a Top 10 to form a shortlist.