
Exterior Accessories & Protection Buying Guide for Vehicle Fitment and Mounting
Exterior accessory fitment is more precise than matching a model name and year. Cab length, bed size, roof construction, bumper package, cladding, wheelbase, and factory sensors can change the mounting surface or eliminate it entirely. The correct part should align with the vehicle before force, drilling, or adhesive is used to make it fit.
Evaluate the joint as a load path. Identify which structure carries the force, how the bracket seats, which fasteners provide clamp load, and how water and grit are kept away from damaged coatings. A well-designed installation also preserves wiring, drains, seals, sensors, and future service access rather than treating them as obstacles discovered halfway through the job.
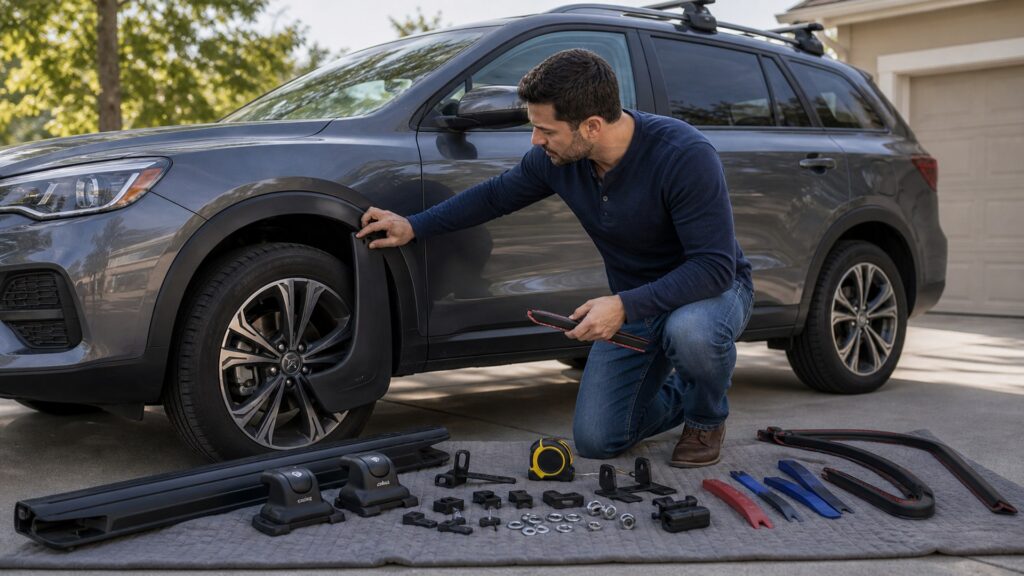
Buying framework
Treat the mount as a structural interface
Fit means more than matching the outer shape. The accessory, bracket, fasteners, and vehicle structure must operate as one joint.
Decode the application: Match year, body style, trim, roof or bed configuration, bumper type, wheelbase, and factory packages. Compare the fit-guide notes with the vehicle in front of you.
Find the load path: Trace force from the accessory through each bracket and fastener into reinforced structure. Plastic covers and thin outer panels may locate a part without being able to support it.
Protect every penetration: Any drilled or exposed edge needs the specified deburring, coating, sealant, and drainage treatment. A tight bolt does not make an unsealed hole corrosion-safe.
Preserve surrounding systems: Map harnesses, hoses, curtains, sensors, lamps, hinges, and service points before drilling or clamping. Clearance must remain both parked and under vibration or body movement.
Who this is for
Different installations carry different risks
The same accessory can be simple on one vehicle and invasive on another. Choose the mounting system that matches both the application and the installer's capability.
Owners using factory provisions: Threaded inserts, studs, rails, and receiver openings usually offer the clearest load path. Verify thread condition and required hardware instead of assuming every visible hole is structural.
Lease and resale-conscious buyers: Prioritize reversible clamps or approved adhesive systems that do not permanently alter panels. Reversibility still requires paint protection, correct removal temperature, and inspection for trapped grit.
High-load accessory users: Steps, racks, carriers, and guards need documented brackets and limits. Installation quality matters as much as product rating because uneven seating or incorrect torque can concentrate force.
Complex body or sensor packages: Vehicles with panoramic roofs, active shutters, radar, cameras, air curtains, or extensive cladding deserve model-specific instructions. Professional installation is appropriate when hidden-system mapping or calibration is required.
What to pay attention to
Mounting details worth reading closely
Hardware lists and diagrams reveal more about fit than marketing photos. Look for a complete joint design and a repeatable installation process.
Geometry & Load Path
Application notes, bracket seating, hole locations, reinforcement, and clearance.
Joint Integrity & Sealing
Fasteners, torque, locking, isolation, adhesives, coatings, and water control.
Bracket indexing: Tabs, shoulders, and shaped plates should locate the mount positively on known vehicle features. Large unexplained slots may indicate broad fit rather than precise support.
Fastener callout: Instructions should state size, thread, washer or spacer order, locking method, and torque where critical. Substituting longer bolts can bottom in blind holes or damage hidden components.
Surface preparation: Adhesive mounts need specified cleaning, temperature, pressure, and cure conditions. Waxes, ceramic coatings, textured plastics, and repainted panels can change bond reliability.
Metal isolation: Coated brackets, nonconductive washers, and sealants can separate dissimilar metals and exclude moisture. The system matters more than the corrosion label applied to one fastener.
Inspection features: Visible fastener heads, witness marks, and accessible bracket edges make movement or rust easier to catch. A joint hidden forever behind trim is harder to maintain responsibly.
Avoid these traps
Fitment errors that force the wrong part to work
A wrong application often looks almost correct. Stop when alignment requires bending, unexplained spacers, enlarged holes, or heavy clamp force.
Trusting a broad fit range: Listings that span body changes or multiple trims need detailed exclusions. Confirm the exact mounting illustration and part revision rather than accepting a vehicle-name match.
Using hardware to pull gaps closed: Bolts should clamp seated parts, not bend brackets into position. Forced alignment can preload panels, distort doors, and leave a joint that loosens as the materials relax.
Drilling before inspecting behind the panel: A clear outer surface can hide a harness, curtain airbag, reinforcement, fluid line, or double-wall cavity. Use the documented location and depth control, or hand the work to a qualified installer.
Treating sealant as structure: Sealant excludes water; it does not restore edge distance, replace reinforcement, or correct an oversized hole. Mechanical strength and corrosion sealing require separate solutions.
Decision guidance
Choose the least invasive mount that meets the load
Reversible is valuable only when it remains stable and paint-safe. Escalate to permanent attachment when the duty requires it and the vehicle supports it.
If factory threaded points exist: Use the specified brackets and hardware, clean the threads, and follow the seating and torque sequence. Do not add spacers that change the bracket angle unless instructions include them.
If the design clamps to rails or seams: Confirm the rail or pinch weld is approved to carry that direction of force. Use shaped pads and stated tightening limits so the clamp does not crush or walk along the surface.
If the design bonds to paint or plastic: Verify substrate compatibility, repaint history, coating removal requirements, temperature, and cure time. Adhesive trim is unsuitable where a structural or recovery load can occur.
If drilling is required: Demand a vehicle-specific template, safe-depth method, edge-distance guidance, and corrosion-sealing steps. Choose professional installation when hidden systems or calibration make an error difficult to reverse.
Ownership & compatibility
A mount remains a service item
Fasteners, adhesive edges, and contact pads change with vibration and exposure. Inspection should focus on movement and water paths.
Watch alignment: Record initial gaps or witness marks, then look for shifted brackets, polished paint, cracked sealant, or new contact after early use and rough-road travel.
Maintain clamp load: Use the maker's recheck interval and proper torque method. Replacing a locking fastener with ordinary hardware or repeatedly overtightening it can reduce joint reliability.
Inspect for water and corrosion: Check drilled holes, seams, washers, adhesive edges, and mixed-metal joints. Correct coating damage and water entry early rather than covering them with more sealant.
FAQ
Fitment and mounting questions
These answers address the details that determine whether a mount is truly compatible.
What vehicle information is needed for accurate fitment?
Can I reuse factory bolts for an accessory bracket?
Is drilling always weaker than using factory holes?
Why do accessory instructions specify a tightening sequence?
How do I know whether an adhesive will bond to my vehicle?
What is the concern with mounting stainless hardware to aluminum?
Should I add threadlocker to every exterior fastener?
How can I check for hidden wiring before drilling?
When should a mount be removed and inspected?
Bottom line
Correct fit is a load path, not a label
A listing begins the verification; it does not finish it. The joint must align, carry force, exclude water, and preserve everything around it.
Match the whole vehicle: Use complete configuration and factory-option data, then confirm the actual attachment points.
Demand a defined joint: Look for seated brackets, specified hardware, controlled torque, safe surface preparation, and corrosion treatment.
Leave evidence visible: Choose an installation that can be inspected for movement, water intrusion, and coating damage over time.
Reading Shortcuts
Move from application data to a defensible mounting choice.
Decision Reminders
Fit is proven at the interface.
- Application: Year, body, trim, and packages.
- Structure: Know what carries the force.
- Hardware: Use specified grade and stack-up.
- Torque: Seat evenly in the stated order.
- Sealing: Protect holes, edges, and drains.
- Clearance: Preserve wiring, sensors, and service.
Glossary Snippets
Joint-design terms found in better instructions.
When to Use a Top 10 Review
Use a roundup only after the exact vehicle application and mounting family are known.
- Exact application: Configuration notes are resolved.
- Mount family: Factory, clamp, bond, or drill.
- Duty known: The load path is appropriate.
- Need candidates: Several verified designs remain.
Have finalists already? Open a Comparison for a closer tradeoff.
When to Use a Comparison
Compare two mounts by joint design rather than by appearance alone.
- Bracket seating: Indexing and adjustment differ.
- Hardware: Locking and coatings differ.
- Installation: Tools and invasiveness vary.
- Service: Inspection and removal vary.
Need a broader field? Use a Top 10 to form a shortlist.