
Exterior Accessories & Protection Buying Guide: How to Choose the Right One
Exterior accessories can protect paint, make a tall cabin easier to enter, carry awkward gear, or change how a vehicle looks. Those are different jobs, and the best choice begins by naming the problem before comparing materials or prices. A roof basket cannot be judged like a splash guard, but both still need exact fit and a secure attachment.
Use the vehicle manual and a model-specific fit guide together. Check load limits for anything that carries weight, clearance for doors and sensors, and how the mount treats paint, seals, and drainage paths. The right accessory should perform its task without creating noise, corrosion, blocked visibility, or difficult maintenance elsewhere on the vehicle.
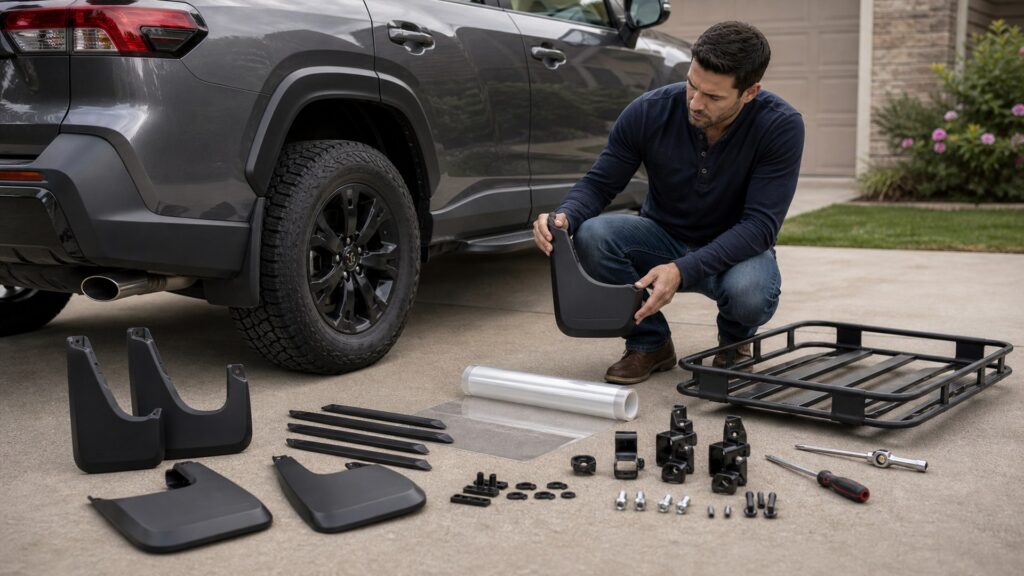
Buying framework
Choose the job before the hardware
Start with the result the vehicle needs, then narrow the product family. Shared fit and safety checks come after that first separation.
Define the outcome: Decide whether the accessory must deflect spray, prevent scuffs, support cargo, improve step-in height, or provide cosmetic trim. A product that performs two jobs should still be evaluated against both sets of limits.
Map the mounting zone: Identify factory holes, studs, rails, hitch receivers, seams, and painted contact points. The map reveals whether the installation is reversible and which surfaces carry the load.
Check the vehicle envelope: Open every door and hatch, turn the steering to both locks, and account for roof antennas, cameras, lamps, and exhaust outlets. Clearance must remain through the full range of normal operation.
Plan for exposure: Match hardware and finishes to salt, UV, gravel, mud, automatic washes, and the cleaning chemicals the vehicle regularly sees. Decorative plating and structural coatings should not be treated as equivalent.
Who this is for
Match the accessory to the owner and vehicle
Use pattern and vehicle configuration matter more than a universal best list. These profiles point to different priorities within the same aisle.
Daily commuters: Low noise, wash compatibility, and clean removal matter more than maximum carrying capacity. Small paint-contact protectors and spray-control parts should not complicate parking sensors or routine cleaning.
Family and pet vehicles: Door-sill, bumper, and cargo-loading protection sees repeated abrasion. Choose broad coverage with smooth edges, secure attachment, and surfaces that can be cleaned without trapping grit.
Outdoor-gear carriers: Roof, hitch, or rear-door systems need a complete weight calculation and reliable tiedown points. Hatch access, plate visibility, and the loaded vehicle's height deserve equal attention.
Appearance-focused owners: Trim alignment, finish stability, and reversible installation drive the decision. Inspect whether edges can hold moisture or rub clear coat, because a cosmetic upgrade should not leave permanent body damage.
What to pay attention to
Characteristics that change real-world use
A useful specification connects construction to a consequence on the vehicle. Favor documented fit and load information over broad universal claims.
Fit & Attachment
Vehicle geometry, mounting points, contact surfaces, and fastener design.
Exposure & Integration
Weather durability, moving-panel clearance, sensors, lamps, and maintenance access.
Application code: A fit listing should identify model year, body style, trim, roof or bed configuration, and relevant factory packages. A shared model name is not enough.
Rated capacity: For carriers and steps, compare the accessory rating with the vehicle and mounting-point limit, then obey the lowest value. Include the rack, box, brackets, and load in the calculation.
Fastener system: Look for captured hardware, locking features, corrosion protection, and a stated tightening procedure. Mixed metals and exposed threads deserve more scrutiny in salted climates.
Contact management: Pads, edge seals, and stand-offs should spread pressure without holding abrasive grit against paint. Adhesive products need defined surface preparation and service temperature.
Operational clearance: Confirm full movement of doors, hatch, hood, suspension, steering, wipers, and antenna. Verify that cameras, radar, lamps, plate, and reflectors remain unobstructed.
Avoid these traps
Shortcuts that create expensive problems
Most accessory failures begin before installation. The error is usually an incomplete fit or load assumption, not a mysterious material defect.
Buying by model name alone: One model can have several roof, bumper, cab, bed, and trim configurations. Match the complete vehicle description and inspect the actual mounting points before opening hardware bags.
Using the accessory rating as the vehicle limit: A strong carrier cannot increase a roof, hitch, rail, or body attachment limit. The lowest applicable rating controls, including any dynamic-versus-static distinction.
Ignoring sensors and moving panels: A bracket can fit the sheet metal yet block radar or touch a hatch at full travel. Test the entire operating envelope, not only the parked position.
Skipping post-installation checks: Clamps seat, adhesives cure, and fasteners can relax after initial use. Reinspect alignment and tightening at the maker's interval before wear becomes visible damage.
Decision guidance
A practical path through the category
Choose among product families by the job, then use fit and exposure to settle the configuration. Do not let styling decide a structural application.
If the goal is spray or chip control: Start with vehicle-shaped splash guards, mud flaps, or deflectors that cover the actual impact zone. Check tire clearance, ground clearance, airflow, and fastener access.
If the goal is loading protection: Choose bumper, sill, bed-rail, or door-edge coverage where objects repeatedly contact the body. The protector should follow the panel contour without creating a grit-catching hard edge.
If the goal is access: Use steps or running boards with documented brackets and a rating above the expected user load but within the vehicle's mounting design. Ground clearance and winter ice buildup can change the choice.
If the goal is carrying capacity: Select roof, hitch, bed, or rear-door equipment only after calculating weight, leverage, vehicle height, access, and securement. A trailer may be more appropriate when the vehicle limits are too restrictive.
Ownership & compatibility
Inspect the interfaces, not just the finish
Exterior hardware lives where water, grit, and vibration meet. Short inspections at mounts and contact points prevent most long-term surprises.
Recheck attachment: Follow the stated retightening schedule and inspect clamps, straps, brackets, and locks after rough roads or heavy use. New witness marks or changed gaps indicate movement.
Clean hidden contact zones: Remove trapped leaves, salt, and grit from pads, seams, and drainage paths. Lift or remove reversible parts when the maker's instructions call for periodic cleaning beneath them.
Repair coatings promptly: Touch up chipped protective finishes with an approved method and replace corroded or deformed hardware. Cosmetic polish cannot restore a fastener or bracket that has lost section or strength.
FAQ
Exterior accessory questions
These answers cover the fit, load, and ownership details buyers commonly discover late.
Are universal exterior accessories ever a good choice?
Does a no-drill mount guarantee no vehicle damage?
Which load rating should I follow?
Can an accessory interfere with driver-assistance sensors?
How can I reduce paint rub under a mounted accessory?
Are stainless fasteners always safe with aluminum parts?
Will a roof accessory noticeably change driving?
Should exterior accessories be removed for an automatic wash?
When is professional installation worth it?
Bottom line
A good accessory leaves the vehicle working normally
The purchase is successful when the part performs its job and disappears from the driver's list of problems. Exact fit, controlled loads, and clean integration matter more than a long feature list.
Choose by task: Name the protection, access, carrying, or appearance outcome before narrowing the product family.
Verify the interface: Match the full vehicle configuration, mounting system, lowest load limit, and every nearby moving panel or sensor.
Own the contact points: Inspect attachment, clean trapped debris, and address coating damage before small movement or corrosion becomes body damage.
Reading Shortcuts
Find the decision stage that matches your accessory project.
Decision Reminders
Six checks prevent most mismatches.
- Job: Protection, access, cargo, or appearance.
- Vehicle: Exact year, body, trim, and options.
- Mount: Factory points, clamps, adhesive, or drilling.
- Limit: Use the lowest applicable rating.
- Clearance: Panels, sensors, lamps, and airflow.
- Exposure: Salt, UV, gravel, water, and washing.
Glossary Snippets
Terms that clarify mounting and load claims.
When to Use a Top 10 Review
Use a roundup after deciding which accessory family actually solves the problem.
- Known job: The intended outcome is specific.
- Known vehicle: The complete configuration is recorded.
- Known limits: Load and clearance rules are available.
- Need options: Several compatible designs remain.
Have finalists already? Open a Comparison for a closer tradeoff.
When to Use a Comparison
Compare finalists that perform the same job on the same vehicle configuration.
- Same fit: Both list the exact application.
- Same duty: Both serve the same primary job.
- Different mount: Attachment and removal differ.
- Different exposure: Materials and finishes vary.
Need a broader field? Use a Top 10 to form a shortlist.