
Floor Protection Buying Guide for Floor Protection Protection Needs
Water, salt, mud, and sand should not be treated as one generic mess. Water seeks low edges, brine leaves conductive and corrosive residue, clay packs into texture, and dry grit abrades carpet and plastic as feet move. Pet residue and work chemicals add odor or compatibility questions that volume ratings cannot answer.
Write a contaminant profile for each cabin zone. Estimate quantity, entry route, dwell time, removal frequency, and cleaning method. Choose enough containment to survive the credible load, but also test whether a filled piece can leave the vehicle without flexing or pouring. Lift it on schedule to find edge escape, damp padding, stains, or corrosion while the source is still correctable.
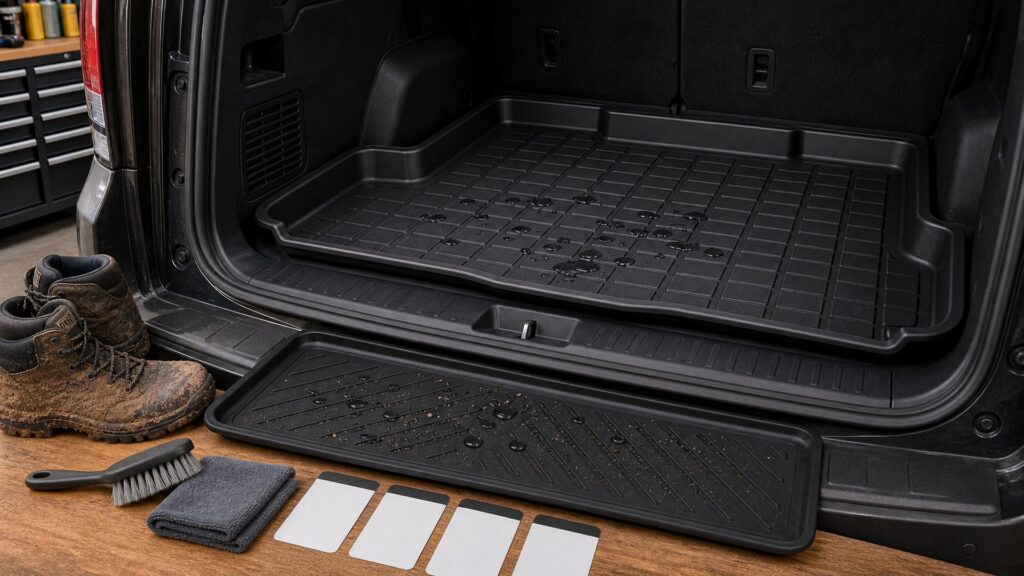
Buying framework
Match barriers to contaminants
Protection starts by identifying what enters, where it settles, and how long it remains.
Characterize the material entering: Record liquid volume, salinity, particle size, oil or chemical content, temperature, frequency, and whether contamination arrives on footwear, pets, cargo, or leaks.
Trace likely escape routes: Inspect firewall corners, door-side edges, console seams, anchor openings, rear bridges, seat bases, cargo transitions, and the path used during removal.
Set a capacity trigger: Define the visible level or event that requires emptying before acceleration, braking, cornering, passenger feet, or lifting can move the contents.
Choose an inspection cadence: Schedule under-mat checks after large spills, salt events, mud loading, odor, leak suspicion, and a maximum routine interval suited to exposure.
Who this is for
Match construction to threat-specific protection routines
Weather, occupation, recreation, pets, and vehicle leaks create distinct barrier requirements.
Rain and light-dirt driver: Moderate edge control, wet traction, simple rinsing, and frequent floor checks may be sufficient without the deepest available liner.
Snowbelt and road-salt owner: High side containment, brine-resistant material, reachable channels, careful carry-out, and aggressive rinse-and-dry discipline deserve priority.
Beach, desert, or trail user: Sand and grit demand shake-out control, abrasion awareness, texture that releases particles, and vacuum access at perimeter gaps.
Trade, farm, or pet vehicle: Mud, oils, fertilizers, animal residue, and sharp debris require substance-specific compatibility plus faster inspection for cuts and escaped contamination.
What to pay attention to
Specifications that change threat-specific protection performance
Capacity is useful only alongside stable edges, resistant material, safe footing, and controlled extraction.
Match barriers to contaminants
Separate standing water, snowmelt, salt brine, clay mud, sand, work grit, pet residue, and occasional chemical spills by volume and behavior.
Maintenance is part of performance
Select edges, channels, texture, stiffness, resistance, and a removal method that controls each contaminant without concealing floor damage.
Usable containment volume: Evaluate the actual low area below escape edges with feet present; decorative channels do not equal liquid capacity.
Edge and anchor leakage: Liquids can pass around retention openings or distorted perimeters, so examine sealing claims, contour pressure, and overflow paths on the exact floor.
Particle release: Deep texture may hold mud well but retain sand during washing; test brushing, vacuuming, rinsing, and visual confirmation of clean recesses.
Material resistance: Confirm temperature range and documented tolerance for salt, oils, fuels, cleaners, sunscreen, pet products, or workplace substances likely to occur.
Loaded extraction stiffness: A barrier should support its credible contents across the door opening; excessive sag can turn captured contamination into a carpet spill.
Post-event visibility: Color, channel layout, removable plugs where specifically designed, and accessible edges should help reveal residue, damage, or liquid requiring attention.
Avoid these traps
Mistakes that undermine threat-specific protection
An impressive lip cannot compensate for overflow, incompatible chemicals, neglected cleaning, or an insecure driver mat.
Equating tall walls with unlimited capacity: Boots and debris occupy volume, and braking moves liquid; empty the liner at a conservative trigger rather than filling to its edge.
Letting salt dry repeatedly: Evaporated water leaves concentrated deposits in channels and at escape points; rinse residue and inspect the floor before reinstallation.
Using an unknown solvent on stains: A strong cleaner can attack surface grip, backing, edges, or color; follow material guidance and test only as directed.
Assuming a liner proves the cabin is dry: Door seals, heaters, drains, windows, and cargo spills can wet carpet from outside the protected area; investigate recurring moisture.
Decision guidance
Choose the right protection pattern
Match the barrier to the dominant contaminant and the owner's ability to empty it.
For mostly liquid exposure: Prioritize stable raised boundaries, clear fill visibility, wet grip, supported carry-out, and a short emptying interval.
For mud and mixed debris: Choose accessible channels and durable texture that contain clumps yet release fully with the available brush and rinse process.
For fine abrasive grit: Favor frequent removal and vacuum access, because trapping sand indefinitely increases grinding at heels, edges, and the carpet below.
For unusual chemicals: Use only products whose makers document the material and cleaning compatibility; add secondary cargo containment when passenger-floor protection is insufficient.
Ownership & compatibility
Keep the system clean and correctly positioned
Inspection frequency should tighten as liquid volume, salt concentration, abrasion, or odor risk rises.
Log severe exposure events: Note substance, quantity, affected zone, dwell time, cleaning method, observed escape, floor condition, odor, and whether the piece changed texture or shape.
Inspect structural condition: Look for cuts, pinholes, thinned heel areas, split channels, distorted lips, damaged locks, slick films, and stiffness that could alter control clearance.
Escalate unexplained dampness: Dry the area, inspect adjacent trim and padding, and seek leak diagnosis when moisture returns without a known spill or wet-footwear event.
FAQ
Questions about threat-specific protection floor protection
Product documentation controls approved exposures and cleaning agents.
How much liquid can a floor liner safely hold?
Are road-salt stains harmful to liners?
What floor protection works best for sand?
Can oil or fuel spills stay in a rubber mat?
Why does mud remain in textured channels?
Should drain plugs be opened inside the vehicle?
How do I detect leakage around retainer holes?
Are carpet mats useful in winter?
What if a liner becomes slippery after cleaning?
Bottom line
Make safe fit the permanent baseline
The right protection makes contamination visible, removable, and unlikely to reach hidden layers.
Profile the contaminant: Distinguish water, brine, mud, sand, organic residue, and chemicals by quantity, route, and dwell time.
Control capture and exit: Select stable boundaries and material that can carry the credible load out without sagging or pouring.
Inspect hidden layers: Clean promptly, dry completely, look beneath edges and anchors, and investigate recurring dampness or material change.
Reading Shortcuts
Move through the contaminant containment and removal decision in order.
Decision Reminders
Containment matters only when the captured load can leave cleanly.
- Characterize the material entering: Verify and record this requirement.
- Trace likely escape routes: Verify and record this requirement.
- Set a capacity trigger: Verify and record this requirement.
- Log severe exposure events: Verify and record this requirement.
- Inspect structural condition: Verify and record this requirement.
- Escalate unexplained dampness: Verify and record this requirement.
Glossary Snippets
Terms used in this floor protection plan.
When to Use a Top 10 Review
Use rankings only after the requirements are fixed.
- Profile the contaminant: Use this as a shortlist filter.
- Control capture and exit: Use this as a shortlist filter.
- Inspect hidden layers: Use this as a shortlist filter.
- Exclude: Use this as a shortlist filter.
Already down to 2–3 options? A Comparison is usually the faster next step.
When to Use a Comparison
Compare finalists through the retainer, edge, pedal, seat-track, door, removal, spill, cleaning, and dry-floor check; make standing water an explicit recorded result.
- Characterize the material entering: Check both candidates against this requirement.
- Trace likely escape routes: Record the result for each shortlisted option.
- Set a capacity trigger: Use the same operating conditions for both tests.
- Choose an inspection cadence: Keep the evidence with the final decision.
Still exploring? Start with a Top 10 to build a shortlist first.