
How to Choose Automotive Replacement Parts for Home Garage Repair Projects
Home-garage part selection begins with project feasibility, not a shopping cart. Confirm the failure, obtain the current service procedure, and identify lifting, stored-energy, electrical, chemical, programming, bleeding, alignment, and calibration requirements. A component that fits perfectly can still create an unsafe or unfinished vehicle when the workspace cannot support the procedure.
Choose the repair boundary before ordering. Complete kits and preassembled units may reduce pressing, contamination, or adjustment work, while some systems require factory-level software, refrigerant recovery, wheel alignment, or restraint precautions. Plan every fastener, fluid, tool, return condition, and verification step, plus a stop-work and towing option if inspection reveals damage beyond the original scope.
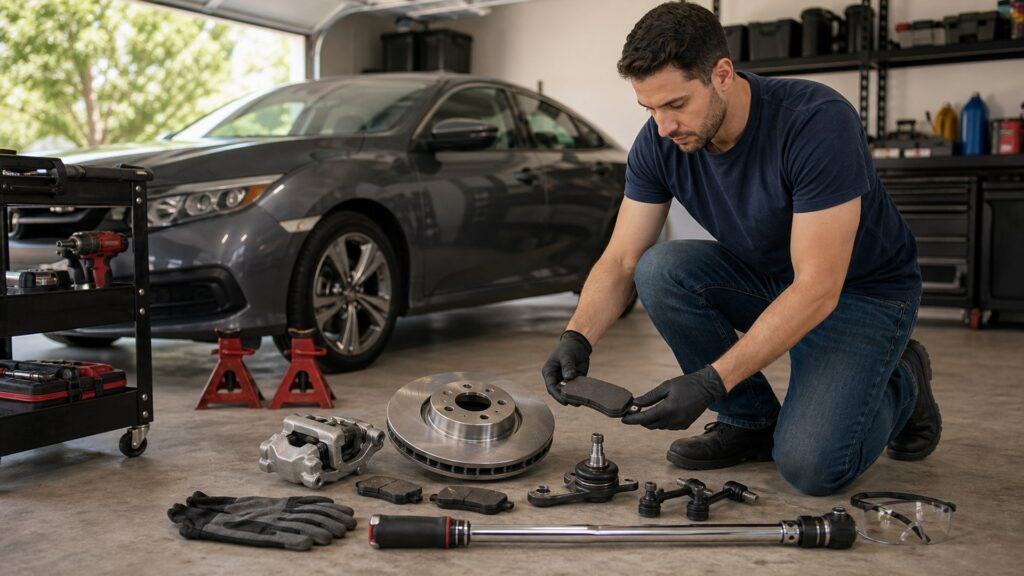
Buying framework
Prove the project before buying the part
Feasibility combines diagnosis, safe access, information, and verification. Missing any one can leave the vehicle disabled.
Confirm the failed function: Use measurements, scan data, inspection, and circuit or system tests so a new component is not substituted for diagnosis.
Read the full procedure: Review removal, installation, torque sequence, single-use hardware, fluids, bleeding, programming, calibration, and final inspection before deciding the work is manageable.
Audit the workspace: Check level floor, lighting, clearance, ventilation, weather protection, fire safety, lifting points, parts storage, and room to keep removed components organized.
Match tools to the task: Verify capacity and range for stands, jacks, pullers, presses, torque tools, scan equipment, battery support, fluid capture, and measuring instruments.
Define the escape route: Set stop-work conditions, preserve reassembly options, keep transport available, and know which shop can finish programming, alignment, machining, or recovery work.
Who this is for
DIY scope should match experience and equipment
Confidence is not a substitute for procedure control. Select projects whose hazards and verification steps fit the person and garage.
First-time home mechanics: Start with accessible maintenance or bolt-on tasks that have clear instructions, low stored energy, simple verification, and an easy return to safe operating condition.
Experienced mechanical DIYers: Deeper suspension, cooling, drivetrain, or electrical work still requires current service data, calibrated tools, contamination control, and honest limits around machining or coding.
Shared-space repairers: Driveways and communal garages add weather, time, noise, fluid, security, and immobilization constraints, favoring short jobs and preplanned cleanup.
Remote owners: Parts availability and professional backup may be limited, so diagnosis, complete kits, spare fasteners, communications, and recovery planning deserve greater weight.
What to pay attention to
Part attributes that change DIY difficulty
The same repair can be straightforward or impractical depending on assembly level. Compare what arrives in the box and what remains to be done.
Project Feasibility & Safety
Diagnosis, workspace, lifting, stored energy, hazardous materials, tools, information, skill, and recovery from complications.
Part Completeness & Verification
Fitment, preassembly, hardware, consumables, programming, bleeding, alignment, testing, returns, and warranty records.
Assembly completeness: Determine whether bearings, seals, sensors, bushings, studs, brackets, or adjustments are installed and whether preassembly introduces shipping or quality tradeoffs.
Required specialty tools: Check press adapters, pullers, spring compressors, flare tools, scan functions, vacuum equipment, torque-angle gauges, and manufacturer fixtures by exact procedure.
Hardware and consumables: List single-use bolts, clips, cotter pins, gaskets, sealants, cleaners, lubricants, fluids, thread treatment, and protective caps separately from the primary part.
Information availability: Confirm access to torque values, sequence, connector release methods, lifting points, fluid specifications, initialization, and test criteria before disassembly.
Programming and calibration: Identify VIN writing, immobilizer pairing, battery registration, steering-angle reset, brake service mode, sensor calibration, or relearn tasks the chosen tools can actually perform.
Return condition: Understand whether installation marks, opened electrical packaging, filled hydraulic units, missing core parts, or damaged labels eliminate return or warranty eligibility.
Avoid these traps
Home-garage choices that turn into stranded projects
Most trouble begins before installation. Scope, support, and verification need the same attention as fitment.
Ordering before diagnosis: Symptoms can come from wiring, grounds, leaks, contamination, alignment, control logic, or neighboring wear, leaving the purchased part unused or ineffective.
Relying on a short video: A demonstration may omit model-year differences, corrosion, torque requirements, one-time hardware, safety steps, or failures encountered off camera.
Working under inadequate support: A hydraulic jack alone is not a stable support system; follow vehicle lift points and use appropriately rated equipment on a suitable surface.
Discovering coding at the end: Research scan-tool coverage and software subscriptions before purchase because generic code reading does not establish access to special service functions.
Skipping final verification: A vehicle that starts may still have leaks, loose fasteners, trapped air, incorrect alignment, warning data, or unsafe braking that requires defined tests.
Decision guidance
Choose the part configuration that fits the garage
Reduce uncontrolled steps without buying unnecessary assemblies. Transfer work when hazards or verification exceed the setup.
If the job is accessible and mechanical: Use an exact-fit part with complete hardware and follow the manufacturer procedure, measuring and documenting the result before road use.
If pressing or adjustment is required: Compare a preassembled component with local machine-shop support, considering shipping quality, alignment, tool control, and the cost of replacing reusable housings.
If fluids or contamination dominate: Favor capped, clean, complete assemblies and prepare compatible fluid, capture, flushing, priming, bleeding, and lawful disposal before opening the system.
If software is required: Verify the exact scan function, subscription, interface, battery support, and internet or security access, or schedule a qualified shop to complete that stage.
If safety systems are involved: Use current procedures and qualified support for restraints, high voltage, refrigerant, brake hydraulics, springs, fuel, glass-mounted sensors, or calibrations beyond the workspace.
Ownership & compatibility
Close the project with evidence
A repair is complete only when function and safety are verified. Records also protect the next diagnosis.
Photograph the baseline: Capture routing, connector locks, labels, fastener locations, damage, measurements, scan data, and fluid condition before removal.
Control removed parts: Keep hardware grouped and labeled, protect open ports, retain the original component and packaging, and separate hazardous waste from reusable materials.
Perform staged checks: Inspect before lowering, after static operation, after a cautious functional test, and again after heat cycles or mileage appropriate to the system.
Update the service history: Record the diagnosis, part and batch numbers, supporting items, torque or programming completion, measurements, date, mileage, and unresolved observations.
FAQ
Home-garage repair planning questions
Check tools, safety, software, and verification before disassembly.
How do I decide whether a repair is DIY-friendly?
Should I buy parts before taking the vehicle apart?
Is a preassembled part better for home installation?
Can a basic scan tool program replacement modules?
What should I know about lifting a vehicle?
Which repair supplies are commonly forgotten?
When should I stop a repair and call a shop?
How should I test a repair before driving?
Can DIY work preserve warranty coverage?
Bottom line
Buy only after the project has an ending
Home repair succeeds when the garage can remove, install, and prove the part safely. Recovery planning belongs in the estimate.
Confirm feasibility: Align hazards, tools, information, and workspace.
Control completeness: Order hardware, fluids, and verification resources.
Set boundaries: Stop and transfer work when conditions change.
Reading Shortcuts
Move directly to the decision you need to resolve.
Decision Reminders
Use these checks while narrowing the field.
- Diagnose before ordering: Parts do not prove causes.
- Use stable support: A jack is not enough.
- Check scan functions: Code reading is limited.
- Preserve return condition: Compare before installation.
- Plan lawful disposal: Fluids need control.
- Test in stages: Starting is not completion.
Glossary Snippets
Terms that appear in listings, labels, and service information.
When to Use a Top 10 Review
Use rankings after requirements and exclusions are clear.
- Scan candidates: Find credible options.
- Compare strengths: See major tradeoffs.
- Build a shortlist: Choose what to inspect.
- Check availability: Confirm current offerings.
Already down to 2–3 options? A Comparison is usually the faster next step.
When to Use a Comparison
Compare directly when only a few candidates remain.
- Align versions: Compare equivalent configurations.
- Trace differences: Locate meaningful distinctions.
- Price the outcome: Include continuing costs.
- Verify uncertainty: Inspect unresolved details.
Still exploring? Start with a Top 10 to build a shortlist first.