
How to Choose Bicycles for Indoor Training
For indoor training, choose the bicycle and trainer as a matched system. A bicycle can have the right axle dimensions yet still lack the necessary frame clearance or manufacturer approval. Start with the exact frame, trainer generation and drivetrain, then confirm the workout software you intend to use. Buying a better bicycle does not solve an incompatible mounting arrangement.
This guide focuses on a real bicycle used with an indoor trainer, while explaining when a dedicated indoor bike is the simpler purchase. The central choices are mechanical compatibility, riding position and changeover effort. Maximum advertised power matters much less if mounting, shifting or connecting the equipment prevents the sessions you want.
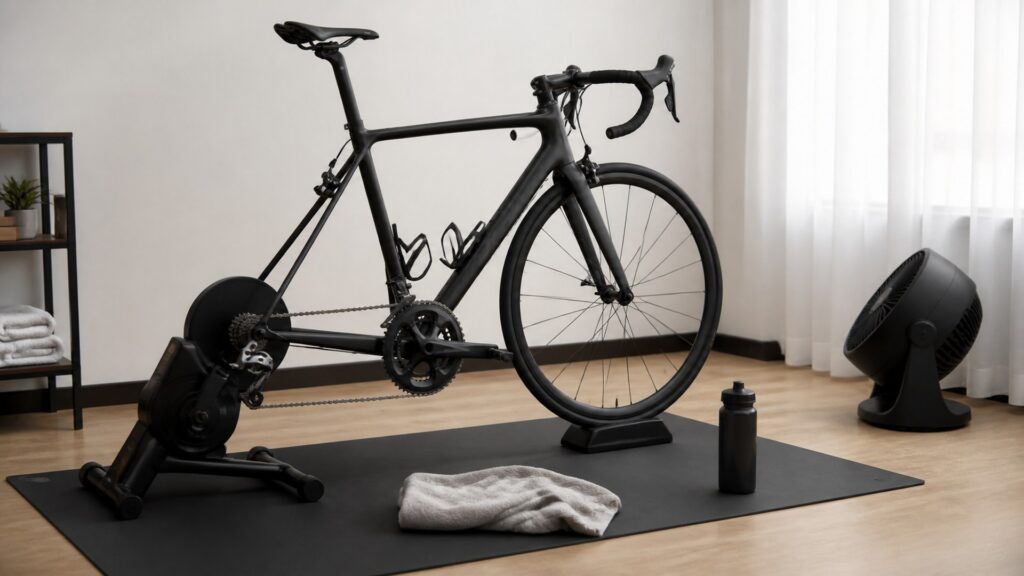
Buying framework
Prove the bicycle-trainer match before buying
Treat compatibility as several separate checks. Passing one does not establish the others.
Identify the exact frame: Record the bicycle’s model, year and size, then consult both bicycle and trainer guidance. Wahoo’s compatibility documentation warns that nominal dimensions alone cannot guarantee clearance for every frame.
Separate mounting from shifting: The axle and adapters secure the bicycle; the freehub, cassette and drivetrain determine the gear interface. Confirm both groups of requirements rather than interpreting an axle adapter as a complete compatibility solution.
Decide whether this bicycle must go outdoors: A dedicated indoor frame can remain attached, while a shared outdoor bicycle needs repeated changeover. Include wheel removal, reinstallation and any adjustment in the ownership decision.
Specify the workout connection: Decide whether you need only recorded data or app-controlled resistance. Those are different capabilities, and a connection icon alone does not prove that your preferred app supports the full workout mode.
Who this is for
Choose around the training arrangement
Indoor riders differ most in how the bicycle is shared and moved. These patterns point toward different purchases.
One rider keeping a bicycle permanently mounted: A compatible direct-drive trainer is worth considering when frequent use justifies the initial setup. The bicycle can retain a familiar saddle and cockpit without being rebuilt for each session.
A rider alternating indoor and outdoor days: Compare the complete changeover process, not only mounting time shown in a demonstration. Wheel-on arrangements retain the rear wheel but introduce tire and roller considerations; direct drive removes that contact but requires wheel handling.
Several people sharing the training space: A dedicated adjustable indoor bike may avoid swapping complete bicycles. Check saddle and handlebar adjustment ranges for every rider, while accepting a permanent footprint and a machine that cannot serve as an outdoor bicycle.
Occasional indoor sessions on a limited budget: A compatible basic trainer may be sufficient if controlled app workouts are unnecessary. Leave money for the correct hardware, airflow and sweat management rather than spending everything on an impressive peak-resistance figure.
What to pay attention to
Check the interfaces in a fixed order
Ask the retailer to verify the full combination. Use model-specific documentation rather than a generic adapter chart alone.
Mechanical interface
Prove frame clearance, axle retention and cassette compatibility before considering software features.
Workout control and daily setup
Compare app-controlled resistance, mounting access and the work involved in changing riders or returning outdoors.
Frame and component clearance: Check rear dropouts, stays, brake caliper and derailleur clearance against the trainer’s approved combinations. Stop if the frame must be forced into place or touches an unintended surface; fitting an axle is not proof of approval.
Axle and supplied adapters: Match axle type, dimensions and the required hardware to the trainer generation. Follow its retention and torque instructions, and have uncertain mounting checked rather than improvising spacers to remove a gap.
Freehub, cassette and chain system: Verify the cassette interface and its compatibility with the bicycle’s shifter, derailleur and chain. Equal sprocket counts alone are not a complete standard; Wahoo publishes separate drivetrain guidance for this reason.
Wheel-on contact requirements: For a roller-contact trainer, confirm the permitted wheel and tire sizes and the maker’s pressure and tension procedure. Tire choice and adjustment affect that interface, so follow the trainer instructions rather than transferring another unit’s settings.
App, device and control protocol: Check the intended phone or computer, connection protocol and supported resistance-control mode. A device that receives power readings may still need a different connection or subscription for the workout feature you want.
Position and indoor access: Confirm saddle height, reach and space to mount with the bicycle held in its training position. Include the trainer legs, fan and nearby furniture in the occupied area rather than measuring only the bicycle’s wheelbase.
Avoid these traps
Avoid compatibility shortcuts that hide another purchase
The difficult part is often the interface, not the bicycle’s equipment tier. Clarify these assumptions before paying.
Reading an adapter list as universal frame approval: An adapter addresses a particular mounting dimension. It cannot establish clearance around every dropout or brake caliper, so use the exact frame compatibility guidance alongside the hardware list.
Assuming the included cassette is the one you need: A trainer bundle may ship with a cassette intended for another drivetrain. Identify what must change, including the freehub or spacers where applicable, and add the necessary parts and installation to the quote.
Expecting virtual shifting in every app: Virtual gears depend on a supported trainer, controls, firmware and software combination. Confirm that combination explicitly; a physical single-cog arrangement does not make every training application compatible.
Buying maximum watts instead of the intended session: Peak resistance does not explain mounting convenience, connection reliability or suitable low-intensity control. First establish the required workout modes and usable range, then compare higher limits if your training actually needs them.
Decision guidance
Choose the arrangement that removes recurring friction
Each format simplifies one task and introduces another. Select the compromise that fits how often the bicycle changes roles.
If you train indoors frequently on one bicycle: Shortlist approved direct-drive combinations and price the complete drivetrain interface. Accept rear-wheel removal in exchange for avoiding rear-tire roller contact, then confirm normal shifting through the needed range.
If sessions are occasional and cost dominates: Consider a compatible wheel-on unit after accounting for the recommended tire and setup procedure. It can reduce the initial purchase but leaves roller contact, tire wear and repeatable adjustment to manage.
If several riders need quick adjustments: Compare a dedicated indoor bike with the time required to swap their bicycles onto one trainer. The dedicated machine can simplify handovers, but its fit range, software support and indoor-only cost must work for everyone.
If your frame is excluded or the match remains uncertain: Resolve the combination with the manufacturer before purchasing. Choose a documented alternative rather than forcing a fit; a less expensive compatible bicycle may be a better indoor tool than a premium incompatible frame.
Ownership & compatibility
Keep the interfaces clean and repeatable
Indoor riding creates different upkeep from outdoor miles. Plan for perspiration, mounting and software as well as the chain.
Protect the bicycle from sweat: Use suitable protection and wipe affected surfaces according to the component instructions. Do not let sweat accumulate around bars, fasteners or the frame, and provide airflow without placing a fan where it obstructs mounting.
Follow the trainer’s calibration procedure: Some models need specified calibration and others handle it automatically. Check the exact instructions after setup or firmware changes instead of applying a routine learned on a different trainer.
Keep the outdoor transition safe: When refitting a wheel, follow the bicycle’s retention and brake procedures and check normal operation before riding. Store the correct axle hardware together so changeovers do not depend on guessing which spacer belongs where.
FAQ
Indoor bicycle compatibility questions
Check less obvious equipment combinations before committing to the indoor system.
Can a mountain bike be used on an indoor trainer?
Do I need a rear wheel for a direct-drive trainer?
Can I leave a carbon bicycle mounted all winter?
Will my existing power meter be useful indoors?
Does ERG mode replace shifting for every workout?
Are rollers an alternative to a fixed trainer?
Can I use the trainer without an internet subscription?
Is a second inexpensive bicycle sensible for indoor use?
What should I ask a retailer to demonstrate?
Bottom line
Buy a verified combination, then refine the workout
A reliable indoor purchase begins with compatible hardware. Extra training features become valuable only after that foundation works.
Confirm mechanical approval: Resolve frame clearance, axle hardware and drivetrain together.
Confirm the intended control mode: Test the app and device combination that will run the sessions.
Choose the easier recurring task: Let changeover, rider adjustments and care determine whether a trainer or dedicated bike makes more sense.
Reading Shortcuts
Separate the mechanical match from the workout connection.
Decision Reminders
Use these prompts when requesting a trainer compatibility check.
- 1: Record the bicycle year and trainer generation.
- 2: Separate axle approval from drivetrain matching.
- 3: Verify resistance control in your intended app.
- 4: Price the complete adapter and cassette package.
Glossary Snippets
The hardware and control terms that decide indoor compatibility.
When to Use a Top 10 Review
Use indoor-training lists to identify candidate combinations for an exact compatibility check.
- Complete pairing: Shortlist the bicycle and trainer together, including any exclusions or adapter requirements.
- Software evidence: Look for documentation of the particular control mode rather than a generic connected label.
References: Wahoo frame compatibility; Wahoo drivetrain compatibility. Sources checked October 6, 2026. No hands-on product test or measured ranking is claimed. Compare finalists using the Comparison.
When to Use a Comparison
Compare the bicycle, trainer, adapters and software as one purchase.
- Resolve the specification: Verify resistance control in your intended app.
- Resolve the practical cost: Price the complete adapter and cassette package.
Need candidates first? See the Top 10. Confirm exact-model requirements before ordering.