
How to Choose Brake Components for Home Garage Repair Projects
A brake project belongs in a home garage only when the mechanic can safely support the vehicle, identify and measure the exact system, complete required hydraulic or electronic procedures, apply specified torque, and verify the repair.
Read the procedure before ordering, inspect for corrosion and scope changes while the vehicle can still move safely, and define stop conditions. The job is not complete when the parts bolt on; pedal, leaks, warnings, road test, and bedding remain.
Buying framework
Decide whether the garage can complete the whole job
A brake repair is suitable for home only when the mechanic can lift safely, identify the system, measure it, handle fasteners and hydraulics, perform required electronics, and verify the result.
Read the exact procedure first: Obtain vehicle service information and component instructions before ordering. Identify lift points, torque and angle steps, one-time hardware, piston method, electronic parking-brake mode, fluid, bleeding, road test, bedding, and warnings.
Inspect without committing the vehicle: Confirm fitment and likely scope while the car can still move safely. Check corrosion, fasteners, lines, hoses, bleeders, calipers, parking brake, hub, bearing, tools, parts availability, weather, lighting, and alternate transportation.
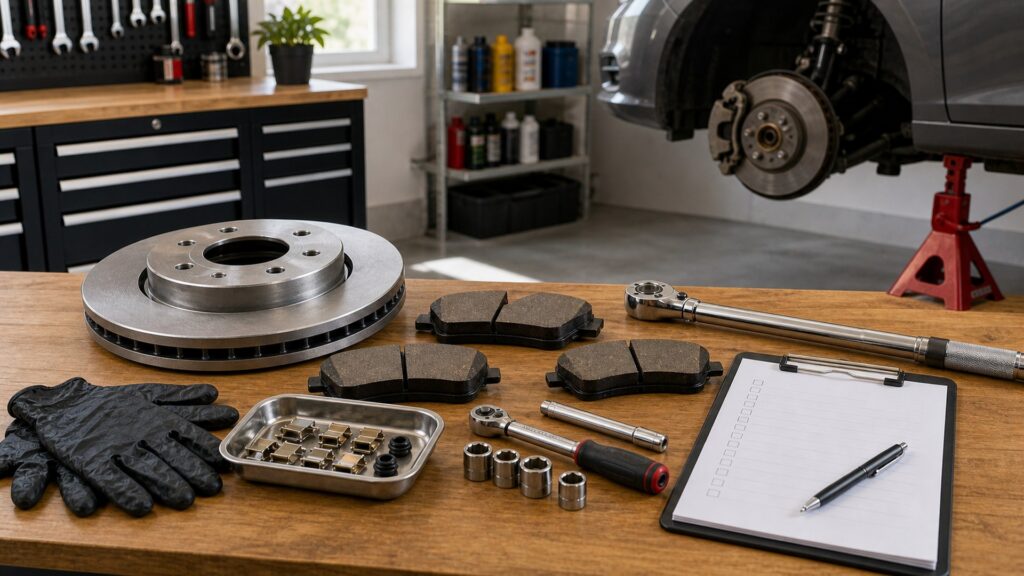
Audit tools and workspace: Verify level surface, rated jack and stands or lift, wheel chocks, lighting, ventilation, PPE, torque tools, measurement gauges, piston and caliper support tools, scan capability, fluid equipment, containers, and a clean parts layout.
Set stop conditions: Plan to stop for uncertain fitment, unsafe lifting, structural corrosion, damaged lines, seized or rounded critical fasteners, contaminated hydraulics, missing electronic access, unexpected wheel-bearing work, or inability to verify pedal and braking.
Stage assembly and verification: Acquire complete axle parts, hardware, fluid, fasteners, cleaning materials, manuals, torque data, and bedding instructions. Budget time for a second parts run without rushing, then complete pedal, leak, warning, wheel, road-test, and follow-up checks.
Who this is for
Repair complexity changes by system
A pad service, drum rebuild, caliper opening, and electronic parking brake require different tools and failure contingencies.
First-time pad-and-rotor mechanics: Choose a straightforward system with accessible procedures and mentor or qualified help. Practice safe lifting and torque-tool use, photograph disassembly, support the caliper, measure rotors and runout where required, and avoid opening hydraulics unnecessarily.
Experienced mechanical DIYers: Prior experience does not replace model-specific service information. Confirm one-time bolts, electronic modes, hub preparation, wheel torque, caliper carrier values, fluid, and bedding; modern brakes can add actuators and scan functions to familiar hardware.
Drum-brake projects: Expect spring tension, orientation, adjusters, wheel cylinders, parking cables, backing-plate pads, dust, and drum limits. Use correct spring tools and dust-control practices, photograph both sides, and follow the exact assembly and adjustment procedure.
Hydraulic component repairs: Caliper, wheel-cylinder, hose, or line work requires contamination control, correct sealing, fluid, bleeding, disposal, leak verification, and sometimes scan-tool actuation. Stop if line fabrication, seized fittings, or system bleeding cannot be completed correctly.
Electronic parking-brake vehicles: Verify service mode, battery support, scan tool or approved control sequence, piston retraction, motor handling, calibration, fault clearing, and emergency procedure. Never force an actuator or trust a generic app without confirmed vehicle coverage.
What to pay attention to
Capabilities required from wheel lift to road test
The project is only as safe as its support, measurement, torque, hydraulic, and electronic steps.
Garage Capability
Lift, stands, chocks, torque, measurement, piston tools, caliper support, cleanliness, lighting, and time.
System Completion
Fitment, hardware, electronics, hydraulics, bleeding, pedal, leaks, warnings, road test, bedding, and follow-up.
Safe lifting and restraint: Use only vehicle-approved lift points and equipment rated for the load on a firm level surface. Chock and support as instructed, account for parking-brake release requirements, and never rely on a hydraulic jack alone.
Torque coverage and fastener method: Confirm wrench ranges cover caliper, bracket, hose, bleeder, wheel, and one-time or angle-tightened fasteners with appropriate sockets and access. Follow dry, lubricated, threadlocked, or replacement requirements exactly; do not guess from bolt size.
Measurement capability: Use suitable pad or shoe gauges, micrometer, drum gauge, dial indicator, and hub or flange setup where required. Understand measurement locations, lip avoidance, runout stack-up, tool resolution, and the controlling wear specifications.
Piston and caliper handling: Match push, wind-back, opposed-piston, fixed-caliper, drum, and electronic mechanisms. Use a hanger so hoses bear no load, protect boots, monitor reservoir level, and avoid forcing fluid or contamination through sensitive systems outside procedure.
Hydraulic tools and cleanliness: Use compatible fluid, sealed supply, caps or plugs, line and flare tools only when approved and skilled, bleeder equipment, containers, and spill protection. Prevent petroleum, dirt, water, and unsuitable cleaners from entering the circuit.
Diagnostic and electronic access: Confirm scan-tool make, model, year, module, and function coverage for parking-brake service, ABS bleeding, calibrations, fault reading, and warning clearing. An OBD connection alone does not prove the needed bidirectional function.
Post-repair verification: Plan pedal establishment before movement, fluid and leak checks, free wheel rotation where appropriate, parking-brake operation, warning status, wheel torque, safe road test, bedding, and a follow-up inspection under the instructions.
Avoid these traps
DIY shortcuts that turn a parts job into an unsafe recovery
The vehicle should remain assembled until every critical tool, part, procedure, and contingency is available.
Starting before checking seized hardware: Corroded bracket bolts, bleeders, lines, fittings, retaining screws, hubs, adjusters, and parking cables can exceed the planned scope. Inspect and plan extraction or professional escalation before disabling daily transportation.
Supporting the car or caliper incorrectly: An unstable vehicle can kill, and a hanging caliper can damage its hose. Use approved lift points, rated stands or lift, chocks, and caliper support; keep every person clear of an inadequately supported vehicle.
Retracting pistons without system guidance: Forcing fluid backward, twisting the wrong piston, overfilling the reservoir, or bypassing electronic service mode can damage seals, actuators, or hydraulic and control components. Follow the exact retraction procedure.
Using an impact tool as final torque: Removal speed does not establish correct clamp load. Clean and prepare threads and mounting faces as specified, use a suitable torque wrench and angle method, and torque wheels in the required sequence.
Driving before establishing the pedal: Pistons may be retracted and the first pedal stroke can travel unexpectedly. Complete the prescribed pedal, fluid, leak, warning, parking-brake, wheel, and static checks before movement, then road-test conservatively in a safe permitted area.
Decision guidance
Match the project to the available capability
A home repair is successful when every step, including fault recovery and verification, remains within the workspace and mechanic's control.
If the job is pads and rotors with good hardware: Proceed only after fitment, wear limits, caliper movement, hoses, hub, tools, torque, lifting, and bedding are confirmed. Keep alternate transport available in case inspection reveals a caliper, sensor, bearing, or fastener issue.
If a brake line or hose must open: Assess corrosion, fitting tools, compatible parts, sealing, fluid, bleeding sequence, ABS functions, disposal, and leak testing. Use professional help when lines require fabrication or fittings threaten to twist adjacent tubing.
If electronic service mode is required: Confirm the exact supported procedure and tool function before retraction. Provide battery support where specified, read existing faults, complete calibration, and verify parking-brake operation; stop if the module will not enter or exit service mode.
If fasteners or hubs are heavily corroded: Price professional extraction, line work, hub preparation or replacement, alignment with other repairs, and downtime. Heat, cutting, drilling, or structural corrosion may create hazards inappropriate for a home garage.
If post-repair behavior is abnormal: Do not continue bedding through a soft pedal, leak, pull, severe noise, overheating, warning, binding, or vibration. Stop, preserve evidence, and obtain qualified diagnosis; repeated road testing can worsen a fault.
Ownership & compatibility
Leave a repair record for the next wheel-off service
Good documentation makes future fitment, warranty, and diagnosis easier.
Save the parts and procedure file: Keep VIN, brake code, service pages, part and lot numbers, seller, hardware, fasteners, fluid, tool functions, torque sources, measurements, photographs, date, mileage, road test, bedding, and follow-up findings.
Inspect tools after the job: Clean and store torque, measurement, piston, spring, scan, bleeding, lifting, and support tools under their instructions. Quarantine damaged stands, sockets, hoses, adapters, or gauges and record calibration or battery needs.
Monitor the early service period: Follow bedding guidance, preserve stopping margin, and check for leaks, warnings, heat, pull, odor, noise, vibration, or pedal change. Recheck wheel torque or fluid only where and when the controlling procedure specifies.
Review the DIY boundary honestly: Use the completed job to update which repairs fit the garage. New vehicles, corrosion, electronic controls, line work, and calibration can move a familiar brake service beyond available equipment or safe verification.
FAQ
Home-garage brake repair FAQ
Answers about lifting, torque, piston tools, measurements, bleeding, electronic parking brakes, and stop conditions.
What tools are essential for a home brake job?
Can I support a vehicle on the hydraulic jack?
Why should I measure new rotors and old rotors?
Can I push a caliper piston back with a clamp?
Do I need a scan tool for rear brake service?
When does brake bleeding become necessary?
May I reuse caliper bracket bolts?
What should make me stop a DIY brake repair?
How should I dispose of brake fluid and cleaner waste?
Bottom line
The whole procedure must fit the garage
Brake DIY is appropriate only when safe support, exact information, tools, parts, electronics, hydraulics, and verification are all available.
Read before ordering: Identify lift points, parts, torque, fluid, electronics, and bedding.
Inspect before disabling: Find corrosion, line, caliper, hub, and fastener contingencies early.
Set stop conditions: Escalate when safety, tools, fitment, or verification becomes uncertain.
Finish the system: Establish pedal, inspect leaks and warnings, torque, road test, and document.
Reading Shortcuts
Confirm measurements before ordering.
Decision Reminders
Checks to complete before committing.
- Confirm application: Cross-check vehicle and installed-system evidence.
- Diagnose first: Let abnormal wear guide inspection.
- Keep axle consistency: Use the specified paired-service scope.
- Follow procedures: Respect torque, fluid, electronics, and bedding.
- Protect friction: Prevent unsuitable chemical or fluid contact.
- Verify release: Confirm pedal, leaks, warnings, and operation.
Glossary Snippets
Terms used in this decision.
When to Use a Top 10 Review
Use rankings after fitment and repair scope are documented.
- Fitment confirmed: Filter with codes and measurements.
- Scope identified: Compare the complete required repair.
- Evidence visible: Rank construction, hardware, and support.
- Procedure covered: Include tools, fluid, testing, and records.
Already down to 2–3 options? A Comparison is usually faster.
When to Use a Comparison
Compare finalists for the same verified application.
- Application data: Match each dimension and interface.
- Included content: List hardware, sensors, and companion parts.
- Service evidence: Review instructions, traceability, and warranty.
- Installed outcome: Price labor, consumables, testing, and downtime.
Still building a shortlist? Start with a Top 10.