
How to Choose Brake Components for OEM Replacement Planning
OEM replacement planning means restoring the documented brake configuration and service method, not simply ordering a familiar brand. Original numbers may be superseded, kits may omit companion hardware, and current bulletins can change diagnosis or procedure.
Identify the factory system, inspect the failure, verify the latest parts and service information, and build the complete axle or hydraulic job. Preserve the specification, installation, testing, and warranty record for later service.
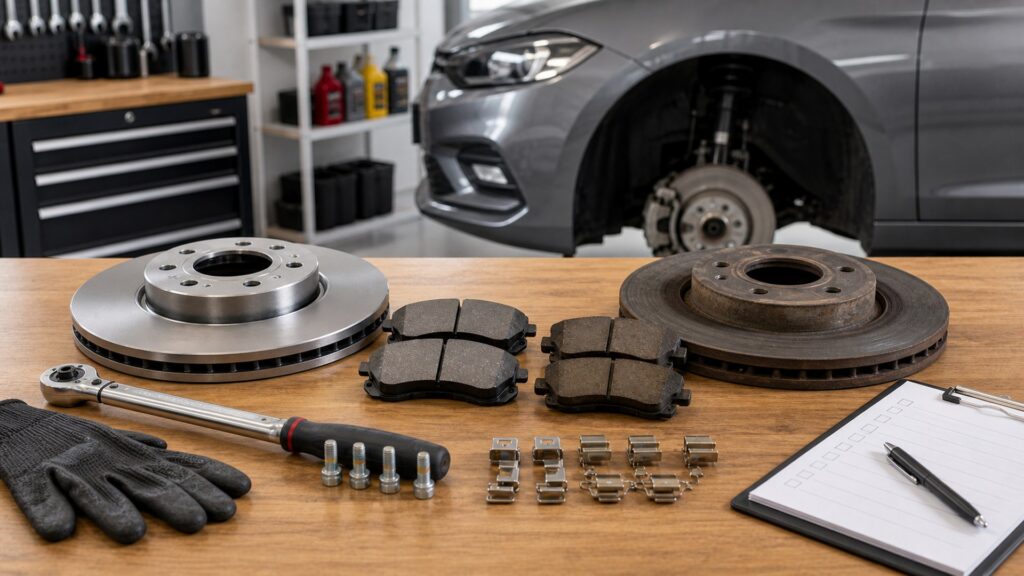
Buying framework
Restore the documented original system
OEM replacement planning begins with the vehicle's service specification and the current cause of wear. The goal is original function and procedure, not merely a familiar logo.
Establish the OE configuration: Decode VIN and brake option, then record original part numbers, supersessions, rotor or drum dimensions, caliper and sensor design, fluid, parking brake, and wheel package. Distinguish factory equipment from prior replacements or modifications.
Check current service information: Review manufacturer procedures, technical bulletins, updated parts, wear limits, machining rules, one-time fasteners, axle-pair requirements, electronic service mode, bleeding, calibration, and bedding. Use information for the exact model year and system.
Diagnose why replacement is needed: Measure wear and inspect surfaces, slides, pistons, boots, hoses, lines, hubs, bearings, parking brake, fluid, and sensors. An OE part installed over a seized or contaminated system will not restore OE behavior.
Choose the supply path: Compare genuine service parts, documented OE-supplier components, and OE-equivalent alternatives by application, specification, kit content, traceability, instructions, availability, return terms, and warranty. Avoid assuming OE supplier branding proves an identical service part.
Build the complete repair order: List friction pairs, rotors or drums, hardware, sensors, fasteners, calipers, hoses, fluid, cleaners, approved lubricants, scan functions, tools, labor, bedding, and records. Account for superseded kits and package quantities.
Who this is for
OE planning serves different restoration goals
A leased vehicle, long-term keeper, corrosion repair, performance package, and collector each value different evidence.
Late-model warranty-adjacent owners: Confirm whether diagnosis or repair may be covered before disassembly. Use dealer or manufacturer procedures, retain measurements and fault data, and avoid unauthorized work that complicates a valid warranty or goodwill request.
Long-term daily drivers: Prioritize exact OE behavior, supportable part numbers, complete hardware, corrosion resistance, service documentation, and future availability. A slightly higher complete-system cost can be preferable to repeating labor for omitted clips, sensors, or seized slides.
Performance or towing-package vehicles: Verify package-specific rotors, pads, calipers, shields, fluid, cooling features, wheel clearance, and software. Do not downgrade to a visually similar base system or assume an upgrade part preserves cold behavior, noise, balance, and warranty.
Corrosion-exposed vehicles: OE planning may expand to shields, fasteners, abutments, brackets, hoses, parking hardware, and mounting surfaces. Check whether service kits supersede individual pieces and whether the manufacturer permits cleaning, coating, reuse, or replacement.
Restoration and originality-focused owners: Document casting marks, finishes, hardware, labels, date codes, service-part substitutions, and reversible changes. Balance originality with current safety-critical service information; aged hoses, fluid, seals, or friction materials still require condition-based judgment.
What to pay attention to
OE means specifications, procedures, and revision history
The correct part number must be paired with the current service method and required companion content.
OE Identity
VIN, brake code, original number, supersession, geometry, friction, caliper, hose, sensor, and package.
OE Procedure
Bulletins, fasteners, torque, fluid, electronics, bleeding, road test, bedding, and records.
Original number and supersession chain: Record numbers from vehicle build data, parts catalogue, and installed components, then confirm replacement numbers, package quantities, axle or side, effective dates, and notes. A supersession can require new hardware or paired components.
Friction and rotor specification: Match pad or shoe geometry, compound family, shims, slots, chamfers, sensors, rotor diameter, thickness, height, vane design, balance, coating, minimum thickness, and permitted machining. Equivalent dimensions alone do not document equivalent behavior.
Caliper, hose, and hydraulic specification: Verify piston and seal system, bracket, slides, hose seat and routing, bleeder, parking mechanism, fluid standard, line materials, and bleeding sequence. Remanufactured and new service parts may have different core and warranty procedures.
One-time fasteners and hardware: Identify bolts, washers, hose seals, retaining clips, pad springs, pins, sensors, dust caps, hub nuts, and other items prohibited from reuse or specified for inspection. Apply only the documented thread preparation and torque method.
Electronic procedures: Confirm electronic parking-brake service mode, battery support, scan-tool functions, steering or brake-module checks, pressure bleeding, actuator calibration, warning clearing, and any post-repair initialization. Mechanical fit does not prove electronic readiness.
Bulletins and updated procedures: Search manufacturer communications for noise, vibration, wear, corrosion, revised components, torque, lubrication, bedding, and diagnostic guidance. A newer bulletin may change the preferred service plan without changing the visible failure.
Verification and documentation: Complete pedal, leak, wheel-torque, warning, parking-brake, safe road-test, and bedding steps. Save VIN, source references, numbers, revisions, measurements, technician, date, mileage, and results for future service or claims.
Avoid these traps
OEM assumptions that omit service reality
Buying a boxed genuine part does not diagnose the fault, supply every companion item, or execute the current procedure.
Equating OE supplier with OE service part: A company may supply the automaker yet sell a different aftermarket line, compound, coating, kit, or country application. Verify the exact service number and specification rather than inferring identity from the manufacturer name.
Ordering the original number without checking revisions: Earlier numbers may be superseded for availability, hardware, coating, noise, wear, or package reasons. Confirm the current chain and notes before purchasing old stock or mixing revisions on an axle.
Replacing only the quoted line item: A pad number may exclude sensor, clips, rotor, fasteners, lubricant, fluid, or a seized caliper repair required by the procedure. Build the job from inspection and service information, not the catalogue title.
Using generic torque or bedding rules: Fastener preparation, angle torque, wheel sequence, electronic mode, fluid, and bedding vary. Universal forum values can damage threads, distort rotors, or produce an unverified repair; use current vehicle and component instructions.
Discarding OE diagnostic evidence: Removed pads, rotors, boots, fluid, sensors, and hardware reveal wear and failure patterns. Photograph and measure them before cores, warranty returns, or disposal so the root cause and claim evidence are preserved.
Decision guidance
Choose the closest documented restoration path
The best option preserves approved fit, function, and procedure with supportable parts and complete scope.
If genuine parts are available and supported: Confirm the current number, kit content, axle quantity, warranty, return rules, and required companion parts. Genuine supply can simplify specification evidence, but diagnosis and current procedures still control the repair.
If a service number is discontinued: Obtain the documented supersession or manufacturer-approved alternative. Compare geometry, friction, sensors, hardware, paired replacement, and instructions; avoid marketplace claims that list an obsolete number without traceable support.
If an OE-supplier alternative is considered: Verify the exact aftermarket line, application, dimensions, compound, coating, hardware, certification where applicable, warranty, and support. Do not treat a logo relationship as proof of identical material or service packaging.
If the system has been modified: Determine whether restoration to original configuration is practical and whether hubs, knuckles, wheels, modules, lines, or parking brakes changed. Use qualified engineering or specialist support instead of combining OE numbers from incompatible donor systems.
If a bulletin addresses the symptom: Confirm applicability by VIN, date, condition, and prior work, then follow its diagnostic and parts sequence. A bulletin is not permission to skip inspection or apply a repair to a different cause merely sharing the complaint.
Ownership & compatibility
Keep the OE decision auditable
Future technicians should be able to see which specification and revision was installed.
Archive the configuration: Save VIN decode, brake code, window or build record, original numbers, supersessions, part labels, supplier, lot data, axle and side, dimensions, sensor and caliper identifiers, photographs, and relevant bulletins.
Record procedure compliance: Document measurements, rotor or drum disposition, hardware replaced, torque source, fluid, bleeding method, electronic service mode, calibration, road test, bedding instructions, technician, date, mileage, and any deferred related condition.
Preserve warranty evidence: Keep proof of purchase, authorized seller, installation invoice, maintenance records, removed parts or return authorization, fault codes, measurements, photographs, and communication. Follow claim instructions before discarding or modifying a failed component.
Review later system changes: Software, wheel, suspension, tire, hub, axle, parking-brake, or brake upgrades can change compatibility and procedure. Update the record so an old OE plan is not reused after the vehicle is no longer in that configuration.
FAQ
OEM brake replacement FAQ
Answers about genuine parts, OE suppliers, supersessions, service bulletins, hardware, rotors, and records.
What is the difference between OE and OEM brake parts?
How do I find the original brake part number?
What is a brake-part supersession?
Should I check technical service bulletins before ordering?
Do genuine brake pads always include new hardware?
Can OE rotors be reused with new pads?
Are OE-equivalent parts identical to factory parts?
Why do one-time brake fasteners matter?
What records support an OEM brake-part warranty claim?
Bottom line
Restore the specification, not just the badge
OEM planning combines original configuration, current revisions, complete service scope, exact procedures, and verification.
Identify the original system: Use VIN, brake code, numbers, geometry, electronics, and build data.
Check current revisions: Confirm supersessions, bulletins, kit content, and one-time hardware.
Correct the root cause: Inspect friction, calipers, hydraulics, hubs, parking brake, and wear patterns.
Document the restoration: Save parts, procedures, measurements, testing, bedding, and warranty evidence.
Reading Shortcuts
Confirm measurements before ordering.
Decision Reminders
Checks to complete before committing.
- Confirm application: Cross-check vehicle and installed-system evidence.
- Diagnose first: Let abnormal wear guide inspection.
- Keep axle consistency: Use the specified paired-service scope.
- Follow procedures: Respect torque, fluid, electronics, and bedding.
- Protect friction: Prevent unsuitable chemical or fluid contact.
- Verify release: Confirm pedal, leaks, warnings, and operation.
Glossary Snippets
Terms used in this decision.
When to Use a Top 10 Review
Use rankings after fitment and repair scope are documented.
- Fitment confirmed: Filter with codes and measurements.
- Scope identified: Compare the complete required repair.
- Evidence visible: Rank construction, hardware, and support.
- Procedure covered: Include tools, fluid, testing, and records.
Already down to 2–3 options? A Comparison is usually faster.
When to Use a Comparison
Compare finalists for the same verified application.
- Application data: Match each dimension and interface.
- Included content: List hardware, sensors, and companion parts.
- Service evidence: Review instructions, traceability, and warranty.
- Installed outcome: Price labor, consumables, testing, and downtime.
Still building a shortlist? Start with a Top 10.