How to Choose Brake Rotors for Home Garage Repair Projects
Home garage rotor services reward brake rotors that fit cleanly, include the small rotors you need, and do not require extra catalog research after the hub and caliper setup is opened up.
This guide helps DIY buyers choose rotors that match their tools, workspace, verification steps, and tolerance for extra trips during the rotor service.
Buying framework
How to think about buying brake rotors for DIY service
Buy around the whole home rotor service: rotor fit confidence, included pieces, access, bleeding or adjustment steps, and safe verification. For rotors, diameter, minimum thickness, hub pilot, venting, coating, and runout tolerance are more important than a generic premium label. For home garage work, buy around the tools, access, cleanup, and verification steps you can actually handle.
Buy for your workspace: Home garage brake rotors should fit your tools, lifting setup, cleanup plan, and ability to verify the rotor service safely. For rotors, diameter, minimum thickness, hub pilot, venting, coating, and runout tolerance are more important than a generic premium label. For home garage work, buy around the tools, access, cleanup, and verification steps you can actually handle.
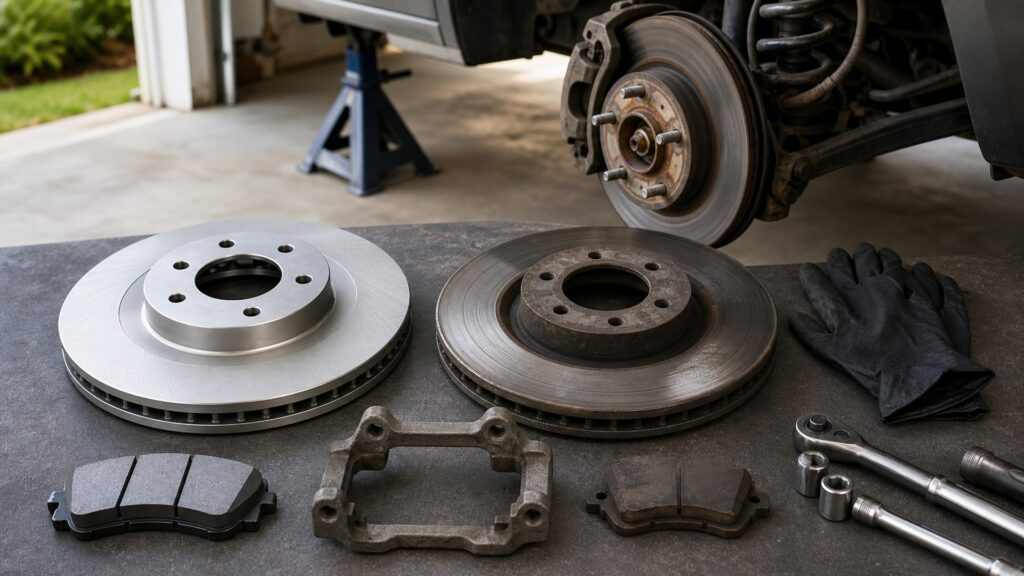
Avoid parts-counter surprises: A complete brake rotor package can save a driveway rotor service when old clips, fasteners, seals, or springs break during removal. A new rotor needs a clean hub face and compatible pad material, or the driver may feel pulsation even when the casting itself is acceptable. Compare the new part with the old one before the vehicle is disabled for the repair.
Confirm before teardown: Compare diameter, thickness, bolt pattern, hub pilot, vented or solid design, coating, and ABS or bearing integration while the hub and caliper setup is still movable whenever possible. Thermal mass and vent design matter most when the vehicle descends grades, tows, carries load, or sees repeated stop-and-go heat cycles. A DIY-friendly choice reduces mid-job parts runs and avoids procedures that require shop-only equipment.
Plan the difficult step: Bleeding, adjustment, cleaning, seating, or access around brake rotors should be understood before the car is apart. Coated hats and edges can reduce visible corrosion, but the friction faces still need proper cleaning and bedding before normal use. For home garage work, buy around the tools, access, cleanup, and verification steps you can actually handle.
Leave room for a stop decision: If the old brake rotor reveals damage beyond your tools or comfort level, the best buying choice may be pausing for help. Rotor value depends on machining quality, shipping protection, and whether the listing separates front, rear, solid, vented, and brake-package variants. Compare the new part with the old one before the vehicle is disabled for the repair.
Who this is for
Match brake rotors to the vehicle, repair goal, and buyer situation
Use these profiles for DIY service decisions. For rotors, diameter, minimum thickness, hub pilot, venting, coating, and runout tolerance are more important than a generic premium label. A DIY-friendly choice reduces mid-job parts runs and avoids procedures that require shop-only equipment.
First-time DIYer: Choose brake rotors with clear rotor fit, complete contents, and instructions that match your rotor service manual. For rotors, diameter, minimum thickness, hub pilot, venting, coating, and runout tolerance are more important than a generic premium label. A DIY-friendly choice reduces mid-job parts runs and avoids procedures that require shop-only equipment.
Weekend mechanic: Buy the brake rotor and related wheel-end hardware together so one broken clip or seal does not stop the job. A new rotor needs a clean hub face and compatible pad material, or the driver may feel pulsation even when the casting itself is acceptable. For home garage work, buy around the tools, access, cleanup, and verification steps you can actually handle.
Tool-limited owner: Favor brake rotors that do not require specialty procedures beyond your confirmed setup. Thermal mass and vent design matter most when the vehicle descends grades, tows, carries load, or sees repeated stop-and-go heat cycles. Compare the new part with the old one before the vehicle is disabled for the repair.
Apartment or small-garage repairer: Reduce downtime by choosing a brake rotor source with fast support and simple returns. Coated hats and edges can reduce visible corrosion, but the friction faces still need proper cleaning and bedding before normal use. A DIY-friendly choice reduces mid-job parts runs and avoids procedures that require shop-only equipment.
Safety-focused DIYer: If the system tied to brake rotors affects braking, steering, airflow, or drivability, verify the rotor service carefully before road use. Rotor value depends on machining quality, shipping protection, and whether the listing separates front, rear, solid, vented, and brake-package variants. For home garage work, buy around the tools, access, cleanup, and verification steps you can actually handle.
What to pay attention to
Which brake rotor specs actually matter
Prioritize specs that change DIY service outcomes. For rotors, diameter, minimum thickness, hub pilot, venting, coating, and runout tolerance are more important than a generic premium label. Compare the new part with the old one before the vehicle is disabled for the repair.
Practical-feel specifications
In DIY service, pulsation control, brake noise, surface finish shape the driver's first signs that the brake rotor choice worked. For rotors, diameter, minimum thickness, hub pilot, venting, coating, and runout tolerance are more important than a generic premium label. For home garage work, buy around the tools, access, cleanup, and verification steps you can actually handle.
Capability specifications
For brake rotors, minimum thickness, venting, coating quality matter when climate, workload, or old related rotors add stress. A new rotor needs a clean hub face and compatible pad material, or the driver may feel pulsation even when the casting itself is acceptable. Compare the new part with the old one before the vehicle is disabled for the repair.
Completeness: For DIY work, included minimum thickness, runout, clips, seals, or brackets are practical specs, not extras. For rotors, diameter, minimum thickness, hub pilot, venting, coating, and runout tolerance are more important than a generic premium label. Compare the new part with the old one before the vehicle is disabled for the repair.
Clear orientation: Home installers benefit from brake rotors with obvious direction, side, airflow, or mounting cues. A new rotor needs a clean hub face and compatible pad material, or the driver may feel pulsation even when the casting itself is acceptable. A DIY-friendly choice reduces mid-job parts runs and avoids procedures that require shop-only equipment.
Access-friendly design: Details tied to pulsation control, brake noise, and surface finish can reduce frustration in tight spaces. Thermal mass and vent design matter most when the vehicle descends grades, tows, carries load, or sees repeated stop-and-go heat cycles. For home garage work, buy around the tools, access, cleanup, and verification steps you can actually handle.
Forgiving support: Choose sellers that handle rotor fit questions quickly because the hub and caliper setup may be stuck while the brake rotor is out. Coated hats and edges can reduce visible corrosion, but the friction faces still need proper cleaning and bedding before normal use. Compare the new part with the old one before the vehicle is disabled for the repair.
Durable basics: Compare minimum thickness, venting, and coating quality after confirming the rotor can be installed with your tools. Rotor value depends on machining quality, shipping protection, and whether the listing separates front, rear, solid, vented, and brake-package variants. A DIY-friendly choice reduces mid-job parts runs and avoids procedures that require shop-only equipment.
Avoid these traps
Common mistakes people make when buying brake rotors
DIY service fails when fit or context is skipped. Thermal mass and vent design matter most when the vehicle descends grades, tows, carries load, or sees repeated stop-and-go heat cycles. A DIY-friendly choice reduces mid-job parts runs and avoids procedures that require shop-only equipment.
Opening the vehicle before checking the box: Inspect brake rotors against the old rotor and listing before the rotor service reaches the no-turning-back stage. Thermal mass and vent design matter most when the vehicle descends grades, tows, carries load, or sees repeated stop-and-go heat cycles. A DIY-friendly choice reduces mid-job parts runs and avoids procedures that require shop-only equipment.
Reusing hardware to save minutes: Old small rotors can cause noise, leaks, restriction, drag, or poor seating after a new brake rotor is installed. Coated hats and edges can reduce visible corrosion, but the friction faces still need proper cleaning and bedding before normal use. For home garage work, buy around the tools, access, cleanup, and verification steps you can actually handle.
Ignoring cleanup supplies: Many brake rotors need clean mating surfaces, correct fluid handling, dust control, or housing cleanup. Rotor value depends on machining quality, shipping protection, and whether the listing separates front, rear, solid, vented, and brake-package variants. Compare the new part with the old one before the vehicle is disabled for the repair.
Forcing a questionable fit: A brake rotor that needs bending, grinding, or improvised fasteners is usually the wrong rotor. For rotors, diameter, minimum thickness, hub pilot, venting, coating, and runout tolerance are more important than a generic premium label. A DIY-friendly choice reduces mid-job parts runs and avoids procedures that require shop-only equipment.
Skipping verification: After home rotor installation, test operation, inspect for leaks or contact problems, and follow service procedures before normal driving. A new rotor needs a clean hub face and compatible pad material, or the driver may feel pulsation even when the casting itself is acceptable. For home garage work, buy around the tools, access, cleanup, and verification steps you can actually handle.
Decision guidance
Which type of brake rotor purchase is right for you
Use the rotor service evidence before choosing a rotor tier. Thermal mass and vent design matter most when the vehicle descends grades, tows, carries load, or sees repeated stop-and-go heat cycles. Compare the new part with the old one before the vehicle is disabled for the repair.
Choose complete kits for first attempts: Complete brake rotors reduce missing-rotors risk when you are learning the rotor service. Thermal mass and vent design matter most when the vehicle descends grades, tows, carries load, or sees repeated stop-and-go heat cycles. Compare the new part with the old one before the vehicle is disabled for the repair.
Choose OE-style for straightforward installs: An OE-style brake rotor lowers the chance of surprise modifications in a home garage. Coated hats and edges can reduce visible corrosion, but the friction faces still need proper cleaning and bedding before normal use. A DIY-friendly choice reduces mid-job parts runs and avoids procedures that require shop-only equipment.
Choose local pickup when downtime matters: If the hub and caliper setup must move soon, locally available brake rotors with confirmed fit may beat a cheaper shipped option. Rotor value depends on machining quality, shipping protection, and whether the listing separates front, rear, solid, vented, and brake-package variants. For home garage work, buy around the tools, access, cleanup, and verification steps you can actually handle.
Choose premium only for the reason: Pay extra for coating, materials, or contents when those details solve your specific rotor service conditions. For rotors, diameter, minimum thickness, hub pilot, venting, coating, and runout tolerance are more important than a generic premium label. Compare the new part with the old one before the vehicle is disabled for the repair.
Stop for unsafe uncertainty: If the brake rotor system cannot be verified safely after rotor installation, do not treat the purchase as complete. A new rotor needs a clean hub face and compatible pad material, or the driver may feel pulsation even when the casting itself is acceptable. A DIY-friendly choice reduces mid-job parts runs and avoids procedures that require shop-only equipment.
Ownership & compatibility
What you are really buying into with brake rotors
Keep records, related rotors, and support in view. Thermal mass and vent design matter most when the vehicle descends grades, tows, carries load, or sees repeated stop-and-go heat cycles. For home garage work, buy around the tools, access, cleanup, and verification steps you can actually handle.
Keep the box until verified: Do not discard packaging for brake rotors until the hub and caliper setup passes inspection and the rotor number is recorded. Thermal mass and vent design matter most when the vehicle descends grades, tows, carries load, or sees repeated stop-and-go heat cycles. For home garage work, buy around the tools, access, cleanup, and verification steps you can actually handle.
Label leftover hardware: Unused clips or seals from a brake rotor kit can reveal a wrong application or optional configuration. Coated hats and edges can reduce visible corrosion, but the friction faces still need proper cleaning and bedding before normal use. Compare the new part with the old one before the vehicle is disabled for the repair.
Recheck after driving: Home-installed brake rotors deserve a short follow-up inspection for seating, leaks, noise, or loosened wheel-end hardware. Rotor value depends on machining quality, shipping protection, and whether the listing separates front, rear, solid, vented, and brake-package variants. A DIY-friendly choice reduces mid-job parts runs and avoids procedures that require shop-only equipment.
Store service notes: Write down torque values, rotor numbers, and any unusual access steps for the next brake rotor service. For rotors, diameter, minimum thickness, hub pilot, venting, coating, and runout tolerance are more important than a generic premium label. For home garage work, buy around the tools, access, cleanup, and verification steps you can actually handle.
Know when to ask a shop: If a new brake rotor exposes damaged threads, seized lines, broken adjusters, or warning lights, professional help may protect the rotor service. A new rotor needs a clean hub face and compatible pad material, or the driver may feel pulsation even when the casting itself is acceptable. Compare the new part with the old one before the vehicle is disabled for the repair.
FAQ
Brake rotors buying guide FAQ
Focused answers for DIY service decisions. Thermal mass and vent design matter most when the vehicle descends grades, tows, carries load, or sees repeated stop-and-go heat cycles. A DIY-friendly choice reduces mid-job parts runs and avoids procedures that require shop-only equipment.
What makes brake rotors DIY-friendly?
Should I open the hub and caliper setup before checking the brake rotor?
What extra supplies should I expect?
When should a DIY buyer stop?
How do I verify home-installed brake rotors?
Bottom line
The simplest way to choose brake rotors
Choose by fit, evidence, and rotor service risk. Thermal mass and vent design matter most when the vehicle descends grades, tows, carries load, or sees repeated stop-and-go heat cycles. Compare the new part with the old one before the vehicle is disabled for the repair.
Buy for the repair day: Home garage brake rotors should include enough detail and wheel-end hardware to avoid a mid-job rotors run. Thermal mass and vent design matter most when the vehicle descends grades, tows, carries load, or sees repeated stop-and-go heat cycles. Compare the new part with the old one before the vehicle is disabled for the repair.
Verify before teardown: Compare the new brake rotor with the old rotor before the hub and caliper setup is disabled. Coated hats and edges can reduce visible corrosion, but the friction faces still need proper cleaning and bedding before normal use. A DIY-friendly choice reduces mid-job parts runs and avoids procedures that require shop-only equipment.
Respect your tool limits: If the job requires procedures beyond your setup, a perfect brake rotor purchase still may not be DIY-safe. Rotor value depends on machining quality, shipping protection, and whether the listing separates front, rear, solid, vented, and brake-package variants. For home garage work, buy around the tools, access, cleanup, and verification steps you can actually handle.
Inspect after use: Recheck pulsation control, brake noise, seating, leaks, or movement soon after the rotor service. For rotors, diameter, minimum thickness, hub pilot, venting, coating, and runout tolerance are more important than a generic premium label. Compare the new part with the old one before the vehicle is disabled for the repair.
Final DIY check: The right brake rotors are the ones you can install, verify, and trust without improvising. A new rotor needs a clean hub face and compatible pad material, or the driver may feel pulsation even when the casting itself is acceptable. A DIY-friendly choice reduces mid-job parts runs and avoids procedures that require shop-only equipment.
Reading Shortcuts
Jump to the sections that matter most for choosing brake rotors.
Decision Reminders
A quick checklist before you commit to brake rotors.
- Confirm the old part: Use the removed rotor, OE number, or service data to verify the catalog listing.
- Check included hardware: Missing clips, springs, seals, brackets, or fasteners can change the real cost.
- Inspect nearby wear: Do not expect a new brake rotor to solve problems caused by related components.
- Read warranty details: Know the claim process, exclusions, and whether labor is covered.
- Plan the install: Cleaning, torque, direction, bleeding, bedding, or adjustment steps matter after purchase.
Glossary Snippets
Quick translations for terms that confuse replacement-rotor buyers.
When to Use a Top 10 Review
Use this format when you want a faster way to narrow the field.
- You are early in the process: A Top 10 can separate common brake rotors by rotor fit confidence, completeness, and value.
- You want a shortlist: Ranked picks help organize budget, OE-style, complete-kit, and harsh-use options.
- You need category context: It is useful when you still need to understand the major choices before comparing two rotors.
Already down to 2-3 options? A Comparison is usually faster than broad buying advice.
When to Use a Comparison
Ideal once you have a shortlist and need clear, practical tradeoffs.
- You narrowed it to 2-3 options: A comparison makes differences in fit notes, included wheel-end hardware, coverage, and total rotor service cost easier to see.
- You are checking the quote: Side-by-side tradeoffs help determine whether a recommended rotor grade is justified.
- You are ready to decide: Use a comparison when the hub and caliper setup fit is known and the final choice is about value and risk.
Still exploring? Start with a Top 10 to identify the right brake rotor category first.