
How to Choose Car Interior Accessories for Cargo and Storage Planning
Cargo planning begins with mass and movement, not liters of storage. A neat bin can still slide, open, overload a weak attachment, block rear vision, press against a seatback, or bury roadside equipment. Drawer systems, barriers, nets, liners, and organizers also consume payload and space, change the loading path, and may interfere with folding seats, top tethers, spare access, sensors, or the hatch.
This guide builds an interior storage plan from the actual load list and vehicle limits. It explains payload, center of gravity, tie-down and barrier evidence, occupant separation, visibility, loading order, emergency access, mixed cargo, and removal. The objective is controlled cargo that can be loaded and verified consistently rather than maximum compartment count.
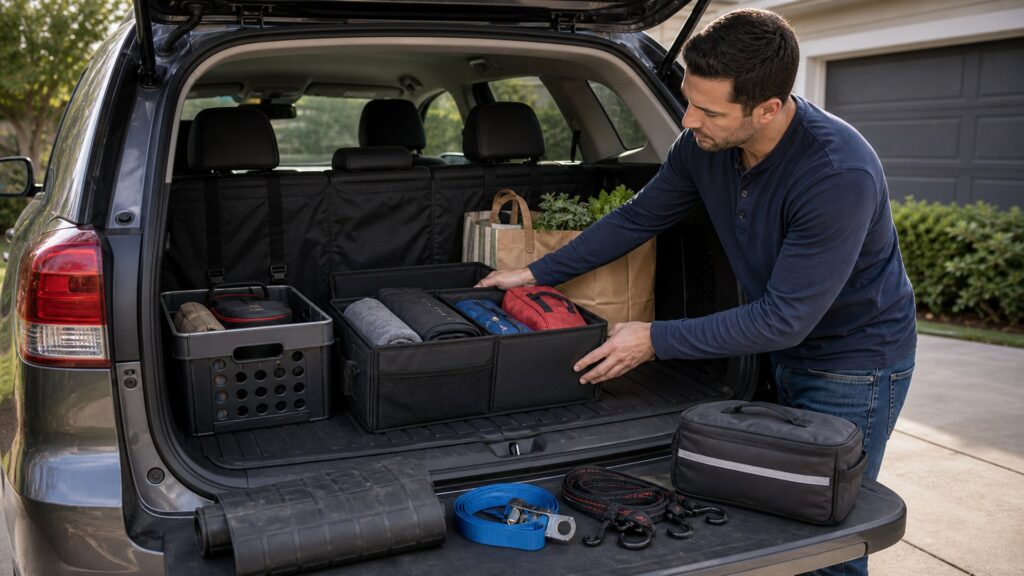
Buying framework
Plan from inventory to restraint to retrieval
Record the load, check the vehicle limit, assign a low controlled position, verify attachments, and preserve access before buying containers.
Inventory and classify the load: Record dimensions, mass, rigidity, sharp edges, liquids, heat sensitivity, hazardous properties, theft value, frequency, occupant need, and the order in which each item is retrieved.
Calculate the vehicle budget: Use the vehicle certification or tire-and-loading label and manual to understand occupants-and-cargo capacity, then include accessories, passengers, pets, and changing supplies. Do not confuse cargo volume with payload.
Design location and restraint: Place heavy items low and as far forward as practical without entering occupant or seat mechanisms. Match bins, straps, nets, barriers, and anchor directions to the item and manufacturer instructions.
Rehearse loading and failure access: Load through the real door or hatch, close every latch, preserve visibility, test seats and cover, reach spare and emergency gear, then practice unloading without releasing other cargo roadside.
Who this is for
Storage systems follow load severity and change frequency
Groceries, work tools, sports gear, pets, emergency supplies, and travel luggage require different containment, anchor evidence, separation, and cleaning.
Everyday errand drivers: Favor small removable compartments, low placement, grocery spill control, quick collapse, and access to emergency equipment without leaving empty organizers loose.
Work and tool users: List each dense item, use appropriate cases and verified restraint points, control sharp or hazardous contents, track payload, protect theft-sensitive gear, and inspect attachments frequently.
Family and sports travelers: Separate passengers from strollers, coolers, bats, helmets, luggage, and loose shoes; preserve child-restraint tethers, hatch access, visibility, and an unload sequence for stops.
Pet and mixed-cargo users: Use vehicle-specific separation where appropriate, maintain ventilation and restraint systems, isolate food, chemicals, wet gear, and sharp objects, and preserve animal and human exit paths.
What to pay attention to
Cargo specifications beyond capacity
A credible system documents vehicle limits, installed mass, attachment strength and direction, closure, material behavior, visibility, and access through actual use.
Mass, Placement & Restraint
Compare payload, item mass, center of gravity, occupant separation, containers, closures, anchors, strap direction, and load movement.
Vehicle Function, Access & Lifecycle
Compare seats, tethers, visibility, hatch, spare access, retrieval order, cleaning, theft, inspection, removal, and changing load sets.
Payload and installed mass: Record the label capacity, passenger and pet mass, accessory weight, normal and maximum cargo, tongue load when relevant, axle or roof limits where applicable, and margins for changing supplies.
Container and closure behavior: Compare rigid versus collapsible walls, lid and latch, dividers, sharp edges, liquid leakage, stacking, compression, handle loads, anti-slip base, temperature, UV, chemical compatibility, cleaning, and empty-state retention.
Anchors and restraint components: Verify manufacturer-rated tie-downs, rails, hooks, straps, nets, barrier mounts, load directions, angles, edge protection, pretension, buckle locking, abrasion, stretch, and incompatibility with child-restraint anchors.
Vehicle interaction: Check seatbacks and latches, top tethers, folding, cargo cover, spare and battery access, side airbags, vents, sensors, rear camera, hatch, doors, trim pressure, wiring, and all occupied seating positions.
Visibility and retrieval: Preserve mirror and direct view where required, lighting, labels, first-needed items, roadside access, emergency release, first aid, fire or spill response as applicable, and a sequence that never relies on climbing over unsecured loads.
Avoid these traps
Storage decisions that confuse neatness with securement
Compartments organize items for convenience; they restrain cargo only when the complete container, closure, attachment, anchor, and vehicle path are suitable.
Using child-restraint anchors for cargo: Lower anchors and top tethers are designed for specified restraint uses, not general cargo attachment unless the vehicle manufacturer expressly says otherwise. Preserve them for their intended purpose.
Loading heavy gear high or rearward: High mass raises the center of gravity and increases movement potential; rearward placement can load seats or hatch areas. Follow vehicle guidance and keep dense cargo low and forward.
Covering the spare and roadside kit: A tidy full cargo floor can make essential equipment inaccessible during a roadside event. Design an access path that does not require placing loose cargo in traffic.
Relying on a friction base: Anti-slip material reduces casual sliding but is not positive restraint for consequential loads. Use appropriate containers, closures, and manufacturer-approved attachment systems.
Decision guidance
Choose containment only after the restraint plan
Buy the system whose installed mass, geometry, attachment evidence, vehicle interaction, and retrieval workflow fit the real load—not the largest advertised volume.
Choose removable bins if: Loads change often, each bin remains manageable, contents are controlled, empty bins are retained, cleaning is practical, and vehicle tie-down and emergency access remain available.
Choose drawers or fixed modules if: Repeated work justifies their mass and lost volume, structural attachment is documented, payload remains adequate, contents latch, service access remains possible, and removal is planned.
Choose a net or barrier if: It is designed for the exact vehicle and intended load direction, mounts to approved points, preserves airbags and seats, and its openings and ratings suit the contents.
Reject the system if: It depends on unrated anchors, overloads the vehicle, places dense cargo near occupants, blocks visibility or exits, prevents seats from latching, buries emergency equipment, or lacks secure closure.
Ownership & compatibility
Cargo plans must follow the changing load
A secure weekend setup can become unsafe when passengers, tools, cases, pets, supplies, or vehicle configuration change without a new weight and restraint check.
Run a departure cargo check: Confirm payload assumptions, seat and hatch latching, closures, anchor and strap condition, dense-item position, passenger separation, visibility, spare and emergency access, liquids, and unloading order.
Inspect restraint hardware: Look for cuts, abrasion, UV damage, stretched webbing, cracked bins, bent hooks, loose fasteners, damaged rails, trim deformation, corrosion, contamination, and unreadable labels; retire suspect components.
Reset after the task: Remove unnecessary or hazardous cargo, clean spills, dry liners, collapse and retain empty containers, return emergency equipment, record damaged parts, and restore seats and covers correctly.
FAQ
Cargo and storage planning FAQ
Answers about payload, organizer ratings, heavy-item placement, anchors, nets, barriers, rear visibility, spare access, mixed cargo, empty bins, and departure checks.
Does a cargo organizer increase vehicle capacity?
How much weight can a trunk organizer hold?
Where should heavy cargo be placed?
Can child-seat anchors secure cargo?
Are cargo nets enough for tools or luggage?
When is a cargo barrier useful?
How much rear visibility should storage preserve?
How can spare-tire access be preserved?
Should empty storage bins be secured?
Bottom line
Storage is successful when the load remains controlled
Know the mass, respect the vehicle limit, keep dense cargo low, use verified restraint paths, preserve occupants and access, and recheck every changed load.
Inventory and weigh: Record real items, passengers, accessories, and changing supplies.
Place and restrain: Keep mass low and controlled with suitable closures and anchors.
Preserve access: Protect vision, seats, exits, spare gear, and unloading sequence.
Reading Shortcuts
Move from cargo and storage planning fundamentals to specifications, decision paths, or recurring questions.
Decision Reminders
Keep these cargo and storage planning checks visible before committing.
- Inventory: List size, mass, hazard, and retrieval need.
- Capacity: Check label limits including occupants and accessories.
- Place: Keep dense loads low, forward, and separated.
- Restrain: Match containers, closures, straps, and anchors.
- Access: Preserve visibility, hatch, spare, and emergency gear.
- Reset: Inspect hardware and remove unnecessary cargo.
Glossary Snippets
Terms that clarify cargo and storage planning decisions.
When to Use a Top 10 Review
Use rankings after the requirements and compatibility gates are settled.
- Load field: Filter by mass and hazard.
- Restraint screen: Compare closures and anchors.
- Vehicle review: Rank function and access effects.
- Departure check: Show changing-load verification.
Already down to 2–3 options? A Comparison is usually the faster next step.
When to Use a Comparison
Use direct cargo and storage planning comparisons when finalists differ in specifications that alter installation, use, or ownership.
- Same vehicle: Normalize limits and anchors.
- Same load: Use identical mass and shapes.
- Same direction: Compare restraint paths.
- Same access: Test retrieval and unloading.
Still exploring? Start with a Top 10 to build a shortlist first.