
How to Choose Car Interior Accessories for Dash, Console, and Seat Layouts
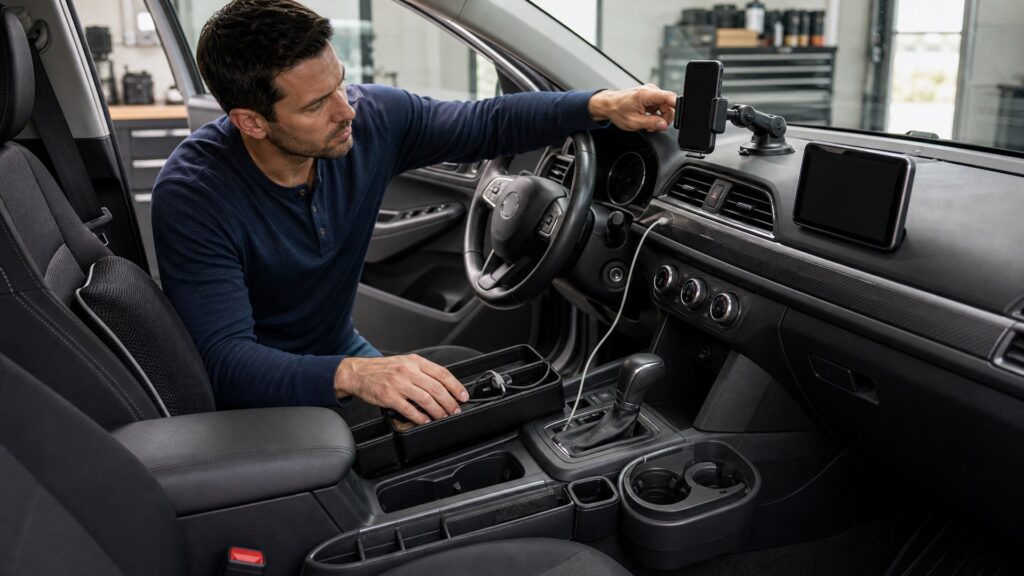
Dash, console, and seat accessories compete for the same small areas used by controls, vents, displays, airbags, restraints, occupants, cables, doors, and moving seats. A mount that appears clear while parked can obscure a road view from the driver’s eye point, shake on rough pavement, block defrost airflow, or collide with a shifter. A seat-gap bin can disappear into a track or hide a buckle.
This guide maps the cabin as interacting zones before purchase. It compares mounts, trays, holders, gap storage, organizers, and pads through driver reach and glance, deployment clearance, vent and control access, passenger space, seat movement, cable routing, attachment, retrieval, cleaning, and reversibility. The goal is a layout that remains understandable through every driver and seating position.
Buying framework
A four-stage test for dash console and seat layout accessories
Make each stage produce ergonomic evidence that constrains the next one.
Quantify driver eye and reach: Quantify driver eye and reach with a stated pass condition. Use dash and console interfaces to reject ergonomic choices whose performance cannot sustain the measured workload.
Confirm dash and console interfaces: Establish the supported boundary for dash and console interfaces. Name the approver, source, and corrective action before ergonomic uncertainty reaches seat and restraint movement.
Map seat and restraint movement: Lay out seat and restraint movement at the actual vehicle or site. Include ergonomic movement, access, exposure, and the fault route leading into attachment and cable path.
Test attachment and cable path: Run a realistic trial of attachment and cable path. Confirm retrieval and reset still works when the preferred ergonomic arrangement, control, or service is unavailable.
Who this is for
Match the plan to the user
Workload, authority, parking, and recovery needs separate these buyers.
Daily commuters: Keep navigation, charging, sunglasses, and small essentials reachable without blocking displays, vents, controls, sightlines, or the normal sweep of hands around the wheel.
Families and rideshare drivers: Plan storage around changing passengers, seat movement, restraint access, cleaning, and quick removal instead of filling every open pocket with a fixed organizer.
Drivers using accessibility aids: Test reach, operating force, transfer space, and one-handed retrieval in the actual seating position before accepting any dash, console, or seat-mounted accessory.
Enthusiasts with added electronics: Treat mounts, hubs, microphones, cameras, and cables as one layout so power, cooling, visibility, and airbag clearance are resolved together.
What to pay attention to
Specifications that change the installed result
Read each characteristic inside the complete ergonomic system.
Driver eye and reach: Seated eye point, road and mirror view, glance angle, touch distance, steering, and parked setup
Dash and console interfaces: Screens, controls, shifter, parking brake, vents, defrosters, cupholders, doors, and service panels
Seat and restraint movement: Rails, recline, fold, head restraints, buckles, anchors, sensors, airbags, and occupant entry
Attachment and cable path: Surface material, clips, adhesives, tension, heat, vibration, strain relief, doors, and feet
Retrieval and reset: Item mass, passenger access, distraction, loose-object control, cleaning, and driver handoff
Avoid these traps
Planning errors that create expensive corrections
These ergonomic failures usually begin before equipment reaches the site.
Filling every open gap: Unoccupied space may be required for controls, seat movement, airflow, or occupant motion. Put this filling failure in the ergonomic requirements and close it before ordering.
Mounting by dashboard appearance: The driver’s actual eye point and airbag map determine whether placement is acceptable. Expose the mounting conflict through a realistic ergonomic trial under normal use.
Routing cables through moving joints: Seat tracks, doors, hinges, pedals, and storage lids cut, pinch, or snag leads. Assign a ergonomic reviewer to the routing gap before the system reaches users.
Testing one seating position: Another driver or passenger can move the accessory into vision, restraint, or control conflict. Define ergonomic recovery from the testing error; reject unsupported improvisation.
Decision guidance
Choose the least complicated supported route
The supported ergonomic branch meets the measured requirement and remains recoverable.
Use a dashboard or windshield mount: Visibility, law, surface, heat, vibration, airbags, reach, and removal are verified. This remains the lean ergonomic choice while evidence stays inside every verified ergonomic limit.
Use console or cupholder storage: Controls, shifter, brake, lids, drinks, cables, passenger knees, and retrieval remain clear. Price the complete ergonomic path, including who operates it, provides ergonomic support, and restores the site.
Use seat-mounted organization: Seat construction, airbags, sensors, head restraints, buckles, folds, and occupant clearance are supported. Let a measured ergonomic constraint—not feature appeal—justify the added ergonomic capability.
Reject the layout: Any normal movement blocks vision, controls, restraints, exits, airflow, or secure item containment. Commission the ergonomic option; reject it without proven ergonomic behavior and a usable fallback.
Ownership & compatibility
Keep performance verifiable after installation
Inspection, records, and exit planning protect the original decision.
Audit the driver zone: Repeat seated sightline, reach, control, and airbag checks after moving a mount, changing a phone, or adding another device to the console.
Control cables and loose objects: Inspect plugs, strain relief, routing, heat, and attachment; remove anything that can migrate into pedals or become a projectile during a sudden stop.
Restore the cabin cleanly: Keep original pieces, removal instructions, and surface-safe cleaning records so adhesives, clips, and brackets can leave without damaged trim or blocked features.
FAQ
Questions buyers ask about dash console and seat layout accessories
Short answers for unresolved evidence and approval questions.
How should buyers evaluate driver eye and reach?
How should buyers evaluate dash and console interfaces?
How should buyers evaluate seat and restraint movement?
How should buyers evaluate attachment and cable path?
How should buyers evaluate retrieval and reset?
How should buyers evaluate filling every open gap?
How should buyers evaluate mounting by dashboard appearance?
How should buyers evaluate routing cables through moving joints?
How should buyers evaluate testing one seating position?
Bottom line
A defensible purchase in three checks
Demand, ergonomic fit, and lifecycle responsibility must all remain clear.
Define the need: Base the purchase on measured ergonomic demand and a named pass condition.
Prove the fit: Verify compatibility, ergonomic access, and failure behavior before acceptance.
Own the outcome: Keep inspections, ergonomic support, and replacement planning active.
Reading Shortcuts
Jump to the evidence you need.
Decision Reminders
Keep these checks visible.
- Driver eye and reach: Quantify the evidence.
- Dash and console interfaces: Confirm the evidence.
- Seat and restraint movement: Map the evidence.
- Attachment and cable path: Test the evidence.
- Retrieval and reset: Document the evidence.
Glossary Snippets
Terms used in this guide.
When to Use a Top 10 Review
Rank products after compatibility is settled.
- Requirement: Normalize the needed outcome.
- Compatibility: Remove unsupported options.
- Installation: Compare the complete path.
- Ownership: Price support and exit.
Already down to 2–3 options? A Comparison is usually the faster next step.
When to Use a Comparison
Compare finalists under identical verified conditions.
- Same demand: Use one duty cycle.
- Same boundaries: Hold site limits constant.
- Same trial: Observe equivalent use.
- Same horizon: Include lifecycle costs.
Still exploring? Start with a Top 10 to build a shortlist first.