
How to Choose Car Interior Accessories for Interior Fitment Checks
Interior fitment is a moving-geometry problem. A product can match the model name and still conflict with a different seat frame, console, floor anchor, buckle stalk, side-airbag seam, cargo floor, powered track, or fold mechanism. Static width and length do not show what happens when the driver changes position, a rear seat folds, a child restraint is installed, or a door closes around a loaded organizer.
This guide provides a disciplined fitment check for covers, mats, organizers, shades, liners, mounts, and related cabin products. It explains vehicle identification, reference measurements, safety zones, attachment tolerances, full-range parked testing, documentation, and return timing. The goal is verified compatibility rather than confidence borrowed from a generic application list.
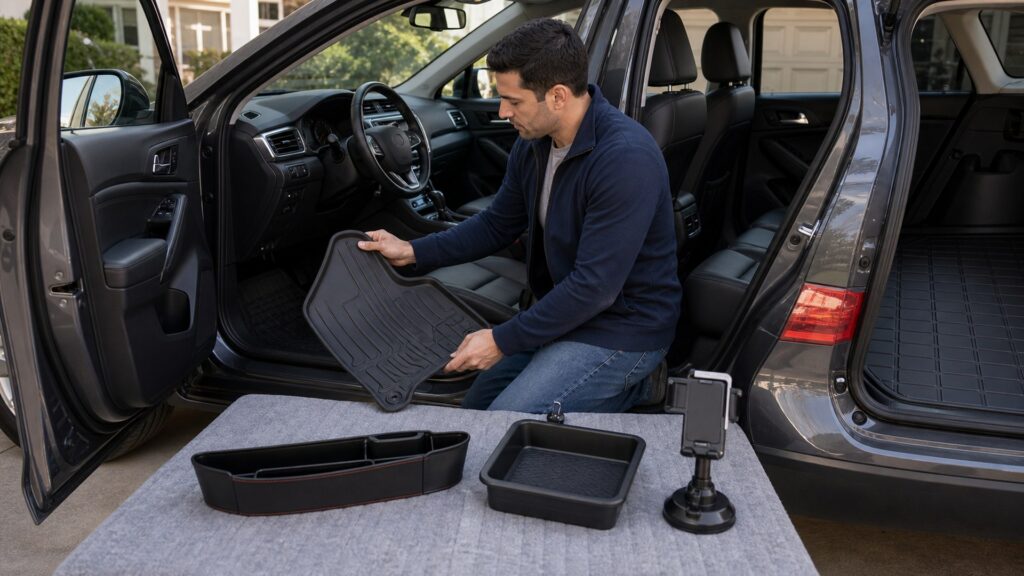
Buying framework
Measure the vehicle as a moving assembly
Confirm exact identity, establish repeatable reference points, map safety exclusions, and trial every affected motion before regular use.
Decode the exact configuration: Record VIN-relevant model year, body style, trim, seat count and type, powered functions, factory mats, console, audio or climate options, cargo floor, and accessories already installed.
Choose repeatable measurement datums: Measure between fixed seams, rails, anchors, trim edges, glass borders, or floor points rather than soft edges. Photograph the tape position and record seat settings.
Map movement and exclusion zones: Cycle seats, backs, head restraints, armrests, buckles, child anchors, pedals, doors, consoles, hatches, cargo floors, and factory covers while marking airbags, sensors, labels, and sight lines.
Perform a reversible acceptance test: Install without permanent changes, then repeat every movement and normal loading action. Check retention, pressure, noise, surface marks, warnings, and removal before discarding packaging.
Who this is for
Fitment risk rises as the product approaches moving systems
A loose console tray and a seat cover require different evidence because their installation tolerances and failure consequences differ.
Seat and restraint shoppers: Verify seat model, integrated belts, side airbags, occupant sensors, head restraints, armrests, controls, buckles, anchors, fold and entry mechanisms, ventilation, and heating.
Driver-footwell shoppers: Use exact floor contours and factory retention. Test full pedal and seat travel with normal footwear and never stack mats or accept curling edges.
Door, dash, and glass shoppers: Check trim gaps, switches, handles, vents, speakers, defrosters, mirrors, cameras, sensors, visibility, airbag zones, adhesive temperature limits, and removal marks.
Cargo-area shoppers: Measure floor levels, side contours, tie-downs, seatbacks, spare access, hatch clearance, cargo cover, subfloor, pet barriers, and the largest real load through its loading path.
What to pay attention to
Fitment evidence worth collecting
Useful specifications connect a product dimension to a vehicle reference, movement, tolerance, and prohibited zone.
Identity, Dimensions & Dynamic Clearance
Compare exact configuration, fixed datums, tolerances, seat and door movement, controls, restraints, vision, and loading paths.
Attachment, Contact & Reversibility
Compare anchors, straps, clips, adhesives, pressure, abrasion, moisture, hidden surfaces, removal tools, parts, and return evidence.
Application specificity: Look for exact model year, body, trim, seating, option exclusions, left- or right-hand drive, product revision, installation guide, and photographs showing the same interior—not only a vehicle name.
Dimensions and tolerance: Compare length, width, depth, thickness, loaded compression, strap range, clip reach, edge radius, hole or anchor position, seam allowance, production tolerance, and adjustment range.
Attachment compatibility: Verify factory posts, hooks, head-restraint rods, seat gaps, rails, trim lips, adhesives, fasteners, strap paths, tension direction, substrate cleanliness, and service access.
Dynamic clearance: Cycle seat and steering adjustments, pedals, buckles, doors, drawers, lids, armrests, vents, folding rows, hatch, cargo cover, child restraints, and emergency-exit routes.
Surface and removal effects: Inspect friction backing, grit capture, dye transfer, adhesive residue, pressure marks, abrasion, moisture trapping, UV lines, coating compatibility, tool needs, replacement clips, and restoration steps.
Avoid these traps
Fitment checks that stop too early
A product is not proven when it merely enters the cabin or lies flat; it must survive the full use cycle without interference.
Trusting the product photo: Marketing vehicles may use a different market, trim, seat, console, or prototype. Match explicit application data and measurements to the actual interior.
Measuring soft boundaries: Cushions, carpet, weatherstrip, and fabric compress inconsistently. Use documented fixed reference points and account for loaded thickness and manufacturing tolerance.
Testing only the preferred seat position: Another driver, rear passenger, child restraint, folded row, or service technician may move the system into conflict. Cycle the complete designed range.
Making permanent changes before acceptance: Drilling, trimming, removing labels, or bonding can eliminate return options before safety and function are proven. Trial reversibly whenever the product permits.
Decision guidance
Require evidence proportional to fitment consequence
The closer an accessory sits to restraints, controls, vision, or moving structures, the more exact and reversible the validation must be.
Accept catalog fitment as a starting filter if: It names the exact configuration and exclusions, provides measurements and instructions, and the product remains subject to a full vehicle trial.
Require vehicle-specific construction if: Contours, factory anchors, deployment seams, pedals, folding systems, glass borders, or small tolerances make universal adjustment unreliable.
Use a professional installer if: Trim removal, hidden wiring, seat systems, permanent fasteners, airbags, sensors, structural attachment, or uncertain restoration is involved.
Return the product if: Any movement binds, hardware disappears, warnings appear, retention loosens, pressure marks develop, doors or seats change behavior, visibility is reduced, or the seller cannot resolve an application mismatch.
Ownership & compatibility
Preserve the fitment record
Measurements, photographs, settings, product revision, and observed clearances make later inspection, replacement, resale, and troubleshooting much safer.
Create an installation record: Save order and revision, application claim, dimensions, packaging, instructions, serials, seat settings, photographs, contact points, exclusions, acceptance results, and support correspondence.
Inspect after settling: Recheck tension, compression, curling, sliding, abrasion, moisture, controls, seat travel, restraint access, and surface marks after the first week and after temperature changes.
Repeat checks after reconfiguration: Revalidate when drivers change, seats move or fold, child restraints are installed, cargo patterns change, trim is serviced, or the accessory is removed and reinstalled.
FAQ
Interior fitment checks FAQ
Answers about model matching, trim differences, measurements, seat travel, airbags, floor mats, cargo liners, permanent installation, return windows, and fitment records.
Is a year-make-model listing enough to confirm fit?
Which trim differences most often affect cabin accessories?
How should interior dimensions be measured?
Why must every seat position be tested?
How are airbag zones checked during fitment?
What should I verify when fitting a floor mat?
How can I test a cargo liner before keeping it?
When should permanent installation begin?
What belongs in a fitment record?
Bottom line
Exact fit is demonstrated through movement
Identify the configuration, measure from fixed points, protect exclusion zones, run the full use cycle, and preserve evidence before accepting the product.
Identify precisely: Record body, trim, seating, options, and existing equipment.
Measure dynamically: Cycle seats, restraints, controls, doors, and cargo systems.
Trial reversibly: Document retention, contact, function, and removal.
Reading Shortcuts
Move from interior fitment checks fundamentals to specifications, decision paths, or recurring questions.
Decision Reminders
Keep these interior fitment checks checks visible before committing.
- Identity: Record exact year, body, trim, seats, and options.
- Datum: Measure from fixed repeatable references.
- Movement: Cycle seats, doors, controls, and cargo systems.
- Exclusions: Mark restraints, airbags, pedals, vision, and exits.
- Trial: Install reversibly and repeat the use cycle.
- Record: Save photos, settings, product revision, and findings.
Glossary Snippets
Terms that clarify interior fitment checks decisions.
When to Use a Top 10 Review
Use rankings after the requirements and compatibility gates are settled.
- Application field: Filter by exact configuration.
- Measurement view: Compare dimensions and tolerances.
- Clearance audit: Rank full-range compatibility.
- Return evidence: Show acceptance results.
Already down to 2–3 options? A Comparison is usually the faster next step.
When to Use a Comparison
Use direct interior fitment checks comparisons when finalists differ in specifications that alter installation, use, or ownership.
- Same vehicle: Normalize trim and options.
- Same datums: Use identical reference points.
- Same movements: Cycle the entire operating range.
- Same tolerance: Include load and variation.
Still exploring? Start with a Top 10 to build a shortlist first.