
How to Choose Crutches for Caregiver Assistance
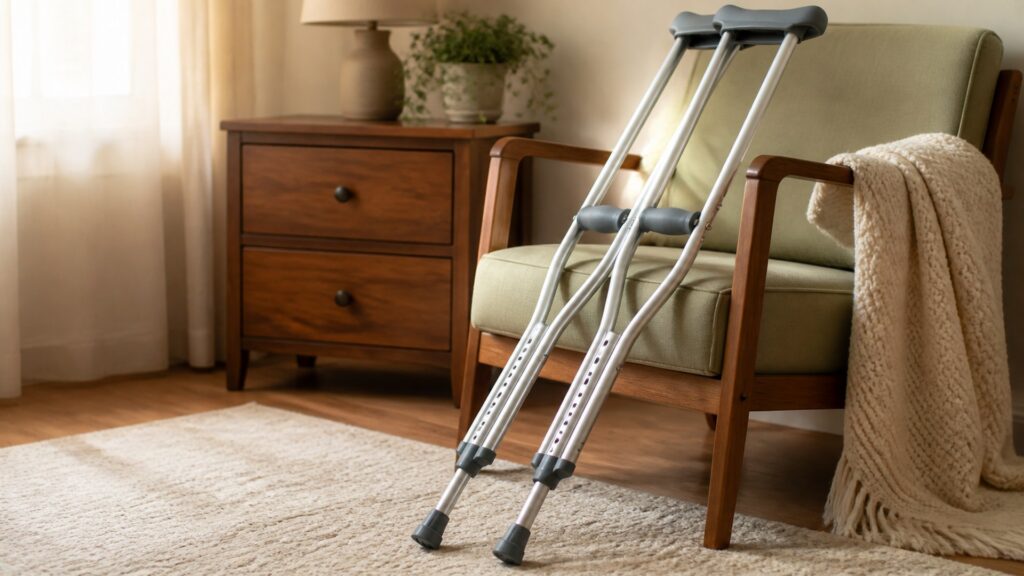
Caregiver-assisted crutch use changes the buying decision because the crutches may be adjusted, checked, stored, or handed over by someone other than the wearer. The best pair makes correct setup visible: height holes line up, handgrips are easy to confirm, and contact points can be inspected before transfers.
This guide focuses on assisted fitting, seated checks, transfer support, marking settings, clear adjustment hardware, and communication between wearer and helper. It is not medical instruction; weight-bearing limits, gait pattern, surgery recovery, and fall-risk concerns should be handled by qualified professionals.
Buying framework
Make the correct setup easy for another person to verify
Caregiver assistance puts a premium on clarity. A pair of crutches should help the helper confirm height, grip position, pad clearance, and tip condition without guesswork.
Choose visible adjustment points: Height holes, push buttons, collars, and handgrip settings should be easy to see while the user is seated. Hidden or fussy hardware increases the chance of uneven setup.
Plan the handoff moment: The crutches need to be reachable from a chair, bed, or car door without forcing the wearer to twist. Where the helper places them matters as much as the product shape.
Keep contact checks simple: A helper should be able to inspect underarm clearance, grip comfort, and rubber tips before a transfer. Complicated covers or loose accessories can slow that check.
Separate buying from training: Caregiver-friendly crutches can make setup easier, but they do not teach safe gait or weight-bearing rules. The helper needs clinical instructions when recovery or fall risk is involved.
Who this is for
Caregiver situations that change the crutch choice
Assisted crutch use is not one scenario. The best design depends on who adjusts the crutches, where transfers happen, and how much the wearer can check independently.
Bedside helper: This caregiver needs crutches that can be parked close, lifted easily, and checked while the wearer is seated. Wide pads and visible height marks reduce rushed setup errors.
Transfer-focused household: Chair arms, car doors, and bathroom thresholds make handoff timing important. The pair should stand or rest predictably so the helper can position it before movement starts.
Shared-care team: When multiple people help, marked settings and simple locks prevent each person from making a different adjustment. Consistency matters more than clever features.
Limited-reach wearer: The wearer may not be able to correct a twisted grip, loose collar, or misplaced crutch alone. Easy visual checks give both wearer and helper more confidence.
What to pay attention to
Features that make assisted setup more reliable
For caregiver assistance, specifications matter when they reduce setup errors. Focus on visibility, repeatability, and how easily the helper can check the pair before movement.
Assisted Adjustment Visibility
The helper should be able to confirm matching height, grip, and lock settings from a seated setup position.
Transfer-Ready Placement
Crutches need to be easy to park, retrieve, and hand over without blocking the wearer’s next movement.
Height-hole readability: Adjustment holes should line up clearly on both crutches. If the helper cannot confirm matching settings quickly, the pair is more likely to be used unevenly.
Handgrip adjustment access: Some crutches require tools or awkward positioning to move the grips. Caregiver-assisted use favors grips that can be inspected and tightened without disturbing the wearer.
Stable parking behavior: Crutches that slide down walls or tip from a chair create extra transfer risk. Rubber tips, frame shape, and storage clips can affect where the helper safely places them.
Pad and grip condition: A caregiver may notice worn pads, sticky grips, or loose covers before the wearer does. Replaceable contact parts make those checks easier to act on.
Weight and handling: The helper may carry, reposition, or load the crutches repeatedly. A lighter pair helps, but not if it sacrifices frame stiffness or clear locking.
Avoid these traps
Caregiver-assistance mistakes that create confusion
Assisted use fails when the product assumes one person will notice every detail. The buying goal is to reduce handoff errors before they reach the transfer moment.
Relying on memory for settings: Caregivers should not have to remember which hole or grip position was correct. Marked or easily visible settings reduce accidental changes.
Parking crutches out of reach: A pair that looks tidy across the room may be useless when the wearer needs to stand. Storage should support the next transfer, not just clean up the space.
Missing worn tips or loose collars: A helper may focus on the person and overlook the aid. Tip wear, collar tightness, and button engagement deserve a quick routine check.
Treating assistance as clinical training: A caregiver can help position and inspect crutches, but medical restrictions still need professional direction. Guessing at stairs or weight bearing is the wrong shortcut.
Decision guidance
Choose crutches that make helping simpler
Once the clinically appropriate style is known, favor features that make repeat setup consistent. The best choice is the one a helper can verify under ordinary household pressure.
If one caregiver helps most: Choose crutches with easy-to-read settings and contact points the helper can inspect quickly. A simple pair may outperform a more compact one if it reduces setup mistakes.
If several people rotate care: Prioritize repeatable markings, durable locks, and a storage spot everyone uses the same way. Shared care punishes vague adjustment systems.
If transfers are the hard part: Look at how the crutches stand, lean, and fit near chairs or beds. The handoff path should be stable before the wearer starts moving.
If recovery instructions are complex: Do not ask the product to solve unclear restrictions. Clinician guidance should define weight bearing, gait sequence, stair use, and when assistance is required.
Ownership & compatibility
Keep assisted-use crutches consistent over time
Caregiver-friendly ownership is mostly about repeatability. The same setup should be easy to recreate tomorrow, after cleaning, and after another helper handles the pair.
Mark the approved settings: Use a non-damaging visual cue if a clinician or fitter has confirmed the height. Clear marks reduce accidental changes during cleaning or storage.
Create a pre-transfer check: Before standing, confirm tips, buttons, collars, pads, and grip position. A short routine helps helpers catch problems without turning every transfer into a debate.
Store for the next use: Keep crutches where the wearer and helper can reach them without crossing a room. Good storage supports safety, not just neatness.
FAQ
Questions about caregiver-assisted crutch use
These answers focus on setup, handoff, checks, and safe boundaries for helpers.
What should a caregiver check first?
Should settings be marked?
Where should crutches be placed?
Can a caregiver adjust crutch height?
What makes crutches easier to help with?
How do helpers check rubber tips?
Are lighter crutches better for caregivers?
What if the wearer cannot check fit?
Can caregiver help replace gait training?
Bottom line
Choose crutches that make assistance repeatable
For caregiver assistance, the strongest choice is the pair that makes correct setup easy to see and repeat. Clear locks, stable placement, and simple checks matter more than travel compactness or decorative comfort extras.
Make settings visible: A helper should be able to confirm height, grip, and lock positions without guessing. Repeatability is the core buying priority.
Design the handoff: Think through chair, bed, bathroom, and car-door moments before choosing. The crutches need to be where help actually happens.
Keep clinical limits separate: Caregiver convenience does not replace professional instructions for weight bearing, stairs, recovery, or fall-risk situations.
Reading Shortcuts
Jump to the sections focused on caregiver checks.
Decision Reminders
Use these checks before ordering.
- Confirm fit: Match the marked height, grip position, pad spacing, and tip condition.
- Check locks: Buttons and collars should be visibly secure before movement.
- Think ahead: Plan the next moment of caregiver checks, not just the product photo.
- Watch tips: Rubber tip condition affects every step.
- Avoid guessing: Clinical restrictions should come from qualified guidance.
- Recheck often: Storage, travel, or helper changes can alter setup.
Glossary Snippets
Crutch terms used in this guide.
When to Use a Top 10 Review
Use a ranked list after the assisted setup requirements are clear.
- Shortlist styles: Compare underarm, forearm, platform, or folding designs.
- Filter by setting: Favor designs that simplify helper checks and transfer placement.
- Scan fit notes: Look for comments on locks, grips, pads, and tips.
- Check ownership: Tip replacement and storage details matter after purchase.
Already down to 2-3 options? A Comparison is usually the faster next step.
When to Use a Comparison
Use a direct comparison when two caregiver-friendly crutch designs seem close.
- Compare locks: See which design is easier to verify.
- Compare tips: Check traction, size, and replacement access.
- Compare storage: Decide which pair fits the real storage moment.
- Compare comfort: Look at grips, pads, and longer-use friction.
Still exploring? Start with a Top 10 to build a shortlist first.