
How to Choose Cycling Accessories for Storage Space
Choose bicycle storage accessories by how the bike is supported and how you will retrieve it. A floor stand suits easy roll-in access but occupies floor length; a wall hook can reclaim some space but introduces lifting, component compatibility and structural fixing requirements. A freestanding rack avoids some drilling, yet still needs a stable base and room around the bicycles.
Measure the loaded setup rather than the empty rack. Handlebars, pedals, bags and the movement needed to unhook a wheel can consume the space you hoped to save. This guide helps you select a compatible storage system, organize loose cycling gear and reject arrangements that make daily access awkward.
Buying framework
Plan the movement before choosing the rack
A storage product earns its place when the bicycle can be parked and removed reliably. Start with the room and the bike's permitted support points.
Mark the everyday access route: Trace the path from the door to the storage position with the bicycle. Include turns and the space needed to stand beside it, rather than measuring only the wall where a hook might fit.
Choose an acceptable lifting task: Try the movement a vertical hook or upper rack position would require with your actual bicycle. Heavy bikes or difficult grips may make a roll-in stand the better purchase despite its larger footprint.
Confirm the supporting surface: Identify the wall, floor or floor-to-ceiling structure required by the proposed system. Follow the rack's installation instructions and obtain competent installation advice when the structure or fixing method is uncertain.
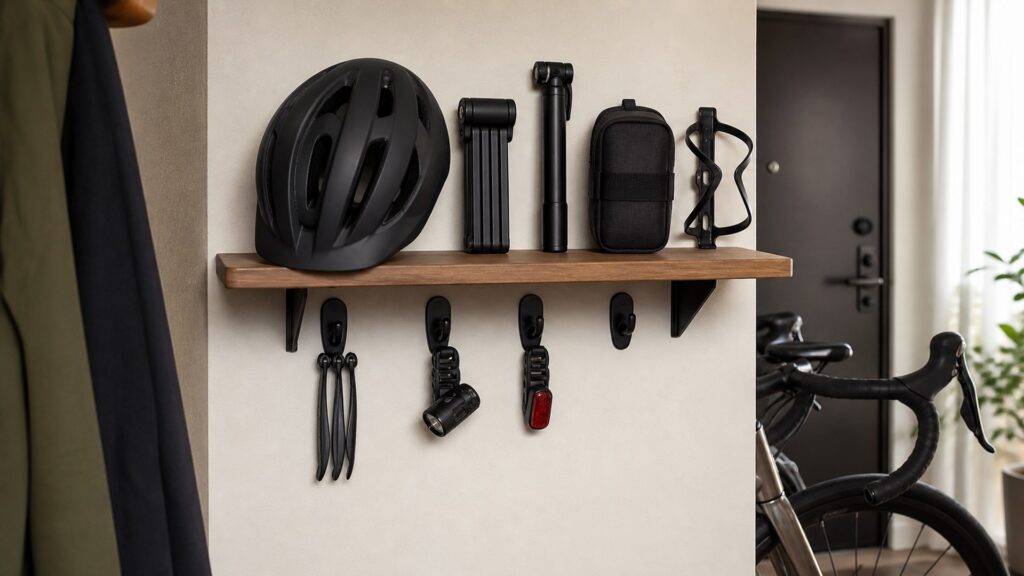
Give loose gear a separate home: Allocate hooks, shelves or containers for helmets, shoes, locks and removed bags. Keeping these items accessible prevents a narrow bike rack from becoming an overloaded general-purpose shelf.
Who this is for
Which storage constraint matters most?
The number of bicycles is only part of the problem. Access frequency, lifting and installation permission determine which families deserve consideration.
One heavy everyday bicycle: You need to leave quickly and prefer not to lift a loaded bike overhead. A compatible floor stand or other approved low-lift system is the useful starting point.
Narrow room with an available structural wall: Floor space is scarce, but a wall-mounted arrangement may be possible. Check bicycle projection and retrieval room before deciding whether a vertical hook or horizontal cradle makes better use of the wall.
Rental with limited installation permission: Permanent drilling may be restricted. Investigate freestanding options with an acceptable base footprint, while checking any anchoring or structural requirements instead of assuming every no-drill design is suitable.
Household with several different bicycles: Wheel sizes, frame shapes and use frequency vary. Arrange the most-used bike for independent access and verify each rack position against the bicycle assigned to it.
What to pay attention to
Six measurements and approvals that matter
A weight rating is necessary but does not answer every compatibility question. Check the exact rack and bicycle together before committing to an installation.
Supported load and contact points
Check where the bicycle's load goes: through its approved contact points, the rack and the specified supporting structure. A single weight number does not verify that chain.
Occupied space and retrieval
Compare the space used while parked with the space needed during removal. A compact static arrangement can still be impractical if the rider has nowhere to stand or turn.
Contact point and geometry: Identify whether the rack supports a tire, rim, frame tube or another component. Obtain bicycle and rack approval for that contact and orientation; padding does not make an unsuitable support point acceptable.
Stored mass and position limits: Include the bicycle and any attached items that remain during storage. Check per-position and total limits where relevant, as well as any restrictions on loading order or uneven occupancy.
Wheel-hook dimensions: Compare permitted tire width and wheel or rim dimensions with the actual wheel. A hook must engage as designed without forcing the tire, contacting an unapproved rim area or fouling nearby components.
Frame-cradle adjustment: Check whether the arms accommodate the frame's shape without pressing on cables, a rear shock or unsupported fittings. Manufacturer support guidance for suspension frames illustrates why a generic frame label is insufficient.
Loaded projection and spacing: Measure how far the stored handlebar, pedal and other parts extend into the room. Multiple rack slots do not guarantee that all bicycles fit side by side with their handlebars and accessories installed.
Fixing specification and retrieval space: Match the manufacturer's installation method to the supporting structure, then allow the full lifting or pivoting movement. Hardware supplied for one substrate should not be assumed correct for another.
Avoid these traps
Avoid racks that save space only on paper
Storage listings often show an empty product or a carefully chosen bicycle. Test these assumptions against your room and the equipment you own.
Using capacity as blanket approval: A rack rated above the bike's mass can still have the wrong hook or cradle geometry. Confirm component contact and exact dimensions separately from the load rating.
Measuring the folded empty rack: Folding arms help only when the bicycle is elsewhere. Judge occupied depth first, then decide whether the smaller empty profile provides a useful second benefit.
Assuming included screws suit every wall: Wood, masonry and other construction require appropriate installation methods. Follow the rack and fixing instructions for the actual substrate rather than choosing anchors from a generic online tip.
Packing every bicycle into the narrowest gap: An arrangement can fit statically while requiring several bikes to move before one can leave. Use realistic removal order and standing room when judging a multi-bike system's capacity.
Decision guidance
Choose the storage family from the hard constraint
Eliminate incompatible supports before comparing finish or price. Then select the system whose daily handling you can repeat comfortably.
Choose a floor stand when lifting is the obstacle: Look for a model approved for the wheel and bicycle mass, with adequate stability and component clearance. Accept its floor footprint in exchange for simpler access.
Choose a vertical hook when wall width is scarce: Proceed only when the wheel interface, bicycle orientation and structural installation are approved. Allow enough room to lift and engage the bike; a tight corridor may negate the apparent space saving.
Choose a horizontal cradle for suitable frame support: An adjustable cradle can organize a bicycle along a wall when the frame contact points are appropriate. Confirm arm spacing and projections rather than assuming all sloping or suspension frames will sit correctly.
Choose a freestanding rack when its base fits: Use this option when it meets installation constraints and provides a workable arrangement for the household. Check stability, any required anchoring and each occupied position before paying for nominal multi-bike capacity.
Ownership & compatibility
Maintain the support, not just the room
Storage hardware has a limited but important care routine. Follow the manufacturer's inspection and adjustment instructions for the chosen design.
Inspect supports and fixings: Check hooks, cradles, joints and structural attachments for movement or damage. Stop using a compromised support until it is corrected rather than masking the problem with an extra strap.
Clean contact pads: Remove grit from approved contact surfaces and replace damaged protective pads as directed. Keep rack and bicycle surfaces clean so routine loading does not repeatedly drag debris across them.
Reassess after bicycle changes: New tires, deeper rims, different bars or a heavier bicycle can invalidate the original fit. Repeat load and clearance checks after changes instead of assuming a rack remains compatible indefinitely.
FAQ
Bicycle-storage accessory questions
Resolve these installation and access details before ordering. Exact-model instructions take precedence over general storage examples.
Can I hang a bicycle with carbon wheels?
Will one floor stand fit road and mountain tires?
Does a freestanding rack need wall anchoring?
Can I use a wall rack on concrete?
Should I remove panniers before storing the bike?
Is ceiling storage the best space saver?
Can a rack double as a repair stand?
How should I store helmets and shoes beside the bike?
Will removing an e-bike battery make any rack suitable?
Bottom line
Buy a rack you can use every day
The right storage accessory supports the bicycle correctly and leaves a practical route out. Fit, structure and movement take priority over advertised capacity.
Approve the support interface: Verify contact location, dimensions and stored load for the exact bicycle and rack.
Measure occupied space: Include projecting parts and the movement needed to remove the bicycle, not merely the product footprint.
Keep access independent: Favor a layout that lets the regular rider retrieve a bike without rearranging the entire household's equipment.
Reading Shortcuts
Choose support, installation and access in that order.
Decision Reminders
Bring these checks to a storage-system comparison.
- 1: Confirm permitted wheel or frame contact.
- 2: Include attached gear in stored mass.
- 3: Verify the supporting structure.
- 4: Leave room for the retrieval movement.
Glossary Snippets
Terms used in rack fit and installation instructions.
When to Use a Top 10 Review
Find candidate racks within the storage family your room supports.
- Choose an interface first: Look for wheel or frame supports explicitly suited to your bicycle.
- Budget for installation: Include any specified hardware and qualified fitting needed for the room.
References: Feedback Sports storage compatibility FAQ; Feedback Sports frame-cradle compatibility guidance; Feedback Sports concrete-wall installation guidance. Checked October 6, 2026. This guide does not claim original product measurements. Use the Comparison to assess finalists.
When to Use a Comparison
Compare the occupied layout with the actual bicycles.
- Compare loaded layouts: Mark handlebars, pedals and the space occupied by the rider during removal.
- Check replacement contacts: Look for supported pads and hardware rather than treating cosmetic padding as permanent.
For a selection of candidates, visit the Top 10.