
How to Choose Cycling Accessories for Weather Changes
Choose weather accessories by what reaches you and your equipment: wheel spray, rain through a bag opening, fading daylight or controls that become awkward in gloves. For regular wet rides, properly fitted full fenders, usable lights and securely closed luggage usually deserve attention before small comfort extras. Occasional showers may justify a lighter removable kit.
The important comparison is the installed system, not the all-weather label. A long guard must clear the tire, a protected bag must close around its load, and a lamp must work in the mode you need. This guide turns those conditions into buying checks without promising that accessories make every forecast rideable.
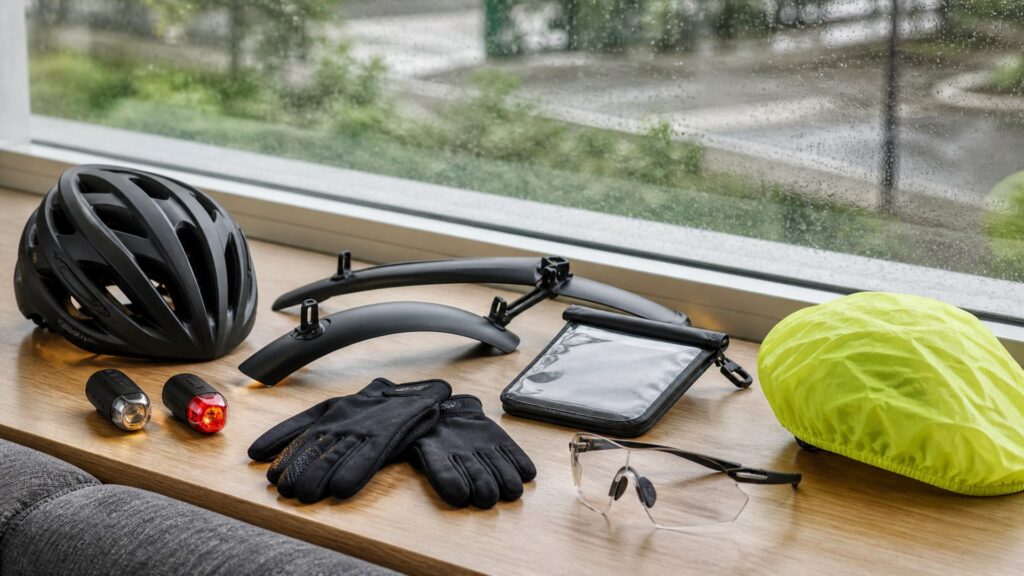
Buying framework
Separate the weather problems before shopping
Different accessories interrupt different routes for water and cold. Decide which recurring exposure you are trying to reduce before choosing a product family.
Map wheel spray separately from rain: A rear saddle shield, full rear guard and front fender protect different areas. Identify whether your priority is your back, feet, luggage or someone following before comparing coverage.
Treat daylight as a changing condition: Cloud, rain and delays can turn a familiar daytime outing into a lighting task. Select lamps for seeing or being seen as required by the route, with usable duration in that particular mode.
Pack a complete closure: Bag capacity is only useful when the opening can still be sealed as directed. Allow space for the required roll or fold rather than filling every nominal liter with clothing and work items.
Preserve hand control: Try light buttons, bag buckles and zippers with the gloves you expect to wear. Weather accessories should remain manageable without interfering with braking, steering or the bicycle's moving parts.
Who this is for
Match the kit to how weather interrupts your rides
Frequency changes how much permanent equipment makes sense. Choose for the conditions you repeatedly face, with a separate plan for days outside those limits.
Occasional shower exposure: You mostly choose fair-weather rides but sometimes get caught out. A removable splash guard and a protected place for vulnerable items may be enough, provided their limited coverage matches your expectations.
Wet-season regular: You ride damp roads often, even after rainfall stops. Full fenders and easy-to-clean luggage attachments can justify their fitting work because spray management is a repeated requirement.
Early starts and changing temperatures: Your ride begins in cool or low-light conditions and finishes warmer. Prioritize lamp operation, room to stow a removed layer and glove-compatible access rather than permanently carrying a bulky winter kit.
All-season work transport: Documents, devices or dry clothes must arrive usable. Evaluate the bag's complete closure and mounting arrangement, then plan how wet accessories will dry before the next trip.
What to pay attention to
Compare coverage in the fitted configuration
Ask to see the parts installed or obtain exact compatibility documentation. Marketing descriptions cannot establish wheel clearance or whether your packed bag seals.
Water paths and physical coverage
Trace where water travels before comparing product claims. Fender length, tire clearance and bag closures determine whether protection reaches the intended area.
Visibility and control when wet
Low light and wet hands change how accessories are used. Compare a lamp's practical mode and the controls you can operate in your riding gloves.
Guard length and endpoint: Look at where each fender and mudflap ends relative to the wheel's spray path. A small shield may protect part of the rider while leaving feet, luggage or following cyclists exposed.
Tire and hardware clearance: Check the approved tire size, fender width, mounting points and clearance instructions together. Stays and brackets must also clear brakes and other components; a guard that rubs is not an acceptable close fit.
Whole-bag protection: Inspect seams, zipper design or roll closure rather than judging only the fabric. ORTLIEB's FAQ illustrates why the specified closure and mounting system matter; apply the exact instructions for the bag you choose.
Lamp enclosure conditions: Read the stated ingress protection and operating restrictions, including port covers and charging. A weather claim for a closed lamp should not be assumed to cover an open charging connection.
Output mode and duration: Compare runtime at the beam or visibility setting you will actually use, with allowance for delays. Do not combine a manufacturer's longest runtime with its highest-output number if they describe different modes.
Wet-hand access and retention: Operate buckles, zipper pulls and light switches with your riding gloves. Check that wet covers or loose straps cannot migrate toward the wheel, and that luggage stays supported by an approved mount.
Avoid these traps
Reject these all-weather shortcuts
A weather purchase can disappoint even when the accessory itself is well made. These errors confuse a useful feature with protection the whole setup does not provide.
Reading water-resistant as unlimited protection: A fabric description says little about an overfilled opening or an exposed connector. Find the conditions attached to the complete product claim and keep the setup within them.
Buying fenders by wheel diameter alone: Two bicycles with the same wheel size can have different clearances, brakes and attachment points. Confirm the complete fit instead of assuming a diameter printed on a box settles compatibility.
Adding a cover without testing its restraint: A loose rain cover can shift or obscure a rear light. Fit it around the loaded bag and secure it exactly as directed before relying on it outside.
Expecting accessories to solve dangerous surfaces: Rain equipment does not establish suitability for ice, flooding or severe wind. Keep the purchase focused on the exposure it addresses, and retain the option to change the route or travel plan.
Decision guidance
Choose the amount of permanent equipment you need
The best configuration depends on how often the same weather problem occurs. Start with coverage and fit, then choose removable or fixed equipment.
For infrequent showers, choose a removable kit: Use a compatible splash guard and a sealed place for items that must stay dry. Accept the smaller coverage envelope rather than expecting a compact guard to behave like a full set.
For repeated wet-road riding, investigate full fenders: Choose a system approved for the bicycle and tire arrangement, with useful front and rear coverage. Include professional fitting when the stays or mounting details exceed your experience.
For rain-exposed luggage, prioritize the closure: Choose a bag whose protected compartment fits your actual load while fully closed. If an existing bag remains suitable, an appropriate internal protective container may address a smaller vulnerability without replacing the whole carrier.
For changing daylight, prioritize controllable lights: Select a beam and mode suited to the route, with a charging routine that covers the ride. Check that the bag, guard and brackets leave the lamps visible after everything is fitted.
Ownership & compatibility
Plan for the wet equipment that comes home
Seasonal usefulness depends on drying and inspection as well as initial protection. Follow each maker's instructions for cleaning, charging and reassembly.
Dry before storage and charging: Empty wet luggage and let equipment dry as instructed. Do not connect a damp charging port unless the manufacturer explicitly permits that condition, and close protective covers correctly afterward.
Inspect fender hardware: Look for loose fittings, damaged stays and accumulated debris around the tires. Correct rubbing or a displaced guard before riding; use the maker's fastening and safety-release instructions where provided.
Keep closures and lenses usable: Remove dirt from bag seals, buckles and lamp lenses using approved methods. Check replacement availability for small hooks, straps and port covers before seasonal wear turns them into a whole-product replacement.
FAQ
Weather-accessory questions
These details can change the final purchase. Use the exact product instructions for exposure limits and fitting requirements.
Can I fit fenders without mounting eyelets?
Will a rear mudflap keep my feet dry?
Does a rain cover make any backpack waterproof?
Can I charge a light while riding in rain?
Should I buy touch-screen gloves for navigation?
Will a wider fender always fit better?
Are reflective details enough for dark rides?
Should I remove wet bags immediately after riding?
Can one bag serve summer and winter loads?
Bottom line
Buy coverage you can actually maintain
Useful weather equipment has a clear job and a verified fit. Choose the smallest system that covers your repeated exposure without compromising bicycle control.
Start with the water path: Select front, rear and luggage protection according to where spray or rain creates the problem.
Verify the closed and loaded setup: Clearances, closures and light visibility must work with the bicycle packed for use.
Include the return-home routine: Choose equipment you can dry, recharge and inspect between the rides you intend to make.
Reading Shortcuts
Move from exposure to fitted equipment.
Decision Reminders
Check the complete wet-weather setup before a first outing.
- 1: Match fenders to tire and frame clearance.
- 2: Close the bag around the real load.
- 3: Try controls in riding gloves.
- 4: Read wet-port charging restrictions.
Glossary Snippets
Terms that explain coverage and protection claims.
When to Use a Top 10 Review
Find candidate guards, bags or lights after identifying the exposure.
- Choose the protection task: Decide whether spray, luggage ingress or low light is the priority.
- Keep fit documents handy: Use exact mounting and closure instructions to narrow the list.
References: ORTLIEB closure, mounting and care FAQ; Trek bicycle lighting guide. Checked October 6, 2026. This guide does not claim original product measurements. Use the Comparison to assess finalists.
When to Use a Comparison
Compare installed protection rather than weather-themed labels.
- Compare equivalent modes: Match light duration to useful output rather than separate headline maxima.
- Include drying and replacement: Check small seals, straps and brackets as well as initial coverage.
For a selection of candidates, visit the Top 10.