
How to Choose Cycling Gear for Mountain Bikers
Mountain-bike gear has to stay put while you climb, brake, corner, and move over the bicycle. A helmet or pad that shifts, a lens that obscures shaded trail detail, a shoe that mismatches the pedal, or a bouncing repair load can interfere precisely when control matters.
Before shopping, describe the trails you ride most: their surface, steepness, technical features, speed, weather, and distance from an easy exit. Use that profile to choose protection, vision, grip, hydration, and repair support. Fit the complete kit in riding positions, because products that feel comfortable while standing may behave differently on rough ground.
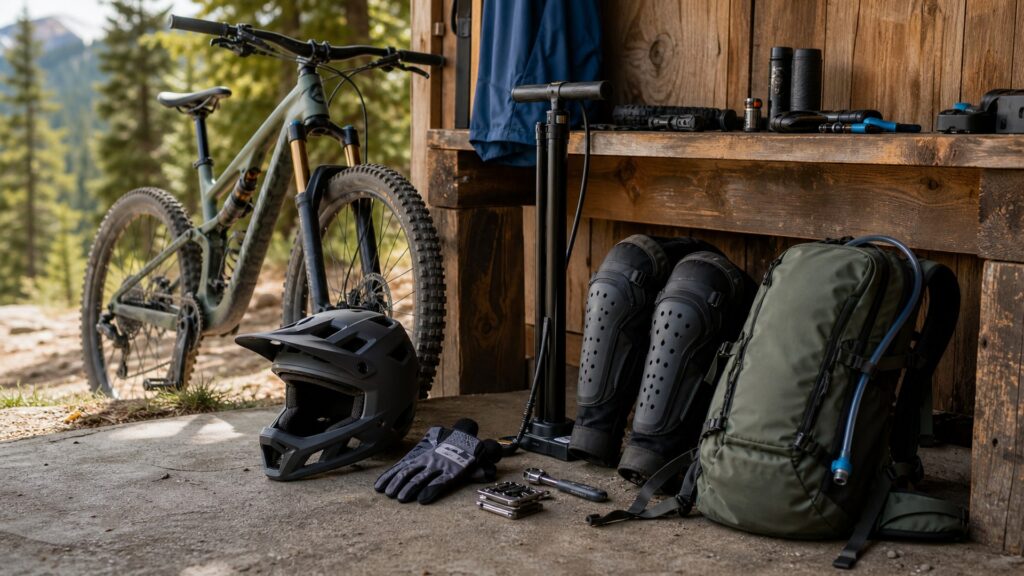
Buying framework
Write a trail profile before choosing gear
Protection and carrying needs come from a repeatable route, not the most dramatic riding image on the packaging. Define the normal ride and the plausible consequences first.
Describe the surface and features: List loose corners, roots, rocks, drops, jumps, sustained climbs, high-speed descents, and hike-a-bike sections that occur regularly. These details establish the balance among coverage, ventilation, walking traction, and freedom of movement.
Account for speed and repetition: One technical feature ridden slowly creates a different exposure from repeated park laps or a long, fast descent. Note where fatigue, heat, or many impacts from trail debris could change what remains comfortable.
Measure remoteness realistically: Record time to the trailhead, road crossings, mobile coverage, water access, and whether a mechanical problem means a short walk or a long carry. This sets sensible limits for hydration, tools, navigation, and emergency supplies.
Map movement around the bicycle: Check how far the rider bends at the knees and elbows, turns the head, lowers the torso, and moves behind the saddle. Gear must cover its intended area without catching the frame, clothing, or another protective piece.
Use a short shakedown ride: Wear and load the complete setup on familiar terrain before committing to a remote route or bike-park day. Adjust pad position, helmet retention, lens choice, pack straps, tool placement, and pedal settings while consequences remain low.
Who this is for
Start with the demands of your riding style
Mountain biking ranges from long pedaling loops to lift-served descents. The best starting kit protects the likely contact points without making the usual ride hotter, heavier, or harder to control.
Cross-country and all-day riders: Give priority to helmet ventilation and stability, clear eye coverage, efficient shoe-pedal interaction, easy hydration access, and compact repair storage. Clothing and packs should remain comfortable through extended pedaling and repeated temperature changes.
General trail riders: Choose versatile head, eye, hand, and knee protection that stays positioned through climbing and descending. Flat or clipless footwear, a bottle or small pack, and tire-specific repair supplies should suit the varied terrain ridden each week.
Enduro and technical riders: Steeper, rougher descents increase the value of greater helmet and pad coverage, secure goggles or glasses, durable gloves, and shoes with a dependable pedal connection. Check that added protection still works during transition stages and climbs.
Bike-park and downhill riders: Start with the park's equipment rules, then compare full-face helmets, goggles, knee and elbow protection, and any torso coverage for fit as a complete system. Ventilation, hearing, head movement, and lift comfort remain practical concerns.
Backcountry and remote riders: Distance from assistance raises the priority of water capacity, weather layers, navigation backup, first-aid choices, communication, and bicycle-specific repairs. Carrying must remain stable enough for technical riding and organized enough for fast access.
What to pay attention to
Inspect the details that affect trail control
A useful specification explains how a product fits, protects, moves, grips, vents, or attaches. Compare those outcomes in the complete riding setup instead of relying on a broad trail or enduro label.
Helmet labels, fit, and coverage: For U.S. bicycling, check for the CPSC compliance label and follow the model's fitting directions. The CPSC helmet guide identifies ASTM F1952 for downhill mountain-bike racing. Also compare head shape, retention, chin-bar design, ventilation, visor position, and goggle or glasses fit.
Pad position through joint movement: Measure where the maker directs, then test knee and elbow protection while pedaling, crouching, and extending. Check cup placement, side coverage, sleeve or strap security, pressure edges, ventilation, and overlap with shorts, pants, or jerseys.
Lens coverage and trail contrast: Compare glasses or goggles in sun, deep shade, dust, and humid conditions similar to your trails. Inspect peripheral view, frame obstruction, venting, fog behavior, lens retention, tint or clear options, and the gap around the helmet.
Glove, shoe, and pedal connection: Gloves should preserve lever reach and bar feel without palm bunching. Flat-pedal shoes need an outsole that engages the pedal pins; clipless shoes need the correct cleat pattern and usable release. Both need secure closures and practical walking traction.
Hydration location and load restraint: Compare frame bottles, hip packs, backpacks, and on-bike storage with the normal volume of water, food, layers, and tools. Check bottle retention, hose routing, back ventilation, strap movement, pocket access, and clearance from tires and controls.
Repair parts for the exact bike: Identify whether the tires use tubes or tubeless sealant, then match inflation, plugs or patches, and any spare tube to the wheels and valves. Confirm axle removal, multitool bits, chain-link compatibility, and storage that protects tools from dirt and loss.
Avoid these traps
Catch trail-gear problems before the first descent
The most expensive mistakes are often fit and compatibility errors hidden by a quick store try-on. Recreate pedaling, descending, walking, and loading before deciding an item belongs in the kit.
Shopping by discipline name alone: Two products marked trail or enduro can differ greatly in coverage, heat, articulation, and intended use. Read the activity claim and instructions, then judge the product against your route rather than the category printed on it.
Choosing a full-face helmet by chin-bar clearance: A chin bar is only one part of the fit. Check the helmet's marked standard and intended activity, head stability, cheek contact, field of view, goggle interaction, ventilation, hearing, and head movement as directed by the manufacturer.
Sizing pads with straight joints: Knee and elbow protection can migrate, gap, or pinch once joints bend repeatedly. Wear the intended base layers, pedal and crouch for several minutes, and check whether straps or grippers remain secure without restricting circulation.
Mismatching shoes and pedals: A casual rubber sole may slide on flat-pedal pins, while the wrong cleat pattern will not attach to a clipless pedal. Verify the interface, closure, release setup, toe room, and hike traction before heading onto technical terrain.
Packing a generic repair pouch: A tool kit cannot help if it lacks the correct axle tool, chain link, valve connection, or tire repair method. Practice removing the wheel and addressing the installed tire system, then pack only compatible parts and tools.
Decision guidance
Build the kit in order of consequence
Spend first where a poor choice can compromise vision, control, or the route home. Add coverage and carrying only after the core fit and bicycle interfaces work together.
Fit head and eye protection together: Choose helmet coverage for the regular terrain and intended activity, verify the applicable labels, and secure the retention system. Add glasses or goggles that preserve peripheral view, trail contrast, ventilation, and unrestricted head movement with that helmet.
Establish the two control connections: Fit full-finger gloves on the actual grips and levers, then match footwear to flat or clipless pedals. Confirm braking reach, palm comfort, pedal engagement or release, toe protection, and traction for walking rough sections.
Add impact coverage selectively: Use trail difficulty, speed, repeated features, park rules, and personal priorities to decide on knee, elbow, shin, or torso protection. Every pad should stay centered through pedaling and descending without creating a gap or snag.
Place water, layers, and tools: Estimate ride time, temperature, refill opportunities, and likely weather changes. Choose bottles or a pack that carries the resulting load securely, keeps essential pockets reachable, and leaves space for the rider to move around the bicycle.
Complete the trail-exit plan: Match flat-repair and chain supplies to the bike, add navigation and communication appropriate to the area, and decide what cannot reasonably be fixed trailside. A pickup, walkout, or emergency plan belongs beside the tool list.
Ownership & compatibility
Reset protective gear after every dirty ride
Dust, mud, sweat, and small impacts can hide wear or change fit. Unpacking promptly makes inspection easier and prevents the next ride from beginning with damp equipment or missing repair supplies.
Review helmets and pads after a fall: Follow each manufacturer's inspection and replacement instructions after an impact. Look for changes in shell or foam, torn fabric, stretched straps, damaged buckles, shifted pad cups, and any new difficulty holding the equipment in position.
Clean without shortening material life: Use the care directions for helmet pads, goggles, lenses, gloves, body protection, shoes, and riding clothing. Remove grit from vents, zippers, hook-and-loop closures, strap guides, and lens interfaces, then let every piece dry completely.
Empty hydration and tool storage: Drain and clean reservoirs, hoses, and bite valves according to their instructions. Open every pocket, dry the pack, inspect frame-contact areas, wipe tools, and check whether water, mud, or vibration damaged the carried contents.
Restock for the installed components: Replace used plugs, patches, tubes, inflation supplies, first-aid items, and food before storage. Recheck pump, axle, fastener, chain, and tire compatibility whenever the bicycle receives new wheels, drivetrain parts, or cockpit storage.
FAQ
Mountain-bike gear questions worth resolving
These answers separate fit, standards, control, and repair compatibility so riders can narrow products without assuming every off-road trip requires the same level of equipment.
What gear should a mountain biker prioritize first?
Should I buy a half-shell or full-face helmet?
What does ASTM F1952 mean on a helmet?
How should mountain-bike knee pads fit?
Are flat or clipless pedals better for trail riding?
Are goggles better than glasses for mountain biking?
Should I carry bottles, a hip pack, or a backpack?
What belongs in a mountain-bike repair kit?
When should mountain-bike protective gear be replaced?
Bottom line
Protect the rider without fighting the bicycle
Good mountain-bike gear stays aligned through movement, preserves sight and control, and supports a realistic exit from the trail. The right amount of equipment follows the terrain, not an image of what a mountain biker should wear.
Fit in riding positions: Check the helmet, eyewear, gloves, shoes, and pads while looking through turns, braking, pedaling, crouching, and stepping off the bike.
Ride with the real load: Fill bottles or reservoirs and pack the normal tools, food, and layers, then check bounce, access, ventilation, and tire or saddle clearance.
Practice the route-home solution: Use the inflation, tire, chain, and wheel-removal equipment at home, and carry communication or navigation that makes sense for the trail area.
Reading Shortcuts
Jump to trail profiling, riding-style kits, product details, or focused mountain-bike questions.
Decision Reminders
Check these details with the complete mountain-bike setup, not one product at a time.
- Helmet: Confirm the activity label, retention, sightline, eyewear fit, and head movement.
- Pads: Pedal and crouch long enough to expose sliding, gaps, pinching, or heat.
- Pedals: Match the mountain-bike shoe outsole or cleat, verify release, and test trail-walking traction.
- Repairs: Confirm tire system, valve, axle, fastener bits, chain link, and inflation method.
Glossary Snippets
Mountain-bike terms that clarify helmet, pad, pedal, and tire-repair comparisons.
When a Top 10 Helps
Consult mountain-bike gear rankings only after defining terrain, helmet use, body coverage, pedal type, carrying volume, and repair compatibility.
- Remove unsafe mismatches: Exclude options with the wrong helmet activity claim, unstable pad fit, blocked vision, incompatible cleats, poor bike clearance, or unusable repair parts.
- Compare on-trail compromises: Judge mountain-bike finalists on heat, pedaling movement, grip, lens behavior, pack stability, cleaning, replacement support, and the conditions on your repeatable trail.
A ranking cannot account for your head shape, joint movement, pedal hardware, frame space, installed tires, or the consequences of a particular trail.
When a Comparison Helps
Wear, mount, and load both mountain-bike gear finalists under the same riding-position and compatibility checks.
- Protection and control: Compare helmet stability, sightline, pad migration, glove feel, shoe-pedal connection, walking grip, and range of motion.
- Trail support: Compare water access, load movement, weather storage, tool fit, cleaning effort, drying time, replacement parts, and warranty service.
Prefer the product that performs its trail job without shifting, obscuring vision, weakening control, trapping necessary movement, or complicating the route home.