
How to Choose Exterior Accessories & Protection for Installation Planning
An exterior accessory is also an installation project. A part that appears simple in a product photo may require trim removal, vehicle-height access, exact templates, blind fasteners, wiring through sealed panels, or adhesive cure at a controlled temperature. Those requirements should influence the purchase before the box arrives.
Read the full instructions and inventory the vehicle interface, tools, workspace, and irreversible steps. Plan when to dry-fit, measure, drill, coat exposed metal, route wiring, apply final torque, test functions, and reinspect after use. A less invasive configuration can be the better product when the alternative depends on tools, calibration, or fabrication that the installer cannot perform reliably.
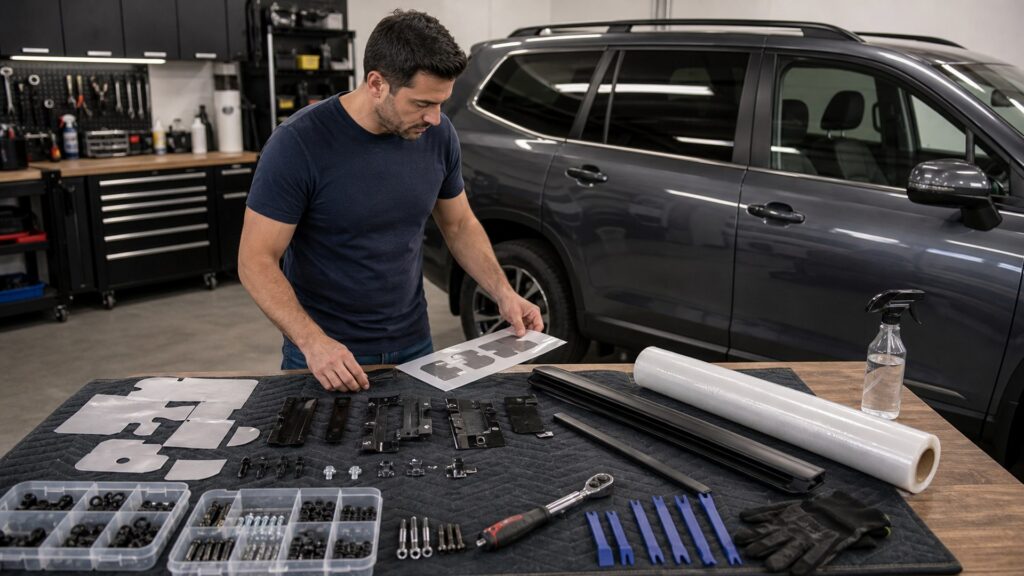
Buying framework
Buy the project, not just the part
Installation quality begins with planning before disassembly. Treat tools, access, sequence, and verification as product requirements.
Read beyond the parts list: Find every trim-removal, drilling, wiring, torque, sealant, and cure step. Missing specifications are a buying risk, especially when the work changes structure or weather sealing.
Stage the job: Divide inspection, dry fit, measurement, irreversible work, final assembly, wiring, sealing, and testing. Identify the last safe stopping point before the vehicle becomes unusable.
Control references: Use stable datums and confirm symmetry, gaps, and full panel travel before tightening or bonding. Cosmetic centerlines may not match structural mounting points.
Plan the finish: Reserve time for coating cut edges, curing adhesives, checking leaks, calibrating affected systems, and retightening after settling. Installation is incomplete when the part merely stays attached.
Who this is for
Match the job to the installer
DIY suitability depends on the hardest step, not the average step. One blind hole or sensor relocation can change the responsible choice.
Basic hand-tool installers: Choose true bolt-on or clamp-on systems using accessible factory points and clear torque instructions. Avoid jobs that require cutting, blind inserts, harness modification, or under-vehicle support beyond available equipment.
Experienced DIY fabricators: Templates, rivnuts, careful drilling, terminal crimping, and corrosion restoration may be manageable with correct tools. Still outsource calibration, structural welding, or work near protected systems when documentation requires it.
Driveway-only projects: Weather, temperature, slope, wind, lighting, and overnight security can interfere with adhesive cure or long disassembly. Favor jobs that can reach a safe stopping point within the available window.
Owners choosing professional installation: Select an installer familiar with the vehicle platform and accessory type, then confirm responsibility for calibration, leak testing, coating restoration, and warranty documentation. A generic labor quote may omit those tasks.
What to pay attention to
Installation details that predict a clean result
Good instructions expose the difficult steps instead of hiding them. Product design should make alignment, fastening, wiring, and inspection repeatable.
Access & Sequence
Disassembly, dry fitting, datums, templates, tool clearance, and safe stopping points.
Permanent Work & Verification
Drilling, bonding, wiring, sealing, torque, function tests, calibration, and recheck.
Template quality: A useful template keys to stable features, specifies print scale, and provides pilot-hole or center-punch guidance. Vague edge measurements compound error across wide accessories.
Tool callouts: Instructions should identify drill sizes, depth control, torque range, rivet or insert tools, trim tools, electrical crimpers, and lifting requirements before the job begins.
Adjustment range: Slots and shims should correct normal production variation while retaining adequate bearing and fastener access. Excess adjustment should not compensate for the wrong application.
Harness design: Prefer sealed connectors, appropriate fuse and relay provisions, abrasion protection, strain relief, and routing away from heat, sharp edges, hinges, and airbag or sensor wiring.
Final checks: Look for explicit alignment, fastener, leak, lighting, sensor, hatch, steering, and road-test checks. A reinspection interval shows that initial settling is expected and manageable.
Avoid these traps
Installation plans that fail halfway
The costly moment arrives after the irreversible step. Eliminate uncertainty while the accessory can still be returned.
Starting before inventory: A missing spacer, wrong bracket, damaged thread, or unavailable specialty tool can strand the vehicle. Lay out every part and verify application before removing trim.
Measuring from flexible trim: Bumper covers, seals, and plastic cladding can move or vary side to side. Use the stated body or structural datum and confirm with a dry fit.
Finishing one side first: Fully drilling, bonding, or tightening one side can lock in skew. Establish all reference points and loosely assemble both sides before committing to final position.
Treating the function test as optional: A bracket may block a hatch, wire may pull at full travel, or a sensor warning may appear only after reassembly. Test every affected function before declaring the project complete.
Decision guidance
Choose by the hardest required operation
The most demanding step sets the tool, skill, and workspace threshold. Select a different configuration when that threshold is unrealistic.
If the accessory uses factory bolts: Confirm access, thread engagement, bracket seating, and torque. This is a strong DIY candidate when no lifting, calibration, or hidden-system work is required.
If clamps or adhesive carry the duty: Verify substrate, surface preparation, temperature, cure time, edge protection, and periodic inspection. Keep bonded cosmetic parts separate from structural or recovery loads.
If drilling or cutting is required: Demand a precise template, depth control, backside inspection, deburring, reinforcement where specified, and corrosion restoration. Stop if hidden structure or systems cannot be identified confidently.
If wiring or sensors are involved: Choose a complete vehicle-specific harness and documented integration. Use a qualified installer when circuit design, module coding, radar or camera calibration, or safety-system proximity exceeds the available expertise.
Ownership & compatibility
Document the installation for future service
Photos, torque records, wire routes, and coating notes make later inspection and removal safer. The next technician should not have to rediscover hidden work.
Record hidden details: Photograph drilled holes, reinforcement, harness routes, grounds, fuses, and sealed pass-throughs before trim returns. Save templates, instructions, and unused hardware labels.
Perform the settling check: Inspect alignment, torque where specified, adhesive edges, wire strain, leaks, and witness marks after the stated interval and after rough-road or heavy-load use.
Preserve service access: Keep keys, fastener tools, connector locations, and removal steps with the vehicle record. Do not bury fuses, tow points, drain plugs, or maintenance fasteners behind undocumented accessories.
FAQ
Installation-planning questions
These answers help buyers judge the real project before choosing an accessory.
What should I look for in accessory instructions before buying?
Is a bolt-on accessory always easy to install?
Why is dry fitting important before drilling or bonding?
Can I install adhesive trim in cold weather?
How should drilled holes be protected from corrosion?
What makes an exterior wiring harness well designed?
Should all accessory bolts receive the same torque?
When does an installation require sensor calibration?
What records should I keep after installation?
Bottom line
Plan past the moment the part goes on
A clean installation is aligned, sealed, testable, and documented. Choosing a manageable process is part of choosing the right accessory.
Find the hardest step: Let drilling, bonding, wiring, lifting, or calibration set the real skill and workspace requirement.
Stay reversible until verified: Inventory, inspect, dry-fit, measure, and test clearance before making holes or exposing adhesive.
Finish the system: Restore coatings, seal correctly, test every affected function, document hidden work, and complete the settling inspection.
Reading Shortcuts
Move from instruction review to a verified installation plan.
Decision Reminders
The hardest step sets the project level.
- Inventory: Verify every part before disassembly.
- Dry fit: Check application and panel travel.
- Datum: Measure from stable vehicle features.
- Permanent work: Plan drilling, cutting, and bonding.
- Systems: Protect wiring, sensors, and seals.
- Verification: Test, document, and reinspect.
Glossary Snippets
Terms used in careful installation instructions.
When to Use a Top 10 Review
Use a roundup after defining the installation method you can support.
- Method known: Bolt, clamp, bond, or drill.
- Workspace ready: Access and cure conditions work.
- Tools ready: Special requirements are covered.
- Need options: Several manageable designs remain.
Have finalists already? Open a Comparison for a closer tradeoff.
When to Use a Comparison
Compare finalists by installation risk and verification burden.
- Access: Disassembly differs.
- Irreversibility: Permanent steps differ.
- Tools: Special equipment differs.
- Finish: Testing and documentation differ.
Need a broader field? Use a Top 10 to form a shortlist.