
How to Choose Floor Protection for Cargo and Storage Planning
The cargo floor is rarely a single fixed rectangle. A hatch or SUV may have two deck heights, a spare-tire well, battery or tool access, split-fold seats, sliding rails, grocery hooks, tie-down rings, and subfloor bins. One-piece coverage can protect the carpet while making the vehicle's storage system frustrating or unsafe to use.
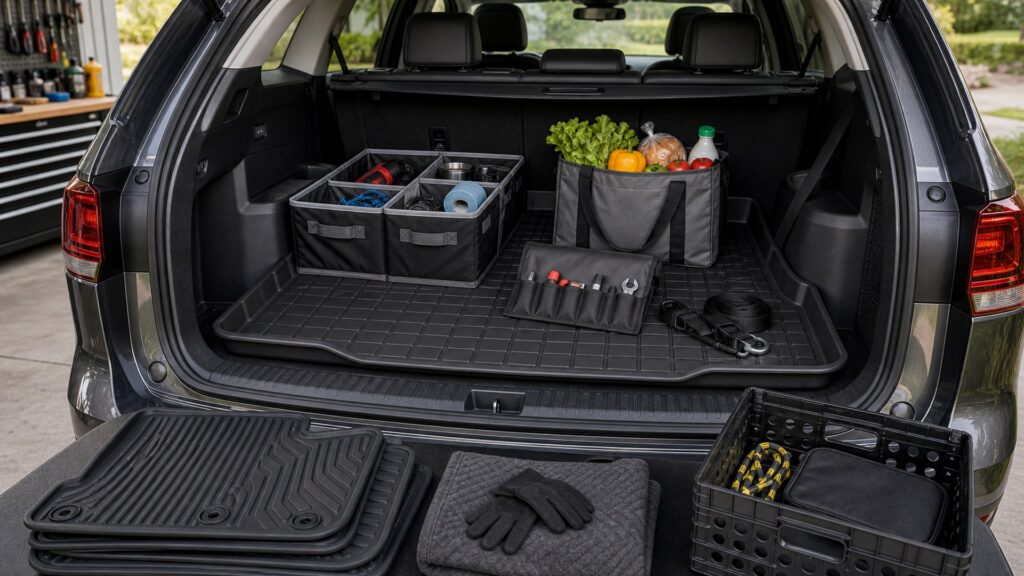
Map every load configuration before choosing a liner. Photograph the deck empty, seats folded in each split, panels raised, tie-downs deployed, and emergency equipment exposed. Then test common bins, luggage, tools, pet carriers, and wet cargo for sliding and edge leakage. Protection should articulate or separate cleanly, not bridge a moving joint or bury a required handle.
Buying framework
Map the changing cargo floor
List every floor state, access point, and load restraint before adding coverage.
Inventory floor configurations: Record seat splits, recline and fold paths, deck heights, reversible panels, sliding rails, subfloor bins, spare or inflator access, battery covers, and hatch opening.
Map restraint and utility points: Locate tie-down rings, cargo hooks, rails, outlets, seat latches, emergency releases, jack tools, third-row handles, and drainage or service openings.
Build a representative load set: Include the bins, luggage, stroller, work cases, groceries, pet carrier, sporting gear, or wet equipment commonly transported.
Test transitions under time pressure: Move between passenger and cargo modes, reach emergency tools, restrain loads, remove spills, and restore the deck without folding or abandoning loose protection.
Who this is for
Match construction to cargo-floor planning routines
Groceries, luggage, tools, outdoor gear, pets, and folded-seat hauling impose different friction and containment needs.
Grocery and everyday cargo owner: Moderate grip, a hatch-edge lip, easy crumb cleanup, and unobstructed subfloor access may provide the most useful balance.
Outdoor and pet user: Water containment, hair release, claw durability, wet-equipment boundaries, carrier stability, and seatback extensions deserve closer evaluation.
Work-gear transporter: Toolbox feet, sharp debris, oils, tie-down use, abrasion, chemical resistance, and individual replacement sections drive the specification.
Frequent passenger-cargo converter: Articulated or modular panels should follow each split seat and deck height without bunching, detaching, or blocking the conversion mechanism.
What to pay attention to
Specifications that change cargo-floor planning performance
Panel articulation, cutouts, surface grip, lip placement, and manageable removal define cargo usefulness.
Map the changing cargo floor
Document raised and lowered floors, split-fold seats, movable panels, tie-downs, spare access, battery covers, subfloor bins, and hatch-sill boundaries.
Maintenance is part of performance
Evaluate load grip, organizer stability, edge containment, folded transitions, access time, removal path, and cleanup with realistic cargo aboard.
Configuration coverage: Compare the protected area with seats upright, partially folded, fully folded, removed, or deployed from the floor, including gaps created during movement.
Access architecture: Cutouts and hinged sections should expose tie-downs, handles, bins, spare equipment, batteries, tools, outlets, and latches without removing unrelated cargo.
Load-surface friction: Test hard cases, plastic totes, luggage wheels, pet carriers, and grocery bins during acceleration, braking, and turns; use restraints regardless of surface grip.
Articulation design: Flexible seams, segmented pieces, and seatback panels must bend at the correct axis without lifting edges, pinching material, or entering latch mechanisms.
Spill boundaries: Hatch-side, seat-side, wheel-house, and panel seams determine whether liquid remains on the removable surface or drains into inaccessible wells.
Loaded maintenance: Consider which cargo must be unloaded, whether the liner clears the hatch level, how much a contaminated piece flexes, and where it can be washed and dried.
Avoid these traps
Mistakes that undermine cargo-floor planning
Coverage becomes counterproductive when it hides emergency equipment or defeats tie-downs and movable decks.
Covering tie-downs because the liner feels grippy: Surface friction does not replace appropriate load restraint; keep rated attachment points accessible and follow the vehicle's cargo guidance.
Trapping the spare or inflator beneath a full liner: Emergency access should be obvious and quick with realistic luggage aboard; practice the sequence before travel.
Letting a one-piece mat bridge folding seats: The unsupported span can buckle, pull forward, obstruct latches, or dump debris when seats move; use compatible articulated sections.
Ignoring the hatch threshold during removal: A deep lip or stiff panel may catch trim and tip its contents; rehearse an unloaded and contaminated exit path.
Decision guidance
Choose the right protection pattern
Select modularity according to how often the cargo area changes configuration.
Choose one-piece coverage for a fixed deck: A stable, correctly shaped liner works when seats and panels rarely move and all required access points remain usable.
Choose segmented panels for changing layouts: Independent cargo, seatback, or split-fold sections support frequent passenger conversion and isolate replacement or cleaning.
Prioritize restraint access for heavy loads: Select openings and geometry that preserve tie-down use, then secure cargo according to vehicle limits rather than relying on texture.
Add secondary containment for leak-prone cargo: Use a removable bin or tray for coolers, plants, chemicals, or wet gear when a broad cargo liner cannot safely contain the credible spill.
Ownership & compatibility
Keep the system clean and correctly positioned
Clean beneath organizers and inspect hinges, seams, wells, and hatch edges after spills.
Inspect beneath storage systems: Remove bins and organizers periodically to find grit, moisture, stains, abrasion, compressed edges, or hardware hidden from routine view.
Exercise emergency access: With a normal load aboard, practice reaching spare equipment, batteries, tools, release handles, and tie-downs without damaging or misplacing protection.
Review the load plan after changes: New pets, strollers, mobility equipment, tools, organizers, folded-seat use, or panel repairs can alter friction, access, and coverage requirements.
FAQ
Questions about cargo-floor planning floor protection
Vehicle load-restraint and equipment-access guidance remains controlling.
Should a cargo liner cover the folded seatbacks?
Can cargo rely on a non-slip liner instead of tie-downs?
How is spare-tire access preserved?
Are tall cargo-liner edges always useful?
What works beneath a pet carrier?
Can a liner cover a hybrid battery panel?
Why does cargo slide on some liners?
How do split-fold seats affect liner choice?
Should wet gear use a separate tray?
Bottom line
Make safe fit the permanent baseline
Good cargo protection follows the deck's transformations while keeping loads and access predictable.
Map the transforming deck: Record seats, panels, wells, bins, tools, batteries, latches, outlets, rails, and hatch boundaries in every used state.
Protect access and restraint: Keep tie-downs and emergency equipment usable while testing realistic loads for sliding, articulation, and leakage.
Choose serviceable modules: Use sections that can move, lift, clean, dry, inspect, and return without disrupting unrelated cargo-floor functions.
Reading Shortcuts
Move through the cargo-floor stability and access decision in order.
Decision Reminders
Cargo coverage must preserve restraint and emergency access.
- Inventory floor configurations: Verify and record this requirement.
- Map restraint and utility points: Verify and record this requirement.
- Build a representative load set: Verify and record this requirement.
- Inspect beneath storage systems: Verify and record this requirement.
- Exercise emergency access: Verify and record this requirement.
- Review the load plan after changes: Verify and record this requirement.
Glossary Snippets
Terms used in this floor protection plan.
When to Use a Top 10 Review
Use rankings only after the requirements are fixed.
- Map the transforming deck: Use this as a shortlist filter.
- Protect access and restraint: Use this as a shortlist filter.
- Choose serviceable modules: Use this as a shortlist filter.
- Exclude: Use this as a shortlist filter.
Already down to 2–3 options? A Comparison is usually the faster next step.
When to Use a Comparison
Compare finalists through the retainer, edge, pedal, seat-track, door, removal, spill, cleaning, and dry-floor check; make cargo deck an explicit recorded result.
- Inventory floor configurations: Check both candidates against this requirement.
- Map restraint and utility points: Record the result for each shortlisted option.
- Build a representative load set: Use the same operating conditions for both tests.
- Test transitions under time pressure: Keep the evidence with the final decision.
Still exploring? Start with a Top 10 to build a shortlist first.