
How to Choose Floor Protection for Seat, Dash, and Console Layouts
The footwell is bounded by safety and service hardware. Seat rails and wiring move above it; controls and knee-airbag panels occupy the lower dash; console ducts and trim run beside it. A mat that matches the carpet outline can still press on a connector, block airflow, cover a release, or lift when a seat reaches an extreme position.
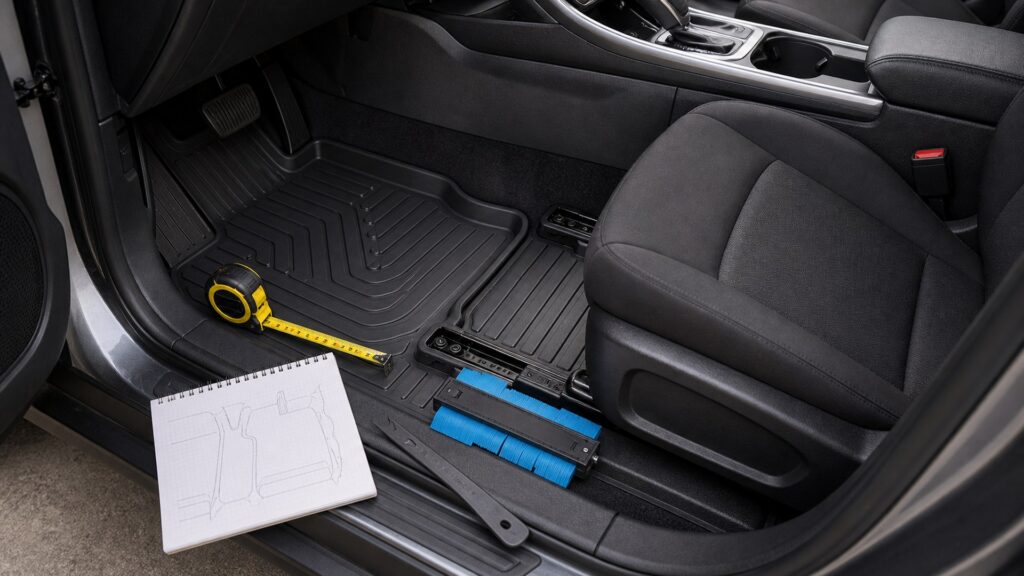
Create an interface map before ordering. Remove every existing mat, identify factory anchors and marked airbag panels, photograph wiring and vents, and trace the complete movement of pedals, parking brake, seats, console lids, and folding rows. Install only the documented application, then repeat those movements and confirm every edge remains stable, visible, and removable without disturbing adjacent equipment.
Buying framework
Set the layout-aware floor protection baseline before buying
Convert the desired layout-aware floor protection improvement into physical, functional, and maintenance requirements.
Map the driver control bay: Locate accelerator, brake, clutch, parking brake, dead pedal, hood or fuel release, steering base, lower trim, anchors, and heel path.
Map each seat base: Record rail travel, height mechanisms, electrical looms, occupancy connectors, ducts, mounting feet, removable-seat locks, and under-seat storage.
Trace console boundaries: Check side panels, rear HVAC outlets, floor ducts, cupholder bases, sliding consoles, power leads, storage doors, and trim-removal seams.
Mark airbag and service keep-outs: Preserve every SRS label, knee panel, fuse door, filter access, diagnostic connector, fastener, and technician removal path.
Who this is for
Match the solution to the layout-aware floor protection user
Different bodies, occupants, routes, climates, and cabin layouts justify different layout-aware floor protection priorities.
Low fixed-seat sedan: A conventional exact-fit set may work when rails, console, and lower-dash boundaries remain simple and fully visible.
Power-seat or memory-seat owner: Test all stored positions, height and tilt settings, rear foot space, wiring slack, and vent exposure with protection installed.
Van or reconfigurable-cabin user: Segmented coverage must adapt to sliding consoles, removable rows, exposed locks, seat stowage, and changing walk-through paths.
Vehicle with lower-dash accessories: Added controllers, mobility equipment, lighting, chargers, or wiring require a fresh keep-out map and professional safety review.
What to pay attention to
Evidence that predicts layout-aware floor protection performance
Specifications matter only when translated into what changes inside the exact vehicle during layout-aware floor protection use.
Static Interfaces
Map firewall, lower dash, console, sill, dead pedal, releases, power outlets, trim fasteners, and airbag-marked panels.
Moving Interfaces
Cycle seats, tracks, pedals, parking brake, storage lids, vents, folding rows, and removable components while watching every liner boundary.
Seat-rail margin: Edges should not enter track slots, collect near rollers, lift under seat feet, abrade wiring, or obstruct manual release bars.
Lower-dash clearance: Maintain space around knee airbags, steering and pedal mechanisms, diagnostic ports, fuses, trim fasteners, and hood or trunk releases.
Console conformity: Side edges must settle without stored tension, blocked rear vents, trapped cables, pressured panels, or interference with sliding console sections.
Airflow preservation: Under-seat and console ducts need open outlets in every seat position; never use a liner edge to redirect or seal a designed vent.
Electrical visibility: Occupant sensors, seat motors, heaters, and accessory wiring should remain secured, inspectable, dry, and outside abrasion or pinch paths.
Removal trajectory: The piece should release and exit without catching switches, wiring, tracks, trim, or lower-dash equipment and without dumping contents onto them.
Avoid these traps
Mistakes that compromise layout-aware floor protection
Convenience becomes a defect when an add-on alters controls, restraints, airbags, visibility, airflow, or secure storage.
Tucking a high edge behind lower-dash trim: Stored tension can distort the liner or panel and may occupy an airbag or service path; use the intended boundary only.
Testing seats in one favorite position: Passenger changes, valet use, cleaning, and memory recall move hardware; sweep every supported position after installation.
Routing charger cables beneath floor protection: Hidden cables can be crushed, heated, abraded, or pulled toward pedals; use vehicle-approved routing outside control zones.
Covering a console vent for cleaner appearance: Blocked airflow can reduce rear comfort or equipment cooling; select geometry that preserves the designed outlet.
Decision guidance
Choose a defensible layout-aware floor protection path
Select the least intrusive option that proves the required layout-aware floor protection outcome under representative conditions.
Use a standard shaped set for simple layouts: Proceed when exact application data and a movement trial show clean separation from all controls and hardware.
Use segmented pieces for movable cabins: Independent zones suit sliding seats and consoles when each segment stays retained and cannot migrate into another area.
Request manufacturer clarification for ambiguous edges: Send photos and configuration details when a liner appears to meet an airbag panel, wiring cover, duct, or release.
Exclude the driver piece when any keep-out is uncertain: Passenger coverage can be solved separately; never improvise around pedals, parking brake, lower-dash restraints, or seat mechanisms.
Ownership & compatibility
Maintain the layout-aware floor protection result
Inspection, cleaning, adjustment, records, and replacement keep the original layout-aware floor protection decision valid.
Inspect interface edges monthly: Look for abrasion, pinched wires, blocked ducts, track debris, panel pressure, edge curl, anchor wear, and changes after seat movement.
Recheck after interior service: Seat, console, dashboard, HVAC, stereo, wiring, mobility, or trim work can alter clearances and invalidate the original fit trial.
Keep a layout record: Store installation photographs, part application, anchor details, marked keep-outs, seat positions tested, accessory routes, and observed limitations.
FAQ
Questions to resolve for layout-aware floor protection
Use exact vehicle documentation and product instructions to settle these points.
Can a floor liner touch the center console?
How close can a mat sit to a seat rail?
Can a liner cover under-seat wiring?
What is a knee-airbag keep-out zone?
Should console vents remain visible?
Can footwell lights sit beneath a liner edge?
Do memory seats need extra testing?
Where should phone-charging cables run?
What if a passenger mat fits but the driver mat does not?
Bottom line
Preserve safety while improving layout-aware floor protection
A successful upgrade remains compatible, removable, understandable, and safe throughout ownership.
Draw the interface map: Locate controls, rails, wiring, vents, console boundaries, releases, airbag panels, and service openings.
Cycle every mechanism: Install the exact application and operate seats, pedals, parking brake, consoles, doors, and folding sections fully.
Keep boundaries inspectable: Reject pressure, blockage, pinching, hidden wiring, unstable edges, or a removal path that disturbs safety equipment.
Reading Shortcuts
Move through the footwell interface mapping decision in order.
Decision Reminders
The floor ends where a moving or safety system begins.
- Map the driver control bay: Verify and record this requirement.
- Map each seat base: Verify and record this requirement.
- Trace console boundaries: Verify and record this requirement.
- Inspect interface edges monthly: Verify and record this requirement.
- Recheck after interior service: Verify and record this requirement.
- Keep a layout record: Verify and record this requirement.
Glossary Snippets
Terms used in this floor protection plan.
When to Use a Top 10 Review
Use rankings only after the requirements are fixed.
- Draw the interface map: Use this as a shortlist filter.
- Cycle every mechanism: Use this as a shortlist filter.
- Keep boundaries inspectable: Use this as a shortlist filter.
- Exclude: Use this as a shortlist filter.
Already down to 2–3 options? A Comparison is usually the faster next step.
When to Use a Comparison
Compare finalists through the retainer, pedal, edge, seat, console, vent, removal, cleaning, and dry-floor trial; make seat rail an explicit recorded result.
- Map the driver control bay: Check both candidates against this requirement.
- Map each seat base: Record the result for each shortlisted option.
- Trace console boundaries: Use the same operating conditions for both tests.
- Mark airbag and service keep-outs: Keep the evidence with the final decision.
Still exploring? Start with a Top 10 to build a shortlist first.