
How to Choose Indoor Bike Trainers for Storage Space
A trainer that folds is not necessarily easy to store. Its packed height, projecting cassette, weight and permitted resting position can matter as much as the span between its legs. A cupboard measurement also says little about whether you can carry the unit there or assemble the bicycle safely in the riding room.
Start by separating the stored trainer from the complete indoor station. The bike, removed wheel, adapters, power supply, mat and fan each need a place, and some remain full size after the trainer closes. This guide helps you compare approved packing and handling with the repeated work of deployment, so saving floor space does not create an impractical setup.
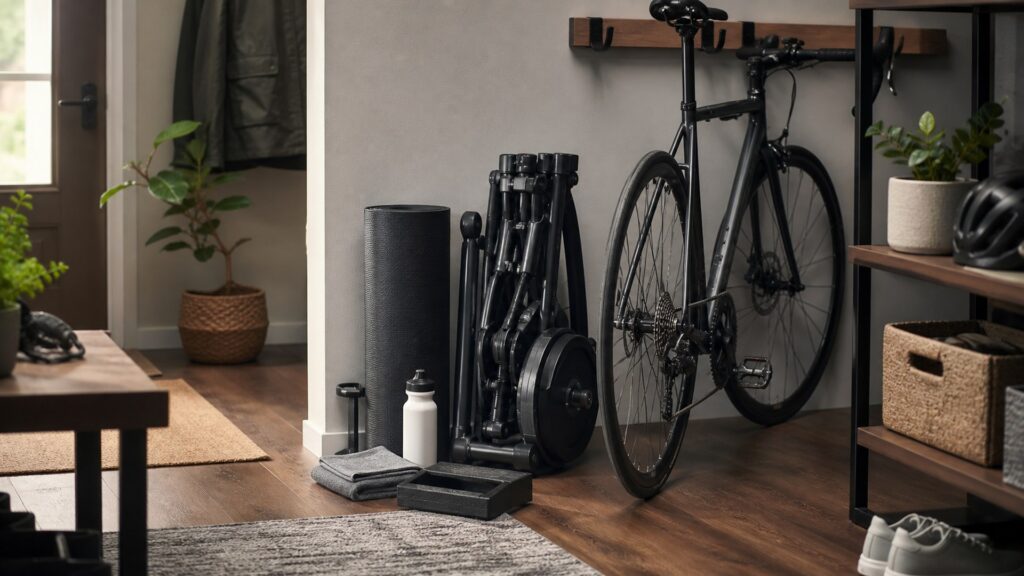
Buying framework
Measure the complete storage job
Treat storage as a sequence from riding to packing and back. The smallest quoted dimension only describes one part of that job.
List everything that moves off the riding floor: Include the bicycle, any removed rear wheel, supply, adapters and supporting accessories. A direct-drive trainer may fold compactly while leaving a separate wheel and full bicycle to accommodate; count the system before comparing units.
Measure the permitted packed shape: Use width, depth and height in the configuration the maker allows. Include fixed projections rather than imagining a rectangular box around folded legs; a cassette or handle can determine whether the actual location works.
Follow the route to the storage location: Look at doorways, stairs and turns while considering the unit’s weight and designated carrying points. A low shelf fit is not useful if moving the trainer there is awkward or exceeds what you can manage.
Keep the stored and riding positions separate: Check full deployment with legs opened and locked, bike attached and room for access. Do not partly fold stabilizers to preserve cupboard-like dimensions during use; the riding arrangement follows the operating instructions.
Compare how often packing happens: Daily unpacking magnifies small mechanical steps and loose-part handling. A permanent station may solve that burden where there is room, but its full deployed footprint is the storage commitment rather than its folded size.
Who this is for
Which space constraint actually limits the purchase?
Different locations create different vetoes. Identify the constraint that cannot be changed before choosing a folding design.
A shallow floor cupboard: Prioritize the entire approved stored outline, including height and drivetrain projections. Measure the usable opening and interior separately; nominal cupboard dimensions may conceal hinges or shelves that block the packed trainer.
Storage reached by stairs: Carrying weight and the maker’s grip method become leading criteria. Compare the move as well as the destination; a small direct-drive unit can still be demanding to lift, and a generic architecture label does not establish manageable weight.
A bike parked in another area: Plan the bike’s route and the location of any detached wheel alongside the trainer. Separate storage may work well, but it adds retrieval and installation rather than letting the folded trainer stand for the whole station.
A room needed immediately after riding: Favor an approved packing routine with few easily lost pieces, provided the bike and accessories can also clear the room. Check the shutdown and handling instructions before expecting to pack immediately after every session.
Frequent use with a dedicated corner: A deployed station can reduce folding and carrying work. Confirm that the full bicycle and trainer leave usable access and required clearance; a dedicated corner must meet operating conditions, not merely hold the packed unit.
What to pay attention to
Read packed shape and deployment together
A useful specification explains both where the trainer rests and how it returns to use. Compare documented configurations rather than improvised positions.
Packed shape and handling
Use complete dimensions, approved resting position and real carrying weight. The path into storage is part of the fit.
Whole-station deployment
Account for loose parts and restore the full operating configuration. Stored compactness and riding clearance answer different questions.
Folded dimensions and projections: Check the maker’s drawing or instructions for the complete packed unit. Legs, handles and any fitted cassette may set different outer limits; do not remove fixed components merely because a listing’s width seems inconvenient.
Weight and approved carrying point: Use the actual model weight and designated grip or handle. Consider where the load sits when lifted and whether your route is manageable; the resistance architecture alone does not rank all trainers from easiest to hardest to carry.
Permitted storage orientation: Look for an explicit storage position, especially if you plan vertical placement. Never assume resting on a cassette, flywheel cover or folded edge is approved because it makes the unit narrower or resembles a product photograph.
Leg locks and setup adjustments: Read the opening, locking and height-adjustment sequence for the exact model. Some packing routines change an adjustment that must be restored for riding; the convenience comparison should include that reset rather than only the folding motion.
Space for associated equipment: Measure the bike and removed wheel separately, then identify dry locations for cables and small adapters. The mat and fan also retain their own storage shapes; do not hide their volume inside the trainer’s footprint claim.
Avoid these traps
Avoid compactness that depends on unsafe shortcuts
Packing should use the design’s documented method. Apparent space savings can conceal handling or deployment problems.
Treating folded width as total volume: Height and depth may remain substantial after the legs close. Compare all three dimensions and the opening into the storage location rather than buying from a single narrow-span figure.
Balancing a trainer on an unapproved part: A projecting drivetrain component or housing is not automatically a support foot. Use only permitted orientations; an unstable position or unintended component load is a poor solution to a cupboard that does not fit.
Leaving riding supports partly closed: Folding convenience does not authorize a narrow deployed stance. Open and secure supports as instructed before mounting or riding; if the approved station occupies too much room, the location or equipment choice needs to change.
Forgetting the pieces created by changeover: A rear wheel, axle parts or loose supply can become the real storage problem. Account for them before purchase rather than piling them against the trainer and calling the whole setup packed.
Decision guidance
Choose the manageable storage arrangement
Select among viable models only after stored and deployed fit both pass. Then decide which repeated burden you prefer.
For a tight cupboard, favor documented folded fit: Choose a unit whose approved full packed outline clears the opening and interior. You gain usable stored space while accepting the model’s unfolding and reset routine; do not make compatibility depend on unapproved dismantling.
For carrying, prioritize handling over the smallest outline: A somewhat larger model may be easier for you to move with a suitable approved grip and manageable weight. You sacrifice compactness for a practical route; confirm both by the exact model rather than assuming wheel-on always wins.
For frequent sessions, consider keeping the station deployed: Where room permits, a permanent setup avoids repeated lifting and bike installation. It commits the full operating area and leaves equipment present between rides, so compare that household cost with packing effort honestly.
For a shared bicycle, include the architecture’s loose pieces: An approved wheel-on arrangement retains the rear wheel but needs tire-contact preparation; direct drive removes that contact but creates wheel and drivetrain changeover work. Choose around the complete storage and refitting routine, not the trainer alone.
Ownership & compatibility
Maintain the packing routine and stored parts
The useful habit is returning a dry, organized setup to an approved position. Repeated folding also deserves inspection.
Prepare equipment before putting it away: Follow shutdown, cleaning and handling guidance and avoid trapping moisture under a cover or in a box. Storage convenience is not permission to pack wet bicycle parts against electronics or to handle components contrary to operating warnings.
Give small mounting parts a fixed location: Keep approved adapters and other loose setup pieces together with identification that suits the bike. Organized parts save retrieval time and reduce the temptation to substitute an unknown piece when the next session starts.
Inspect supports and locks during deployment: Check the folding mechanism and secure the operating stance according to the manual. If a lock or support is damaged, stop treating the usual unfolding motion as proof that the station is ready for rider load.
Protect projecting drivetrain parts: Store the unit so the cassette and other exposed components do not become improvised supports or catch passing items. Maintain the approved position and keep the removed wheel somewhere it will not obstruct access or fall onto the equipment.
FAQ
Questions about stored position and loose equipment
Resolve orientation, support and changeover details before choosing a location. Model instructions govern the permitted packing method.
Can I store every trainer vertically?
Can the bicycle remain attached while the trainer is stored?
Are rollers always the smallest option to put away?
Can I place a heavy trainer on a household shelf?
Should I remove the cassette to save cupboard depth?
Is a carrying bag enough to approve transport?
Can I store the trainer in a damp garage?
Where should the removed rear wheel go?
Will folding mean recalibrating before every ride?
Bottom line
Approve packed fit, handling and riding fit
Storage success requires all three checks. A convenient folded shape cannot compensate for an unusable route or deployed station.
Measure the approved outline: Check the opening, interior depth and height with every projection included. Reject models that only fit after an unsupported orientation or removal step.
Confirm the carrying route: Assess exact weight and permitted grips against stairs and turns. Choose a route and handling method you can manage reliably before considering cosmetic compactness.
Allocate the rest of the station: Give the bicycle, wheel, mat, fan and loose parts their own locations. The trainer measurement becomes useful only within that complete arrangement.
Restore the full riding stance: Verify the documented leg, lock and adjustment sequence in the available room. Buy the setup whose regular deployment remains practical as well as stable.
Reading Shortcuts
Check the location, carrying route and complete return to riding.
Decision Reminders
Compact claims need these checks.
- Full outline: Include height, depth and fixed projections.
- Permitted position: Use documented resting and carrying methods.
- Deployed stance: Restore every support and required adjustment.
Glossary Snippets
Terms describing the physical storage job.
When to Use a Top 10 Review
Shortlist trainers using actual stored and riding measurements.
- Check the destination: Compare complete approved packed outlines.
- Check the route: Consider weight and carrying method.
Already down to 2-3 options? A Comparison is usually faster than reading broad buying advice.
When to Use a Comparison
Compare models with the same bike and storage location.
- Count loose pieces: Include wheel, adapters and supply.
- Rehearse deployment: Compare opening, locking and refitting work.
Still exploring? Start with a Top 10 to identify the right category first.