
How to Choose Interior Comfort for Interior Fitment Checks
Universal fit is especially weak language around modern seats. Two trims of the same vehicle may use different bolsters, integrated head restraints, seat-mounted airbags, ventilation perforations, belt geometry, power controls, and passenger sensing. The same cushion also changes geometry differently for occupants with different torso and leg proportions.
Record the exact seat architecture and measure the person-vehicle fit before ordering. After installation, confirm the accessory lies stable without covering seams or controls, then reset the seat and mirrors. Check belt and head-restraint position, headroom, wheel distance, pedal operation, console knee clearance, shoulder view, rear legroom, and all folding functions. A dimensionally close product is not acceptable when a safety interface remains uncertain.
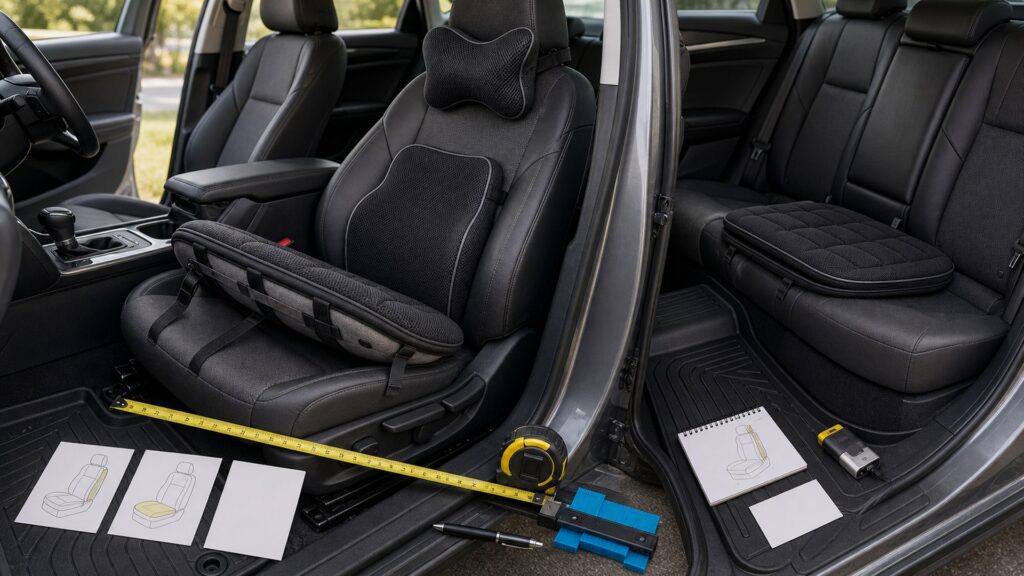
Buying framework
Set the comfort fitment baseline before buying
Convert the desired comfort fitment improvement into physical, functional, and maintenance requirements.
Identify the exact seat: Record model, year, trim, seat style, manual or power adjustment, heat, ventilation, massage, integrated belt, head restraint, and folding functions.
Measure accessory contact area: Capture usable cushion width and depth, backrest height, bolster shape, seam locations, buckle stalk, switches, gaps, and upholstery transitions.
Measure the occupant baseline: Note eye height, headroom, wheel distance, pedal reach, knee and thigh position, belt path, head restraint, mirror setting, and entry clearance.
Repeat every function installed: Operate seat travel, height, tilt, recline, lumbar, memory, folding, easy-entry, heater, ventilation, buckle, and passenger-airbag indicators.
Who this is for
Match the solution to the comfort fitment user
Different bodies, occupants, routes, climates, and cabin layouts justify different comfort fitment priorities.
Standard seat and average fit: A thin, well-secured targeted support may work when explicit vehicle permission and all dimensional checks agree.
Deeply bolstered sport seat: Generic cushions can bridge bolsters, slide, or change lateral support; use a shape designed for that seating surface.
Integrated-restraint or sensor-heavy seat: Avoid unverified covers and pads; exact manufacturer guidance outranks accessory size charts and marketing labels.
Tall, short, or limited-mobility occupant: Added thickness materially changes headroom and controls; a qualified driving-rehabilitation assessment may be more appropriate than experimentation.
What to pay attention to
Evidence that predicts comfort fitment performance
Specifications matter only when translated into what changes inside the exact vehicle during comfort fitment use.
Seat Architecture
Identify cushion shape, bolsters, head restraint, airbag seams, occupant sensing, integrated belts, switches, rails, heaters, ventilation, and folding joints.
Occupant Geometry
Measure added height and depth against headroom, thigh support, knees, wheel distance, pedals, belt path, mirrors, and rear-passenger space.
Contact dimensions: Compare the usable flat areas rather than maximum outer width, accounting for bolsters, seams, gaps, and unsupported overhang.
Attachment geometry: Straps and hooks must avoid airbags, wiring, rails, trim, adjustment mechanisms, occupant sensors, and sharp load paths.
Added seat height: Even a small rise changes eye point, headroom, wheel distance, mirror aim, thigh angle, pedal leverage, and entry through the door.
Added backrest depth: Lumbar and back pads move the torso forward, potentially changing steering clearance, belt contact, head-restraint position, and knee room.
Control accessibility: Seat switches, buckle release, parking brake, console controls, door handles, pedals, and steering adjustments must remain comfortably operable.
Configuration stability: Test with the seat at all intended positions and after repeated entry, braking, temperature change, cleaning, folding, and accessory removal.
Avoid these traps
Mistakes that compromise comfort fitment
Convenience becomes a defect when an add-on alters controls, restraints, airbags, visibility, airflow, or secure storage.
Measuring the seat but not the occupant: Identical products can improve one driver and crowd another; record person-to-control geometry with the item installed.
Running straps through seat wiring gaps: Hidden routes may contact sensors, airbag circuits, motors, heaters, or sharp structure; use only documented attachment points.
Ignoring passenger-airbag status lights: A pad can affect classification on certain vehicles; verify exact manual restrictions and indicator behavior without trying to spoof the sensor.
Calling a product compatible because it does not slide: Stability alone does not prove correct airbags, belts, head restraint, reach, visibility, heating, ventilation, or folding behavior.
Decision guidance
Choose a defensible comfort fitment path
Select the least intrusive option that proves the required comfort fitment outcome under representative conditions.
Choose thin targeted support when geometry is close: Limit dimensional change and confirm the support contacts the intended body area without bridging bolsters or changing restraints.
Choose seat-specific designs for complex contours: Require exact photographs, dimensions, exclusions, attachment routing, and instructions for sport, integrated, or ventilated seats.
Use non-seat solutions when seat compatibility is uncertain: Address glare, cabin temperature, or storage elsewhere rather than placing an unverified layer on a safety-sensitive seat.
Decline the accessory after any unresolved fitment test: Airbag seams, sensor behavior, buckle path, control reach, visibility, or stable removal are hard gates, not future adjustments.
Ownership & compatibility
Maintain the comfort fitment result
Inspection, cleaning, adjustment, records, and replacement keep the original comfort fitment decision valid.
Mark the accepted position: Record seat settings, strap path, cushion alignment, mirror aim, and clearance photos so drift becomes visible.
Inspect after other drivers: Shared use can move seats and accessories; restore the occupant baseline and repeat belt, controls, mirrors, and anchor checks.
Replace dimensional failures: Flattened foam, stretched straps, curled backing, torn seams, migrating pads, or deformed edges invalidate the original fitment evidence.
FAQ
Questions to resolve for comfort fitment
Use exact vehicle documentation and product instructions to settle these points.
How should a seat cushion be measured?
Can straps pass between the seatback and cushion?
Does added height affect pedal reach?
What if the head restraint is integrated?
Can a passenger seat pad affect occupant classification?
How can buckle access be tested?
Should fit be checked with the seat fully forward?
Are universal lumbar rolls safer than full covers?
When should a fitment problem go to a professional?
Bottom line
Preserve safety while improving comfort fitment
A successful upgrade remains compatible, removable, understandable, and safe throughout ownership.
Identify the seat architecture: Resolve airbags, sensors, belts, head restraints, contours, switches, rails, heat, ventilation, and folding before size comparisons.
Measure the person-vehicle result: Retest headroom, eye point, steering and pedal reach, belt path, mirrors, knees, thighs, and entry with the accessory installed.
Keep every hard gate: Reject uncertain deployment zones, sensor behavior, attachment paths, controls, or stability even when the accessory initially feels comfortable.
Reading Shortcuts
Move through the occupant and cabin fitment decision in order.
Decision Reminders
Universal dimensions cannot certify a safety-sensitive seat fit.
- Identify the exact seat: Verify and record this requirement.
- Measure accessory contact area: Verify and record this requirement.
- Measure the occupant baseline: Verify and record this requirement.
- Mark the accepted position: Verify and record this requirement.
- Inspect after other drivers: Verify and record this requirement.
- Replace dimensional failures: Verify and record this requirement.
Glossary Snippets
Terms used in this comfort accessory plan.
When to Use a Top 10 Review
Use rankings only after the requirements are fixed.
- Identify the seat architecture: Use this as a shortlist filter.
- Measure the person-vehicle result: Use this as a shortlist filter.
- Keep every hard gate: Use this as a shortlist filter.
- Exclude: Use this as a shortlist filter.
Already down to 2–3 options? A Comparison is usually the faster next step.
When to Use a Comparison
Compare finalists through the seating, belt, airbag, sensor, control-reach, visibility, airflow, securement, power, and removal trial; make seat cushion width an explicit recorded result.
- Identify the exact seat: Check both candidates against this requirement.
- Measure accessory contact area: Record the result for each shortlisted option.
- Measure the occupant baseline: Use the same operating conditions for both tests.
- Repeat every function installed: Keep the evidence with the final decision.
Still exploring? Start with a Top 10 to build a shortlist first.