
How to Choose Interior Organization for Cargo and Storage Planning
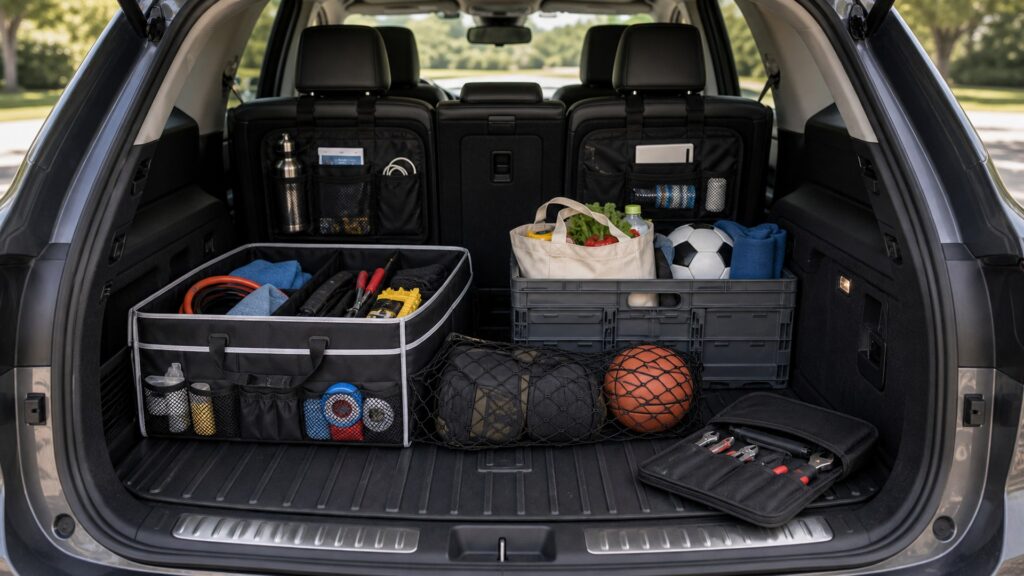
A console tray, seatback pouch, grocery crate, and luggage tote belong to the same load system once the vehicle moves. When passenger needs change, organizers are often lifted out and set on folded seats or the cargo floor without a new restraint plan. Dense contents can then migrate forward or block equipment.
Start with the vehicle's Tire and Loading label and cargo instructions, then inventory occupants and every load. Put heavier objects in appropriate low positions, use only specified anchors and restraints, and preserve required visibility and exits. Give each organizer a normal position, a transfer position for seat conversion, and a removal sequence. With typical luggage aboard, fold rows, reach the spare or inflator, retrieve emergency gear.
Buying framework
Define the cargo-integrated organization job before shopping
Turn the cargo-integrated organization goal into measurable zones, loads, access rules, and safety exclusions.
Payload accounting: Combine occupants, luggage, tools, recreation gear, pets, and organizers against vehicle limits rather than treating storage products as weightless.
Mass placement: Locate dense items according to vehicle guidance, generally avoiding high, rearward, or passenger-adjacent positions that amplify movement.
Restraint inventory: Identify approved tie-downs, barriers, latching compartments, nets, straps, and container closures plus their stated purposes and limits.
Configuration map: Draw passenger, full-cargo, split-fold, grocery, road-trip, pet, work, and emergency layouts with a place for every module.
Who this is for
Match storage to the people using it
Different occupants and routines place different demands on cargo-integrated organization products.
Urban grocery user: Folding crates and small dividers can control light loads if they latch or restrain, store flat securely, and preserve emergency access.
Family road traveler: Luggage, strollers, comfort kits, food, and child equipment need zones plus an unload order that does not bury safety gear.
Outdoor recreation owner: Wet, sharp, dense, or dirty equipment requires compatible containment, strong restraint, drying plans, and separation from passengers.
Mobile trade worker: Tools, batteries, chemicals, and documents demand purpose-built cargo control beyond ordinary cabin pockets or decorative organizers.
What to pay attention to
Evidence that predicts cargo-integrated organization performance
Judge specifications by what they change in the exact vehicle during cargo-integrated organization use.
Vehicle Load Architecture
Respect payload, passenger capacity, axle effects, center of gravity, tie-down guidance, barriers, and manufacturer cargo instructions.
Configuration Logistics
Move modules through passenger, folded-row, grocery, luggage, recreation, and emergency states without loose overflow or blocked access.
Module load path: Confirm contents stay inside, the container stays closed, restraint engages appropriate hardware, and force is not carried through trim or seat controls.
Seat and latch clearance: Operate row releases, head restraints, tracks, recliners, child-seat tethers, cargo floors, tailgate, doors, and removable panels under load.
Visibility boundary: Keep cargo and organizers below required direct and mirror sight lines without covering windows, lamps, cameras, or sensor fields.
Spare-system access: Reach the spare, jack, inflator, wheel-lock key, tow eye, and instructions without completely destabilizing or unloading the vehicle.
Emergency corridor: Reserve a labeled path to first aid, warning devices, extinguisher where appropriate, mobility equipment, medication, releases, and exits.
Unload stability: Choose an order that maintains restraint for remaining items and prevents bins, bottles, or gear from rolling toward occupants or traffic.
Avoid these traps
Errors that undermine cargo-integrated organization
A convenient container fails when it creates movement, interference, or distraction within the cargo-integrated organization layout.
Using child-tether anchors as cargo points: Anchor appearance does not establish purpose; follow the vehicle manual and use only hardware specified for the load.
Stacking bins above the rear sight line: Convenient vertical capacity can block vision, raise the center of mass, and release upper containers during braking.
Folding seats without relocating modules: Seatback organizers, under-seat bins, and cargo dividers may pinch, spill, damage latches, or remain completely unrestrained.
Burying the spare system: A tidy top layer is not successful when roadside equipment requires unloading into traffic or releasing an unstable stack.
Decision guidance
Choose a workable cargo-integrated organization layout
Select the smallest arrangement that proves the required cargo-integrated organization outcome.
Use latching factory cargo spaces: Assign smaller dense or emergency items to designed compartments when load and access guidance permit.
Use restrained modular containers: Choose closable labeled boxes that connect to appropriate points and transfer predictably between layouts.
Add a compatible barrier: Where vehicle and product instructions support it, a correctly installed barrier can separate suitable cargo while preserving seats, airbags, exits, and views.
Reduce or split the load: When restraint, payload, visibility, or emergency access cannot all pass, remove items or use another transport plan.
Ownership & compatibility
Keep the cargo-integrated organization system dependable
Inspection and deliberate resets preserve the original cargo-integrated organization decision.
Inspect the entire load path: Check contents, dividers, closures, container shell, straps, hooks, anchors, floor, seatbacks, and contact surfaces for change.
Rehearse seasonal configurations: Load representative gear, move seats, secure transfers, verify views, retrieve emergency equipment, and revise the map before travel.
Update after vehicle or equipment changes: New tires do not change payload; new passengers, tools, hobbies, modules, or accessibility needs require fresh accounting and placement.
FAQ
Questions to settle before purchase
Resolve these product-specific questions with the vehicle and accessory instructions.
How should I verify payload accounting in this vehicle?
How should I verify mass placement in this vehicle?
How should I verify restraint inventory in this vehicle?
How should I verify configuration map in this vehicle?
How should I verify module load path in this vehicle?
How should I verify seat and latch clearance in this vehicle?
How should I verify visibility boundary in this vehicle?
How should I verify spare-system access in this vehicle?
How should I verify emergency corridor in this vehicle?
Bottom line
Build a safer, calmer cabin
The best cargo-integrated organization setup stays restrained, accessible, reversible, and easy to audit.
Map the real cabin: Measure the spaces, movements, loads, and exclusions that govern the cargo-integrated organization goal.
Prove every transition: Rehearse the representative parked sequence with normal users and contents before accepting the cargo-integrated organization arrangement.
Reset and inspect: Remove clutter, restore cargo-integrated organization clearances, and retire damaged parts before the planned use degrades.
Reading Shortcuts
Move through the cargo and cabin storage planning decision in order.
Decision Reminders
Every organizer is cargo, and every cargo module needs a verified load path.
- Payload accounting: Verify and record this requirement.
- Mass placement: Verify and record this requirement.
- Restraint inventory: Verify and record this requirement.
- Inspect the entire load path: Verify and record this requirement.
- Rehearse seasonal configurations: Verify and record this requirement.
- Update after vehicle or equipment changes: Verify and record this requirement.
Glossary Snippets
Terms used in this interior organization plan.
When to Use a Top 10 Review
Use rankings only after the requirements are fixed.
- Map the real cabin: Use this as a shortlist filter.
- Prove every transition: Use this as a shortlist filter.
- Reset and inspect: Use this as a shortlist filter.
- Exclude: Use this as a shortlist filter.
Already down to 2–3 options? A Comparison is usually the faster next step.
When to Use a Comparison
Compare finalists through the loaded braking scenario, tie-down, seat-folding, spare-access, visibility, and unloading trial; make payload label an explicit recorded result.
- Payload accounting: Check both candidates against this requirement.
- Mass placement: Record the result for each shortlisted option.
- Restraint inventory: Use the same operating conditions for both tests.
- Configuration map: Keep the evidence with the final decision.
Still exploring? Start with a Top 10 to build a shortlist first.