
How to Choose Interior Organization for Interior Fitment Checks
Interior storage spaces are rarely simple boxes. Console cavities taper beneath the opening, door pockets curve around speakers, under-seat space changes with height adjustment, and fabric organizers bulge when filled. A product can match published width and still jam a hinge, rub a seal, enter a rail, or become impossible to remove loaded.
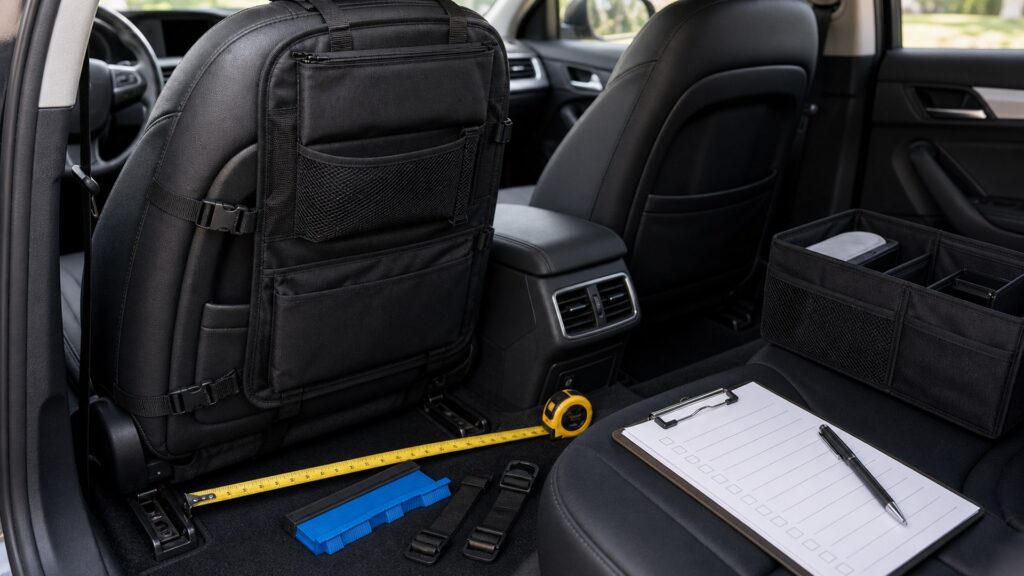
Measure the narrowest opening, the internal contour, and every nearby moving part in the exact trim. Build a cardboard or taped envelope when dimensions are uncertain. Load the candidate with its intended contents, tension attachments as directed, and cycle doors, seats, consoles, rows, and cargo panels. Drive a short representative route, then look for movement, rattles, pressure marks, heat, and abrasion. Fit passes only when.
Buying framework
Define the fit-verified organization job before shopping
Turn the fit-verified organization goal into measurable zones, loads, access rules, and safety exclusions.
Vehicle identity: Confirm model year, body style, trim, seat design, console package, audio hardware, and cargo-floor configuration before trusting compatibility.
Cavity geometry: Measure top and bottom width, depth, taper, radius, protrusions, drains, fasteners, liners, lighting, and usable opening.
Loaded envelope: Add content bulge, lid rise, strap hardware, handles, cable exits, dividers, and maximum intended fill to product dimensions.
Configuration matrix: List every seat position, child-restraint state, folded-row layout, cargo-floor height, and passenger arrangement that must work.
Who this is for
Match storage to the people using it
Different occupants and routines place different demands on fit-verified organization products.
Exact-fit console shopper: Prioritize verified trim-specific cavity geometry, lid function, cable routing, lighting, coin removal, and access to underlying fasteners.
Under-seat storage shopper: Treat rails, motors, occupant sensors, air ducts, wiring, and forward migration as exclusions, not usable leftover volume.
Seatback organizer shopper: Load every pocket, move the front seat fully, check rear knees and restraints, and inspect attachment pressure near airbags.
Convertible cargo-area shopper: Validate modules through upright, folded, split-row, raised-floor, spare-access, and fully loaded configurations.
What to pay attention to
Evidence that predicts fit-verified organization performance
Judge specifications by what they change in the exact vehicle during fit-verified organization use.
Static Fit
Measure openings, tapers, contours, seals, trim, lids, fasteners, anchors, and the organizer's actual loaded envelope.
Dynamic Fit
Cycle seats, doors, consoles, rows, cargo floors, restraints, vents, and removal while checking contact and migration.
Attachment route: Trace straps, hooks, clips, adhesive, hook-and-loop, or fasteners without crossing airbags, wiring, upholstery seams, or moving hardware.
Movement clearance: Cycle doors, seals, seats, armrests, console lids, shifters, brakes, vents, cupholders, rows, and cargo panels around the loaded product.
Hidden hardware: Use a light and vehicle documentation to identify rails, motors, sensors, looms, ducts, amplifiers, batteries, releases, and service panels.
Closure margin: Confirm zippers, lids, latches, elastic, and pockets operate without forcing adjacent trim or compressing contents into other systems.
Insertion and removal: Practice both paths at realistic load, noting hand clearance, spills, snag points, trim pressure, and where the organizer rests during unloading.
Road validation: After turns, braking, bumps, and temperature change, inspect migration, noise, release, witness marks, pinched cables, and changed clearances.
Avoid these traps
Errors that undermine fit-verified organization
A convenient container fails when it creates movement, interference, or distraction within the fit-verified organization layout.
Measuring only the top opening: A tapered cavity can pinch a nominally smaller insert below the rim and make retrieval or cleaning difficult.
Testing an organizer empty: Fabric, elastic, straps, and lids change shape under real contents; only the loaded envelope predicts interference.
Assuming fitment means all trims: Seat frames, consoles, speakers, batteries, cargo floors, and option packages can change usable space within one model year.
Forcing trim during installation: Pressure is evidence of wrong geometry or path; do not bend panels, crush seals, or reroute vehicle wiring to make storage fit.
Decision guidance
Choose a workable fit-verified organization layout
Select the smallest arrangement that proves the required fit-verified organization outcome.
Select a trim-specific insert: Use it when documented geometry and a vehicle trial confirm stable fit, closure, cleaning access, and easy removal.
Select an adjustable soft organizer: Accept it only when loaded straps and panels remain clear of occupants, airbags, seats, hardware, and walkways.
Select a modular cargo system: Choose modules that lock or restrain in every required floor and row configuration and preserve emergency access.
Choose no product for marginal space: Leave a cavity unused when fit depends on compression, blocked hardware, risky attachment, or difficult loaded removal.
Ownership & compatibility
Keep the fit-verified organization system dependable
Inspection and deliberate resets preserve the original fit-verified organization decision.
Repeat the fit check after loading changes: Different bottles, devices, tools, or textiles alter bulge, weight, closure, balance, and contact points.
Inspect for witness marks: Remove the product and look for rubbed trim, compressed foam, dye transfer, stretched seams, loosened clips, and damaged seals.
Retest after vehicle service: Seat work, battery access, trim removal, software hardware, or cargo-floor changes can invalidate prior clearances and attachment routes.
FAQ
Questions to settle before purchase
Resolve these product-specific questions with the vehicle and accessory instructions.
How should I verify vehicle identity in this vehicle?
How should I verify cavity geometry in this vehicle?
How should I verify loaded envelope in this vehicle?
How should I verify configuration matrix in this vehicle?
How should I verify attachment route in this vehicle?
How should I verify movement clearance in this vehicle?
How should I verify hidden hardware in this vehicle?
How should I verify closure margin in this vehicle?
How should I verify insertion and removal in this vehicle?
Bottom line
Build a safer, calmer cabin
The best fit-verified organization setup stays restrained, accessible, reversible, and easy to audit.
Map the real cabin: Measure the spaces, movements, loads, and exclusions that govern the fit-verified organization goal.
Prove every transition: Rehearse the representative parked sequence with normal users and contents before accepting the fit-verified organization arrangement.
Reset and inspect: Remove clutter, restore fit-verified organization clearances, and retire damaged parts before the planned use degrades.
Reading Shortcuts
Move through the interior organizer fitment verification decision in order.
Decision Reminders
If fit depends on forcing, stretching, or hiding a conflict, it does not fit.
- Vehicle identity: Verify and record this requirement.
- Cavity geometry: Verify and record this requirement.
- Loaded envelope: Verify and record this requirement.
- Repeat the fit check after loading changes: Verify and record this requirement.
- Inspect for witness marks: Verify and record this requirement.
- Retest after vehicle service: Verify and record this requirement.
Glossary Snippets
Terms used in this interior organization plan.
When to Use a Top 10 Review
Use rankings only after the requirements are fixed.
- Map the real cabin: Use this as a shortlist filter.
- Prove every transition: Use this as a shortlist filter.
- Reset and inspect: Use this as a shortlist filter.
- Exclude: Use this as a shortlist filter.
Already down to 2–3 options? A Comparison is usually the faster next step.
When to Use a Comparison
Compare finalists through the loaded fit, closure, full-motion, passenger-clearance, and removal-path trial; make cavity taper an explicit recorded result.
- Vehicle identity: Check both candidates against this requirement.
- Cavity geometry: Record the result for each shortlisted option.
- Loaded envelope: Use the same operating conditions for both tests.
- Configuration matrix: Keep the evidence with the final decision.
Still exploring? Start with a Top 10 to build a shortlist first.