
How to Choose Lighting & Visibility for Lighting Upgrade Projects
A successful lighting upgrade begins with a problem statement, not a technology. “I need earlier pedestrian detection on dark curves” is actionable. “I want LEDs” is not. The first statement can be tested against the existing beam, road route, and possible interventions.
Document the vehicle's exact lighting package, condition, voltage, warnings, aim, and optical damage. Then climb an intervention ladder: cleaning and repair, correct replacement source, complete assembly, or a purpose-specific auxiliary system. Price the harness, modules, mounting, coding, calibration, and professional labor with the lamps. Finally, define acceptance tests and a rollback path before installation. If the completed system cannot be aimed, diagnosed, or legally operated, the project is unfinished.
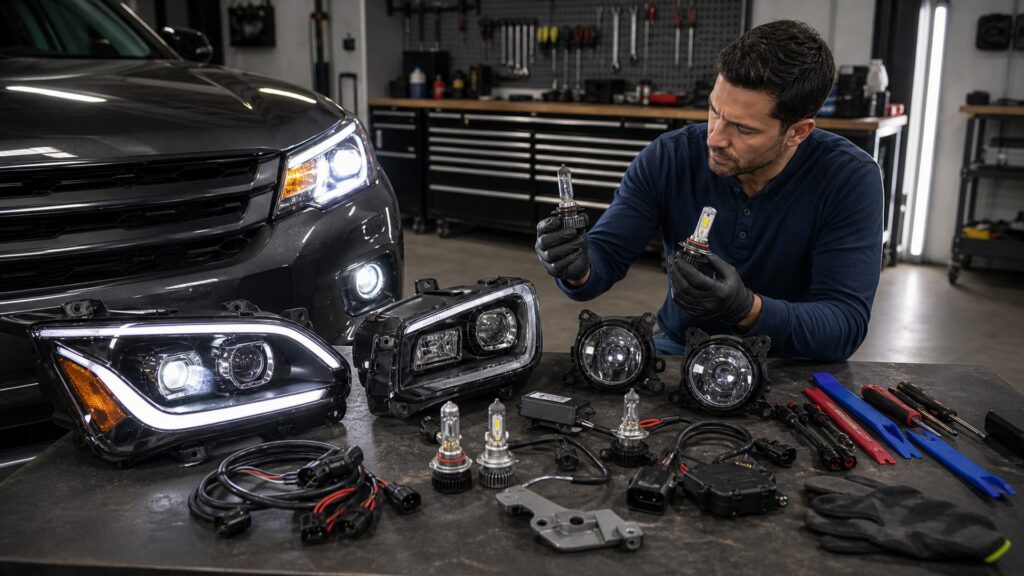
Buying framework
Turn the upgrade idea into a testable project
Define the visibility or signaling outcome, establish the current baseline, and choose the smallest intervention that can close the gap.
Write the performance gap: Describe the route, beam function, hazard, weather, or failed signal and what improvement would be observable.
Capture the baseline: Photograph beam shape on the specified setup, measure energized voltage, scan relevant modules, record part numbers, and inspect optics and mounts.
Build an intervention ladder: Rank maintenance, repair, like-for-like source replacement, complete assembly replacement, and auxiliary lighting by risk and expected benefit.
Set acceptance and rollback: Decide how aim, functions, warnings, heat, sealing, glare, and legality will be checked, and retain a path back to the original configuration.
Who this is for
Scope the project to the owner's real constraint
A daily-driver repair, restoration, off-road build, and appearance project need different evidence and tolerances.
Daily-driver improvers: Prioritize required-light reliability, low-beam performance, serviceability, compliant components, and minimal electronic or warranty disruption.
Older-vehicle restorers: Start with grounds, connectors, voltage loss, corroded reflectors, lens condition, worn adjusters, and available correct-spec replacement parts.
Off-road builders: Separate road-legal required lighting from auxiliary trail zones, then budget power, switching, mounts, dust control, and public-road lockout.
Appearance-led modifiers: Treat visual style as a secondary goal; verify that tint, housings, signatures, and source changes preserve required color, intensity, visibility, and beam performance.
What to pay attention to
Project evidence worth collecting before purchase
Compatibility lists are the beginning. The build also needs optical, electrical, mechanical, software, and regulatory evidence.
Change Control
Baseline records, part traceability, wiring diagrams, reversible interfaces, fault scans, and rollback.
Performance Validation
Beam distribution, aim, required functions, glare, temperature, water behavior, and on-road status.
Exact configuration match: VIN, model year, trim, market, factory source, adaptive functions, leveling, and connector or module numbers must align with the proposed part.
Complete costed bill: Include lamps, brackets, harnesses, fuses, relays, switches, coding, calibration, aim, trim pieces, seals, labor, and troubleshooting allowance.
Installation dependencies: Check bumper removal, fragile clips, one-time fasteners, access panels, cooling clearance, sensor zones, and whether service information is available.
Performance documentation: Seek complete-lamp photometry, vehicle tests, clear road-use certification, thermal and environmental testing, and installation instructions.
Post-change diagnostics: Plan warning-message checks, fault-code scans, required-lamp state tests, voltage and temperature measurements, and specified calibration or aiming.
Avoid these traps
Upgrade projects that solve the wrong problem
Most overruns start with an assumed solution, incomplete scope, or no objective finish line.
Buying before diagnosing: New lamps cannot correct a weak ground, low charging voltage, dirty windshield, loose mount, failed level sensor, or incorrect aim.
Comparing source specifications only: Lumens, watts, and color temperature do not establish the beam produced by the installed optic or compatibility with electronic controls.
Ignoring enabling work: A low-cost lamp can require expensive brackets, harnesses, coding, fascia changes, aim equipment, and calibration before it functions correctly.
Testing only in the driveway: A startup check misses heat soak, rain entry, vibration, monitoring faults, glare, curve coverage, beam shake, and interference with automatic lighting or sensors.
Decision guidance
Climb the intervention ladder one justified step at a time
Escalate when documented restoration cannot close the measured performance gap.
If condition is the issue: Clean, repair voltage loss, replace correct worn sources, restore appropriate lens surfaces, repair mounts, and aim before changing architecture.
If the factory optic is damaged: Use an exact compatible assembly and transfer or replace modules only as specified; budget coding, leveling, aim, and calibration.
If the design remains limited: Compare complete compliant assemblies or a different factory-equivalent package using exact fit and test evidence, not a universal bulb conversion.
If the task is outside road lighting: Add a dedicated auxiliary system with independent protected power, correct beam zone, rigid mounts, labeled controls, and a road-use strategy.
Ownership & compatibility
Keep the project maintainable after the reveal
Documentation and service access determine whether the upgrade remains an asset after a source, connector, or module eventually fails.
Archive the configuration: Save invoices, certifications, wiring diagrams, fuse ratings, controller settings, part numbers, aim records, scan results, and before-and-after photographs.
Schedule validation checks: Reinspect fasteners, aim, sealing, cable routing, terminal heat, faults, and condensation after initial drives and again after harsh weather.
Protect the rollback path: Retain viable original parts and uncut connectors, label adapters, and avoid irreversible body changes unless the measured benefit justifies them.
FAQ
Lighting upgrade project questions
These answers cover diagnosis, scope, compatibility, cost, and validation.
What should I measure before upgrading vehicle lighting?
Is replacing halogen bulbs with LEDs a complete upgrade plan?
How do I estimate the real project cost?
Why should I keep the original lighting parts?
What is a useful lighting acceptance test?
Can a lighting project affect driver-assistance systems?
Should I upgrade both sides at the same time?
How can I make an auxiliary-light installation reversible?
When should a professional handle the upgrade?
Bottom line
A lighting upgrade is complete only when the result is verified
The strongest project solves a documented problem with the least disruptive intervention and leaves behind a serviceable, legal, measurable system.
Baseline the vehicle: Diagnose optics, power, aim, mounts, and modules before choosing parts.
Control the scope: Cost every dependency and preserve a practical rollback path.
Test the outcome: Verify beam, required functions, electronics, environment, and road use against written acceptance criteria.
Reading Shortcuts
Move from the lighting upgrade project problem to a vehicle-compatible plan that can be installed and verified.
Decision Reminders
Keep the complete lighting upgrade project system in view while comparing parts.
- Goal: Name the measurable road problem.
- Baseline: Record beam, voltage, aim, and faults.
- Scope: Include modules, labor, and calibration.
- Compatibility: Match the complete vehicle system.
- Rollback: Preserve connectors and original parts.
- Acceptance: Test more than illumination.
Glossary Snippets
Terms that separate useful performance from apparent compatibility.
When to Use a Top 10 Review
Use a lighting upgrade project roundup only after the required function, vehicle interface, and operating limits are known.
- Problem defined: The visibility or mobility failure is specific.
- Vehicle mapped: Interfaces and limits are documented.
- Format chosen: The correct product family is settled.
- Evidence available: Finalists can be compared on relevant tests.
Have finalists already? Open a Comparison for a closer tradeoff.
When to Use a Comparison
Compare lighting upgrade project finalists that solve the same defined problem on the same vehicle configuration.
- Application: Both match the exact vehicle and function.
- Performance: Evidence addresses the operating problem.
- Integration: Mounting and system effects are understood.
- Ownership: Inspection and service demands are acceptable.
Need a broader field? Use a Top 10 to form a shortlist.