
How to Choose Nail Care Products for At-Home Manicures
An at-home manicure succeeds or fails as a sequence. A sharp clipper is useful before polish, a cleanup brush is useful while lacquer remains workable, and a top coat helps only when its timing fits the color beneath it. Buying isolated “must-haves” can leave the crucial transition between steps unresolved.
Design the station around both hands, especially the less practiced one. Stable bottles, controllable brushes, bright task lighting, a protected tabletop, and enough uninterrupted drying time often improve results more than a large tool roll. The goal is a compact process you can set up, execute, clean, and store without improvising halfway through.
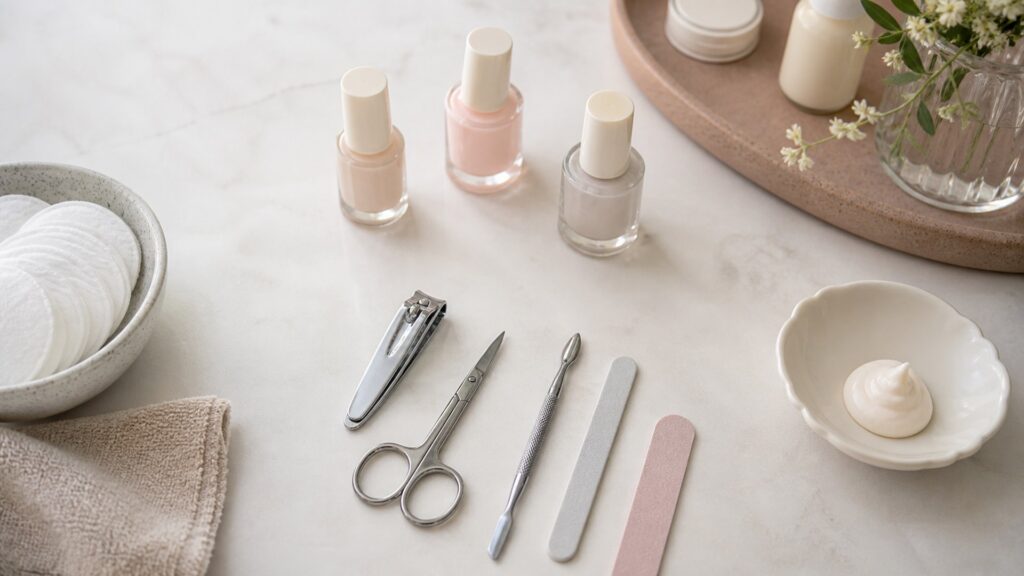
Buying framework
Design the session before filling the organizer
Work backward from the finish you want and the time and surface you actually have. Every purchase should occupy a clear place in the manicure sequence.
Map every stage: List shaping, plate cleanup, base, color, top coat, edge cleanup, drying, and later removal. Buy only the stages you intend to perform, but leave no required stage unsupported.
Reserve two-hand working room: The table should support a forearm and keep bottles beyond the arc of your painting hand. A non-slip, wipeable mat and direct light are functional equipment, not decoration.
Choose for the weaker hand: A brush or tool that feels elegant in your dominant hand may become unwieldy when control reverses. Favor stable handles, visible tips, and polish flow that does not rush toward the sidewalls.
Budget for through-drying: Dry-to-touch is not the same as fully set through several layers. Match the base, color, and top system to the uninterrupted window after the last stroke.
Plan correction before color: Set out a small cleanup brush or pointed swab and the compatible remover first. Immediate, narrow correction preserves the manicure better than wiping an entire finger after lacquer spreads.
Who this is for
Choose a station for the manicure you repeat
Frequency, finish expectations, available space, and hand control create different useful kits. More pieces do not necessarily mean more capability.
The tidy-up minimalist: You mostly shorten, shape, and add clear or sheer polish. Prioritize an aligned clipper, fine file, simple base or clear coat, and a small remover setup rather than nail-art accessories.
The weekly color wearer: You apply base, two color layers, and top coat on a predictable schedule. Bottle stability, brush width, compatible layer timing, and fast edge cleanup deserve more attention than an oversized implement set.
The precision finisher: Clean sidewalls and an even cuticle-line curve matter to you. Add strong task lighting, a fine cleanup brush, lint-free pads, and lacquer with controllable loading rather than relying on a broad brush alone.
The pack-away manicurist: Your dining table or desk must return to another use quickly. Choose capped liquids, a washable mat, and an organizer that keeps upright bottles separate from clean tools and used pads.
What to pay attention to
Translate tool geometry into cleaner strokes
At-home specifications matter when they change control, sequence, or cleanup. Judge each item at the point where your hand meets the tool or the formula leaves its bottle.
Hand control and finish quality
Consider blade alignment, abrasive consistency, handle stability, brush width, polish flow, and correction precision.
Workflow and workstation load
Consider step coverage, drying language, tabletop footprint, spill control, organization, and repeat-use cleanup.
Clipper jaw alignment: The cutting edges should meet evenly without twisting the nail. A comfortable lever and suitable jaw width allow several controlled cuts instead of one forced bite.
File surface and profile: A fine, consistent abrasive finishes the free edge; a slim profile reaches corners. Glass files can be washable, while disposable boards are easy to replace when worn.
Pusher shape: A gently contoured pusher should be easy to guide on the nail plate without becoming a cutting tool. Living skin at the proximal nail fold should not be treated as material to remove.
Brush width and stem loading: A broad paddle covers quickly but may flood narrow nails. A narrower, responsive brush gives extra strokes but can be easier to steer with the nondominant hand.
Lacquer flow: A self-leveling polish can soften brush marks before setting; an overloaded stem can still overwhelm the sidewalls. The bottle neck should let you remove excess predictably.
Drying language: Compare recoat instructions, number of expected layers, and claims about surface versus full drying. A quick-dry top coat cannot erase a thick, wet color layer beneath it.
Organizer layout: Rigid compartments help bottles remain upright, while a separate washable area contains used brushes and pads. Deep mixed bins hide spills and make clean tools harder to identify.
Avoid these traps
Do not let the kit sabotage the process
Most home-manicure problems come from timing, loading, or reach. These buying errors make those constraints worse.
Buying by piece count: Large kits often multiply similar pushers, buffers, and decorations while omitting good lighting or cleanup tools. Audit the sequence, not the accessory total.
Treating surface-dry as finished: Polish can resist a light touch while remaining vulnerable to pressure. If your schedule ends at bedtime or chores, select a shorter layer system or move the session earlier.
Assuming the widest brush is easiest: A broad brush can cover a thumbnail neatly and swamp a little fingernail. Match width to your narrowest nails and comfort when the nondominant hand paints.
Cutting for a sharper outline: Aggressive work around living nail folds can cause injury. Choose gentle plate-grooming tools and use lacquer cleanup to refine the painted border.
Applying one heavy color layer: A thick coat may look opaque sooner but dries unevenly and collects at edges. Choose a formula that reaches the desired finish through the thin layers stated in its directions.
Decision guidance
Assemble the station by constraint
Start with the smallest setup that completes your intended manicure. Add precision or speed tools only where they solve a recurring bottleneck.
If you rarely wear color: Buy a well-controlled clipper, fine file, conditioning hand product, clear coat if desired, and its remover. Skip color-specific accessories until polish becomes a real habit.
If time is the limiting factor: Choose a coherent quick-dry lacquer sequence with clear recoat directions, and use sheer or forgiving color when appropriate. Do not trade application minutes for a long hidden drying period.
If sidewall flooding is common: Select a narrower or more controllable brush, stable bottle, fine cleanup brush, and lint-free pads. Practice with moderate stem loading before buying more opaque colors.
If space is temporary: Use a roll-out mat with a defined bottle zone and one organizer that can close after liquids are capped. Confirm lighting and ventilation before opening remover.
If you want cured gel or extensions: This conventional manicure station is not automatically equipped for those systems. Their lamps, materials, preparation, and removal requirements warrant a separate, product-specific buying decision.
Ownership & compatibility
Reset the station after every session
A clean, complete station makes the next manicure easier to start. Maintenance focuses on tool condition, sealed liquids, and separation of clean and used supplies.
Clean reusable implements: Follow maker directions, dry tools thoroughly, and store them clean. Do not share implements that contact damaged skin, and discard single-use items after their intended use.
Replace worn shaping surfaces: An uneven or glazed file encourages extra pressure and poor control. Replace disposable abrasives and retire chipped glass or misaligned clippers.
Keep bottle necks functional: Remove appropriate buildup before closing caps, then store liquids upright under labeled conditions. Do not thin a changing formula unless its maker specifically provides a compatible method.
Restock the exit supplies: Keep remover, pads, cleanup materials, and a small waste container ready before the next session. Running out during correction or later removal invites scraping and improvised substitutes.
FAQ
At-home manicure questions, answered
These answers cover the small process choices that determine whether a home setup stays manageable.
What tools are essential for a basic home manicure?
Is a glass file better than an emery board?
Do I need both a base coat and top coat?
How can I paint neatly with my nondominant hand?
Why does polish dent after it feels dry?
Should I cut my cuticles before polishing?
What is the best way to clean polish from sidewalls?
Can manicure tools be shared between people?
How should nail polish and remover be stored?
Bottom line
A good home kit keeps the sequence under control
Give yourself a stable surface, visible tools, controllable lacquer flow, a ready cleanup method, and enough time for the complete layer system to dry. That compact station will outperform a crowded case whose pieces do not work together.
Cover the sequence: Make sure shaping, coating, correction, drying, and removal are all supported.
Buy for both hands: Choose handles and brushes that remain steerable when control reverses.
Protect the table and time: Plan a non-slip work zone and an uninterrupted drying window.
Reset after use: Clean implements, seal liquids, discard used pads, and restock correction supplies.
Reading Shortcuts
Go directly to your setup decision.
Station Reminders
Check these before opening polish.
- Surface: Protect and stabilize the work area.
- Light: Illuminate nail edges and sidewalls.
- Brush: Match width and loading to your control.
- Cleanup: Set out remover and a precise implement.
- Time: Leave room for through-drying.
Glossary Snippets
Useful manicure terms.
When to Use a Top 10 Review
Use a roundup after defining the missing station step.
- You need shaping: Compare clipper and file control.
- You need color: Compare brush, flow, and layer timing.
- You need organization: Compare bottle stability and cleanup storage.
Have finalists? Use a Comparison.
When to Use a Comparison
Use a head-to-head within one manicure product type.
- Brushes differ: Compare width, flex, and stem loading.
- Files differ: Compare abrasive consistency and care.
- Systems differ: Compare layer count and drying window.
Still exploring? Start with a Top 10.