
How to Choose Nail Care Products for Damaged Nails
Peeling layers, split tips, pronounced ridges, and flexible nails can all look “damaged,” but they do not create the same buying decision. A fine file may smooth a catching free edge, a flexible clear coating may reduce snagging, and a ridge-filling base coat may improve the appearance beneath color. None of those cosmetic roles explains why the nail changed or promises to restore it.
The useful question is how a product behaves across application, wear, and removal. Aggressive buffing, very rigid films, improvised adhesives, and repeated solvent cycles can add work to an already fragile routine. This guide prioritizes reversible cosmetic protection and identifies when persistent, painful, or unexplained changes should move the decision outside the beauty aisle.
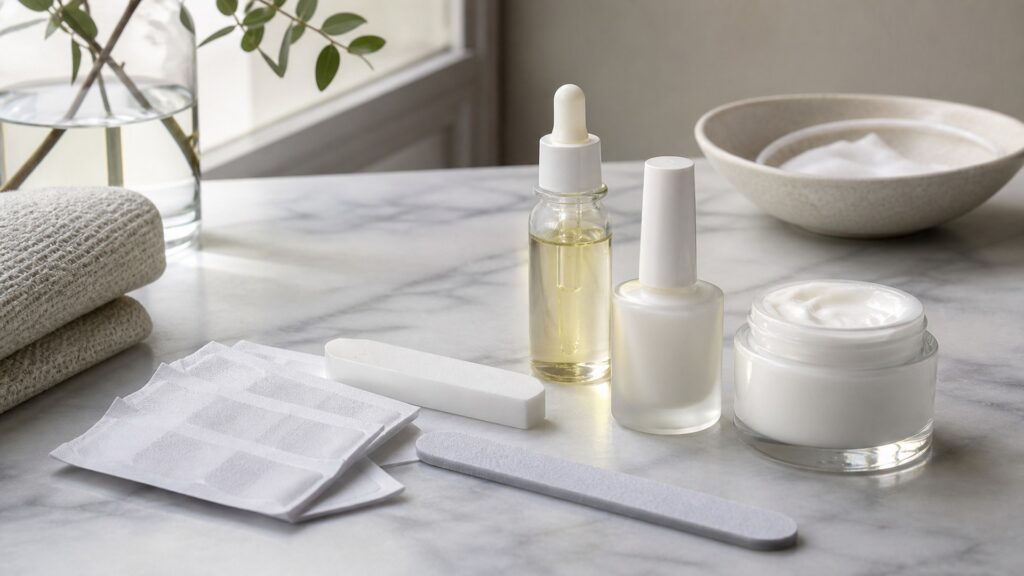
Buying framework
Protect first; correct appearance second
Visible damage changes the shopping order. Identify what is happening at the nail surface, reduce opportunities for catching or abrasion, and choose cosmetic coverage only after considering how it will later be removed.
Name the visible pattern: Peeling layers, a split free edge, grooves, and general flexibility are not interchangeable shopping problems. Describe what you see without trying to diagnose its cause.
Reduce leverage at the edge: Keeping the free edge shorter and smoothly filed can reduce snagging. A fine abrasive gives more control than a coarse board when the edge is already irregular.
Choose a film for movement: If the nail bends easily, a very rigid cosmetic film may chip or lift. Look for a coating described for flexible wear and apply it in thin layers according to directions.
Count the removal cycle: Every coating eventually requires removal. Compare solvent contact, rubbing, peeling temptation, and reapplication frequency as part of the product—not as an afterthought.
Keep cosmetic claims in bounds: A ridge-filling base coat can alter appearance, and a wrap can temporarily shield a small split. Neither establishes why damage occurred or promises to restore the nail.
Who this is for
Match products to the damage you can observe
The same clear coat can behave differently on a peeling edge and a deeply ridged plate. These profiles identify cosmetic priorities while leaving unexplained or concerning changes outside the shopping decision.
Nails peeling in thin layers: Prioritize a fine file that does not catch lifted layers, a manageable shorter length, and a flexible coating with straightforward removal. Avoid repeated buffing intended to erase the peeling.
A small split at the free edge: A temporary wrap or patch may reduce snagging until the edge can be shortened. The reinforcement should lie flat and be removable without prying at the nail plate.
Flexible, break-prone nails: Look for thin, flexible films and controlled cuticle-line moisturizer rather than assuming the strongest hardener is automatically suitable. Removal frequency matters as much as initial shine.
Ridges or surface roughness: A ridge-filling base can create a smoother cosmetic canvas. Heavy buffing trades visible texture for material removal and should not be treated as repair.
Damage with pain or unexplained color change: Cosmetic coverage can obscure what needs observing. Persistent pain, swelling, bleeding, separation, or unexplained change warrants appropriately qualified assessment rather than another coating.
What to pay attention to
Characteristics that change protection and removal
For a damaged-looking nail, a specification matters when it changes abrasion, snagging, film movement, solvent exposure, or visibility of the underlying condition.
Protection without aggressive correction
Compare whether a product smooths edges, moves with the nail, and reduces snagging without demanding heavy abrasion.
Removal and reassessment
Include solvent, rubbing, wear pattern, and the ability to observe changes beneath cosmetic coverage.
Fine, uniform abrasive surface: An even glass file or fine natural-nail board should remove small amounts without a ragged cutting edge. Replace disposable files once the surface becomes uneven or clogged.
Coating flexibility and thickness: Thin films generally follow the nail more readily than a bulky layer. Product descriptions should explain intended wear and removal, not rely solely on words such as strong or repair.
Ridge-filling behavior: These base coats use a leveling film to soften the appearance of grooves. Judge them by smooth application and compatibility with the chosen color, not by an implication that ridges have been erased.
Wrap profile and adhesive area: For a small free-edge split, a low-profile patch is less likely to snag. Adhesive should stay on the intended area and have clear removal directions.
Remover format: A controlled bottle opening and pads that hold liquid can limit spills and repeated rewetting. The correct remover depends on the coating; scraping or peeling is not a substitute.
Oil or cream applicator: A pen, narrow nozzle, or small dropper helps place moisturizer at the cuticle line. The practical advantage is controlled use, not a promise that oil repairs nail-plate damage.
Avoid these traps
Damaged-nail fixes that can compound the problem
A dramatic before-and-after appearance can hide an aggressive process. Judge the whole wear-and-removal cycle and be suspicious of language that turns temporary cosmetic effects into medical conclusions.
Selecting the hardest coating available: More rigidity is not always helpful on a nail that flexes. A stiff film can chip at moving edges, so match film behavior to the nail rather than to the strongest claim.
Buffing until ridges disappear: Removing surface material can make texture look flatter immediately but does not explain the ridges. Prefer a leveling base coat when the goal is cosmetic smoothing.
Peeling off a worn coating: Lifting polish or reinforcement may pull at already peeling layers. Use the removal method stated for the exact product and allow enough time to dissolve or release it.
Using household glue on a split: An improvised adhesive lacks nail-specific application and removal guidance. If temporary reinforcement is appropriate, choose a product made for that purpose and keep it away from surrounding skin.
Covering an unexplained change indefinitely: Opaque lacquer can make monitoring harder. Remove cosmetic coverage periodically, and do not use polish to postpone assessment of persistent pain, swelling, separation, or unexplained discoloration.
Decision guidance
Choose by the least disruptive useful action
Start with the smallest action that prevents catching or improves cosmetic appearance. If the situation cannot be described as a routine surface or free-edge concern, buying another nail product may not be the right branch.
If layers are lifting at the tip: Shorten the leverage if practical, smooth only the free edge with a fine file, and choose a flexible clear coating whose removal does not require scraping.
If one small edge split keeps catching: Use a thin nail-specific wrap as temporary snag protection, following its placement and removal directions. Replace the patch rather than stacking uneven adhesive layers.
If grooves interfere with polish application: Choose a ridge-filling base coat beneath compatible conventional color. This changes the cosmetic surface; it should not be presented as correcting the source of the ridges.
If dryness around the nail is the main issue: A controlled oil or cream applicator targets the cuticle line with less mess. Select a texture you will reapply, while keeping expectations focused on surface conditioning.
If there is pain, bleeding, swelling, separation, or unexplained change: Pause filing, coating, and adhesive experiments. Seek appropriately qualified guidance, especially when the change persists or worsens; this guide cannot determine the cause.
Ownership & compatibility
Watch what happens between applications
Damaged-looking nails can change while a product is in use. Regular observation, restrained removal, and clean tools matter more than preserving a manicure past the point when it lifts or snags.
Inspect wear before adding another layer: Remove or refresh a coating according to directions when chips and lifted edges begin catching. Do not bury peeling film beneath repeated top-coat layers.
Limit avoidable removal cycles: Changing color frequently increases solvent contact and rubbing. A clear or neutral finish may reduce the urge to redo cosmetic coverage while the edge grows out.
Keep abrasives predictable: Rinse washable glass files as directed and protect them from impact. Replace boards that become bent, contaminated, clogged, or rough in isolated patches.
Record meaningful changes: Occasional photographs without polish can help you notice whether splitting, color, or separation is changing over time. They are observations, not a substitute for professional evaluation.
FAQ
Questions about cosmetic care for damaged-looking nails
The answers below clarify what coatings, files, moisturizers, and temporary reinforcement can reasonably do—and what they cannot determine.
Can a nail hardener repair peeling nails?
Should ridged nails be buffed smooth?
What type of file suits a splitting free edge?
Are nail wraps suitable for every crack?
Does cuticle oil strengthen a damaged nail?
Is acetone remover always too harsh for damaged nails?
Can polish hide damage while it grows out?
How often should a protective coating be reapplied?
When is damaged nail appearance not a shopping problem?
Bottom line
Choose protection you can remove gently
For damaged-looking nails, the best cosmetic purchase usually reduces catching, avoids unnecessary abrasion, and has a manageable removal process. Let the visible pattern guide the product role, but do not ask a coating, oil, or file to diagnose or heal it.
Control the edge: Shorter length and a fine file can reduce leverage and snagging.
Judge the full cycle: Coating flexibility matters, and so do solvent, rubbing, and reapplication.
Preserve the boundary: Persistent, painful, or unexplained changes belong with qualified assessment, not stronger cosmetic claims.
Reading Shortcuts
Go directly to the decision you need to make.
Decision Reminders
Keep the purchase tied to actual nail-care tasks.
- Describe the pattern: Peeling, splitting, and ridges need different responses.
- Reduce snagging: Shorter length and smooth edges reduce leverage.
- Prefer reversibility: Plan coating or wrap removal before application.
- Avoid heavy abrasion: Cosmetic leveling is not structural repair.
- Observe between coats: Do not hide changing conditions indefinitely.
- Escalate concerns: Painful or unexplained changes need qualified assessment.
Glossary Snippets
Useful language found on nail-care products.
When to Use a Top 10 Review
Use a ranked list after deciding which product role and format you need.
- Product role settled: You know whether you need a clipper, file, moisturizer, or coating.
- Handling preference settled: You know the control and format you can use comfortably.
- Routine length settled: You know how many steps you will repeat.
- Shortlist needed: You are ready to compare products serving the same job.
Already down to 2–3 options? A Comparison is usually the faster next step.
When to Use a Comparison
Compare finalists when small differences in application, removal, or upkeep will decide the purchase.
- Applicators differ: Brush, opening, or grip changes control.
- Formulas differ: Finish, drying, or removal changes the routine.
- Tools differ: Abrasive and edge design change how material is removed.
- Upkeep differs: Cleaning, storage, and replacement are not equivalent.
Still exploring? Start with a Top 10 to build a shortlist first.