
How to Choose Nail Tools for Tool Organization
Nail tools are objects to organize, not organizing devices. The useful purchase may be a fitted case, divided drawer, washable tray, or protected roll—not another manicure implement advertised as multipurpose.
Inventory clippers, files, brushes, pushers, nippers, and powered attachments by function and cleaning status. Then compare slot dimensions, blade protection, cleanability, airflow, visibility, portability, and whether sharp pieces remain inaccessible to children and accidental hands.
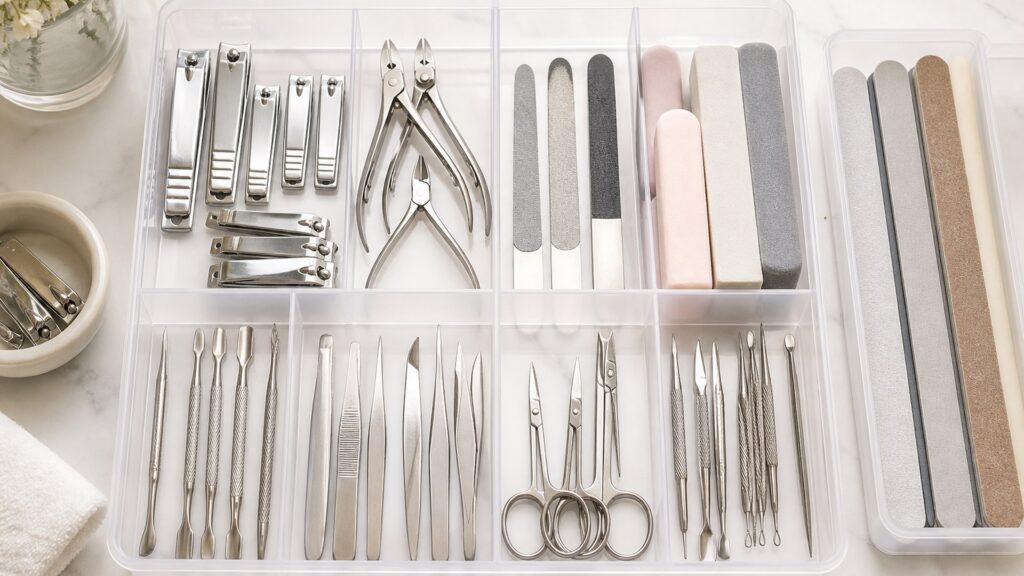
Organization framework
Sort by function, risk, and condition
A safe layout makes the correct tool easy to retrieve without exposing neighboring blades or mixing clean and used pieces.
Remove duplicates: Keep the best working example for each established task. Retire rusted, bent, dull, cracked, unidentified, or impossible-to-clean pieces before measuring storage.
Separate risk levels: Give cutters, nippers, and pointed implements fitted protection. Files and brushes need their own spaces so abrasive dust and bristles do not contact blades.
Create a cleaning route: Designate a washable used-tool tray, an open drying area, and a final clean-storage location. Never move damp equipment directly into an enclosed case.
Storage profiles
Choose organization for the actual collection
A basic personal kit, a polish hobby station, and a shared household require different capacity and labeling.
The compact-kit owner: A slim case with a few secure loops may be enough. Empty decorative slots are not a reason to buy more implements.
The manicure hobbyist: Use labeled compartments for files, detail tools, and accessories, plus a distinct washable surface for pieces awaiting cleaning.
The family bathroom: Personal tools should remain individually identified and separated. Lock or elevate sharp implements where children cannot reach them.
Organizer details
Measure slots, surfaces, and opening clearance
Capacity numbers mean little when handles do not fit or pointed tips remain exposed.
What loading reveals
Placing the real collection exposes handles that overlap, attachments without homes, wasted compartments, and any tool that cannot be identified at a glance.
What a full reset reveals
Cleaning, drying, and returning every piece shows whether the system supports hygiene or merely hides clutter behind a closed lid.
Retention: Invert and gently move the closed organizer. Tools should stay in assigned positions without blades striking metal, tips puncturing fabric, or files shedding onto brushes.
Cleanable materials: Smooth removable trays simplify nail-dust cleanup. Deep seams, absorbent linings, and fixed elastic can trap residue near supposedly clean implements.
Usable access: The lid must remain stable while hands remove one tool. Crowded loops should not require pulling across another sharp edge or touching contact surfaces.
Organization mistakes
Do not organize contamination into a prettier box
Appearance does not compensate for damp storage, damaged tools, or unclear clean-versus-used status.
Mixing used and clean: A clipper awaiting sanitation should not return beside prepared tools. Use a visible holding area that cannot be mistaken for final storage.
Leaving tips uncovered: Open cups and loose drawers expose sharp ends to fingers and allow collisions that bend precision implements. Use fitted protection.
Overfilling compartments: Tight stacking makes retrieval hazardous and conceals wear. Reduce the collection or expand storage rather than forcing another layer into the tray.
Organizer choice
Buy storage instead of redundant nail tools
The organizer should solve measured access and protection problems while fitting the existing collection.
Choose a fitted case: This suits a small personal set when loops match each handle and the case opens fully on the available surface.
Choose a divided drawer: A washable tray works for a larger stationary collection if sharp pieces receive individual covers and the drawer remains inaccessible to children.
Choose neither yet: Pause when damaged and duplicate tools still inflate the inventory. Edit first, then measure the collection that genuinely deserves storage.
System upkeep
Maintain the organizer as carefully as the tools
Dust, polish residue, and moisture accumulate around stored equipment unless the container joins the cleaning routine.
Empty and wipe: Remove all implements periodically, clean the organizer using its material directions, and inspect hidden corners, loops, and hinges.
Return only dry tools: Allow cleaned metal, brushes, and powered attachments to dry completely in open air before closing them into assigned positions.
Audit condition: Check jaw alignment, file wear, corrosion, loose tips, damaged cords, and protective caps while every piece is visible during the reset.
FAQ
Organizing nail tools safely
These answers focus on protected access, sanitation status, and realistic capacity.
What is the best way to organize nail tools?
Can nail tools be stored upright in an open cup?
How often should a nail-tool organizer be cleaned?
Final check
Make safe retrieval the measure of organization
A successful system reveals each tool, protects its working surface, and communicates whether it is ready for use.
Confirm identity: Every implement has a known function and visible assigned location; anonymous pieces and unnecessary duplicates are removed.
Confirm protection: Blades, abrasive faces, and pointed ends cannot contact hands, neighboring tools, children, or the organizer exterior.
Confirm status: Used items follow a separate cleaning and drying path before rejoining clean tools in a washed, fully dry container.
Reading Shortcuts
Move directly to the tool storage decision stage you need.
Decision Reminders
Keep the evidence for tool storage visible while comparing.
- Role: The nail tool serves the named task.
- Proof: The trial observes clean cuts, controlled filing, comfortable leverage, and intact surrounding skin.
- Care: Remove filings, disinfect compatible surfaces, and dry metal hinges before storage.
Glossary Snippets
Useful language for comparing nail tools.
When a Top 10 List Helps
Use rankings to discover credible nail tools, then screen them for tool storage.
- The format is undecided: A broad list reveals plausible forms and price levels.
- A shortlist is needed: Rankings narrow discovery but do not replace fit testing.
Have finalists already? Open the comparison section.
When a Direct Comparison Helps
Compare finalists after establishing their suitability for tool storage.
- Two candidates remain: Side-by-side evidence exposes meaningful tradeoffs.
- An upgrade is uncertain: Compare whether added cost corrects the original weakness.
Still exploring? Start with the Top 10 section.