
How to Choose Towing, Trailers & Hauling for Hitch Class and Payload Limits
A receiver-class label is not a tow rating for the complete vehicle. The exact tow vehicle, installed hitch, coupling parts, trailer, tires, brakes, passengers, cargo, and measured tongue or pin load must work together.
Build a rating worksheet before buying adapters or a heavier hitch. The first applicable vehicle, axle, tire, receiver, ball mount, ball, coupler, trailer, or hitch-transfer limit reached is the boundary that matters.
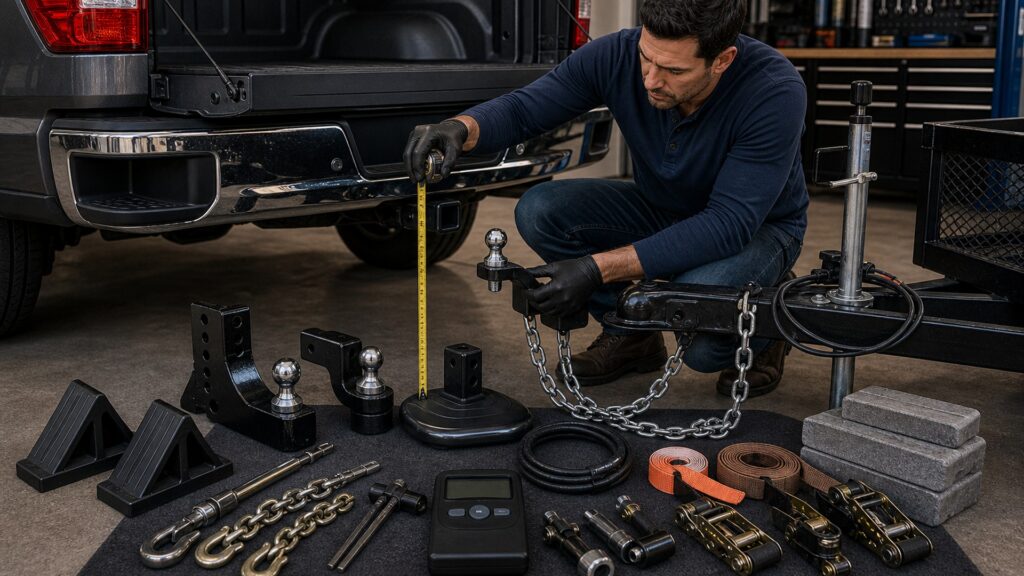
Buying framework
Treat hitch class as one label in a rating chain
Receiver class describes a hitch family, not permission to tow any load beneath a round number. Compatibility depends on the exact vehicle configuration and every installed component.
Identify the exact tow vehicle: Record VIN, model, drivetrain, wheelbase, axle ratio where relevant, tires, factory tow equipment, payload label, occupants, cargo, accessories, and upfits. Use the owner's manual and configuration-specific towing documents rather than a different trim's headline maximum.
Define the loaded trailer: Use the trailer as traveled: cargo, water, fuel, batteries, options, spare, racks, tools, and weight-distribution hardware where used. Record trailer GVWR, actual axle readings, and measured tongue or pin load after stable loading.
Read each component label: Check the receiver or bed hitch, ball mount, ball, pin, coupler, weight-distribution parts, safety chains, fasteners, trailer frame, axles, tires, and wheels. Do not let a higher receiver-class label overwrite a lower component rating.
Place hitch transfer in payload: People, onboard cargo, accessories, installed hitch equipment, and downward trailer transfer load the tow vehicle. Compare actual vehicle and axle weights with payload, GVWR, GAWR, and tire limits instead of counting trailer rating alone.
Verify the complete setup: Set height and attitude under manufacturer guidance, complete required controller and brake checks, then weigh representative travel conditions. Revisit the worksheet after cargo shifts, hitch changes, accessories, passengers, or another trailer.
Who this is for
The coupling architecture changes the math
A light utility trailer, travel trailer, equipment trailer, and fifth-wheel place different loads and hardware on the tow vehicle.
Light utility users: Small trailers still require the correct ball, coupler engagement, chains, connector, lighting, tire capacity, cargo restraint, and vehicle approval. Avoid selecting a ball mount from receiver size alone; rise, drop, shank, and tongue-load ratings also matter.
Travel-trailer owners: Loaded water, propane, batteries, gear, options, and hitch hardware can consume payload quickly. Verify whether weight distribution is required, allowed, or prohibited for the vehicle and receiver, and follow the hitch maker's setup and lubrication instructions.
Equipment and car haulers: Dense or movable cargo changes tongue load and axle distribution. Use actual loaded scale readings, approved equipment attachment points, and a hitch system rated for the operating mode; never shift cargo rearward merely to reduce measured tongue weight.
Fifth-wheel and gooseneck buyers: Pin or vertical load enters the truck bed and can dominate payload and rear-axle capacity. Check bed length, cab clearance, hitch mounting, structure, height, turning geometry, braking, and the exact truck's ratings.
Multi-trailer households: Different coupler sizes, loaded weights, brake systems, connectors, and heights invite setup mistakes. Label compatible components, keep load sheets by trailer, and avoid adapters or adjustable hardware whose lowest rating is unclear.
What to pay attention to
The labels and measurements that govern compatibility
Record each rating with its source, unit, operating mode, and exact component.
Vehicle & Transfer
Exact configuration, payload, GVWR, GAWR, GCWR, tires, passengers, cargo, and hitch transfer.
Hitch & Trailer
Receiver mode, ball mount, ball, coupler, distribution hardware, brakes, trailer ratings, and scale verification.
Receiver class and operating mode: A receiver may list separate weight-carrying and weight-distributing limits. Confirm vehicle approval for the mode, the receiver label, required hardware, and whether a class designation is being used as a category rather than an exact rating.
Payload, GVWR, and rear GAWR: The payload label is a starting point for the as-built vehicle. Occupants, cargo, accessories, upfits, hitch hardware, and coupling transfer affect actual vehicle and axle weights; a scale reveals whether a local limit is reached.
GCWR and trailer rating: Compare loaded combined weight with GCWR and loaded trailer mass with the vehicle's configuration-specific trailer limit. These checks remain separate from vehicle GVWR, axles, tires, hitch parts, and trailer ratings.
Tongue or pin load: Measure the actual downward transfer in the loaded configuration and follow vehicle and trailer guidance for its required range. Universal percentages are screening estimates, not permission to ignore product instructions or scale results.
Ball mount, ball, and coupler: Verify ball diameter, ball rating, shank diameter and length, nut and torque procedure, mount rise or drop, mount rating, pin, receiver engagement, and coupler adjustment. Every interface must suit the same load and geometry.
Weight-distribution system: Confirm both vehicle and receiver allow it, then match loaded tongue weight, trailer-frame geometry, brackets, spring bars, sway-control features, and setup procedure. Weight distribution does not increase vehicle ratings or repair overloaded axles by declaration.
Tires, brakes, and verification: Check tow-vehicle and trailer tire capacities and inflation labels, trailer brakes, controller integration, breakaway system, connector circuits, and required inspections. Weigh the final travel configuration and retain the readings with the component worksheet.
Avoid these traps
Hitch labels that create false confidence
Most errors come from comparing values that measure different parts of the combination.
Shopping by class number: Two hitches in the same class can have different exact ratings, modes, vehicle applications, and installation requirements. Use the product label and approved application rather than treating the class name as a guaranteed capacity.
Using the vehicle maximum from an advertisement: The maximum may require a particular body, drivetrain, axle ratio, cooling package, tires, hitch, or passenger assumption. Identify the exact VIN configuration and read the relevant labels and towing guide.
Ignoring hitch hardware in payload: Receivers, fifth-wheel assemblies, ball mounts, distribution hardware, occupants, and cargo all add vehicle load before tongue or pin transfer is counted. Weigh the actual setup rather than preserving payload only on paper.
Assuming weight distribution creates capacity: An approved system can change load distribution and handling, but it does not raise GVWR, GAWR, GCWR, tire, receiver, trailer, or component ratings. Setup must remain within every limit and the maker's procedure.
Using adapters without a complete rating path: Reducers, extenders, raised mounts, multi-ball assemblies, and adjustable components can change leverage, fit, clearance, or ratings. Verify the exact combination is permitted and identify the lowest rating before use.
Decision guidance
Select the coupling after the rating worksheet
The correct hitch is the one the exact vehicle approves and the loaded trailer can use without any component or axle exceeding its limit.
If the trailer is light and stable: A vehicle-approved weight-carrying receiver and correctly sized ball mount may be sufficient. Still verify tongue load, ball and coupler fit, chain attachment, connector, lighting, cargo restraint, tire condition, and any brake requirements.
If conventional tongue load is substantial: Check whether the vehicle and receiver require or allow weight distribution. Select the system from measured loaded tongue weight and trailer-frame compatibility, then set and verify it under the manufacturer procedures.
If bed-mounted towing is required: Evaluate fifth-wheel or gooseneck architecture using pin or vertical load, payload, rear GAWR, bed structure, mounting system, cab and tailgate clearance, trailer height, turning geometry, and hitch-specific maintenance.
If payload fails before trailer rating: Reduce people or onboard cargo, remove unnecessary installed weight, choose a compatible lighter configuration, lower actual trailer load within stable-loading guidance, or use a suitable tow vehicle. A higher-class receiver cannot create payload.
If one vehicle pulls multiple trailers: Build a separate verified sheet for each trailer and loading state. Use clearly labeled, correctly rated coupling hardware and brake settings, and recheck height, chains, connector, breakaway cable, tires, and restraint at every changeover.
Ownership & compatibility
Preserve the verified configuration
Corrosion, loosened fasteners, worn couplers, changed tires, new accessories, and cargo drift can invalidate a once-correct setup.
Inspect the complete coupling: Check receiver and mount structure, fasteners, pins, ball, coupler jaws or latch, bed hitch, chains, breakaway cable, wiring, spring bars, brackets, lubrication points, and abnormal movement under product guidance.
Keep labels and records readable: Save vehicle and trailer manuals, towing guide pages, installation records, part numbers, ratings, torque procedures, scale tickets, hitch settings, and photographs. Replace damaged labels or obtain manufacturer documentation before identity becomes uncertain.
Reweigh after changes: New passengers, cargo, toolboxes, racks, tires, suspension changes, truck caps, batteries, water, attachments, or trailer storage can alter vehicle, axle, combined, and hitch loads. Update the worksheet rather than reusing old margins.
Service brakes and tires as a system: Maintain tow-vehicle and trailer tires, wheels, brakes, controller, hubs, and breakaway equipment on their specified schedules. A compatible hitch does not compensate for degraded stopping or tire capacity.
FAQ
Hitch class and payload FAQ
Answers about receiver classes, payload, tongue load, weight distribution, and scale checks.
Does a Class IV receiver mean I can tow its maximum?
Where do I find my vehicle's payload capacity?
Does tongue weight count against vehicle payload?
Can weight distribution increase towing capacity?
How do I choose ball-mount rise or drop?
Can I use a hitch extender or reducer?
What scale readings are useful for towing?
Is trailer GVWR the same as the vehicle's tow rating?
When should I recalculate hitch compatibility?
Bottom line
The lowest rating controls
Hitch class is a useful category label, but safe compatibility comes from matching exact components to the exact loaded vehicle and trailer.
Identify the configuration: Use VIN-specific documents, vehicle labels, and installed-component labels.
Count payload transfer: Include people, cargo, accessories, hitch hardware, and measured tongue or pin load.
Match every interface: Verify receiver, mount, ball, coupler, distribution parts, brakes, tires, and trailer.
Confirm with measurements: Weigh the travel configuration and repeat the check after material changes.
Reading Shortcuts
Start with machine, material, and site facts.
Decision Reminders
Checks to complete before committing.
- Use loaded values: Catalog empty weight is not the working combination.
- Check every limit: Receiver class never overrides the exact vehicle, coupling hardware, or transferred-load limits.
- Control the work zone: Keep bystanders clear and use trained spotters where required.
- Protect the load path: Use rated anchors, tiedowns, connectors, and approved attachment points.
- Plan the unload: Arrival surface and sequence affect safety.
- Verify requirements: Road, farm, commercial, and jobsite rules vary.
Glossary Snippets
Terms used in this decision.
When to Use a Top 10 Review
Use rankings after the requirements and budget are fixed.
- The mission is documented: Filter candidates against real trips and loads.
- Nonnegotiables are measured: Reject units that fail fit or capacity.
- Ownership costs are estimated: Rank value after recurring costs are visible.
- Evidence is comparable: Use the same configuration and scenario.
Already down to 2–3 options? A Comparison is usually faster.
When to Use a Comparison
Compare finalists under one written scenario.
- Compare fit: Use identical passenger, cargo, route, or load assumptions.
- Compare capability: Read exact labels and configuration data.
- Compare total cost: Include acquisition, use, service, and exit.
- Compare confidence: Review contracts, inspections, safety data, and support.
Still building a shortlist? Start with a Top 10.