
How to Choose Training Equipment for Agility Training
Agility equipment is often mislabeled. A preplanned change-of-direction drill uses known cuts and routes; reactive agility adds a cue, opponent, ball, or decision. Cones, ladders, lights, and timers can organize either style only when the coach knows which quality is being trained and how the surface behaves.
Use this checklist: 1. choose preplanned change-of-direction or reactive decision work; 2. measure approach, cut, and deceleration zones; 3. verify court, turf, grass, or mat surface; 4. select markers and timing method; 5. add cues only when perception matters; 6. protect traffic and recovery; 7. inspect, clean, and store every piece.
Buying framework
Separate route drills from reaction drills
Agility purchases should reveal whether the athlete knows the path or must respond to information.
1. Define the drill type: Write preplanned change-of-direction for known routes, or reactive agility for a visual signal, opponent, ball movement, or coach call. The equipment list changes immediately.
2. Measure approach and exit zones: Mark acceleration, braking, cut angle, exit path, and recovery space. Agility tools must leave room for deceleration, not merely the cone pattern.
3. Match the surface: Court, turf, grass, track, mats, and rubber floors differ in traction, sliding, weather, and tape rules. Footwear and facility permission belong in the buying decision.
4. Choose measurement or cueing: Timing gates suit standardized drills; lights, colors, cards, balls, or coach calls suit perception decisions. Combining both requires a protocol, not impulse.
5. Rehearse traffic flow: Groups need waiting lines, return routes, cue stations, and equipment storage away from cuts. A layout that works for one athlete can fail during team use.
Who this is for
Compare agility equipment families
Each family supports routes, cues, timing, or surface management with tradeoffs.
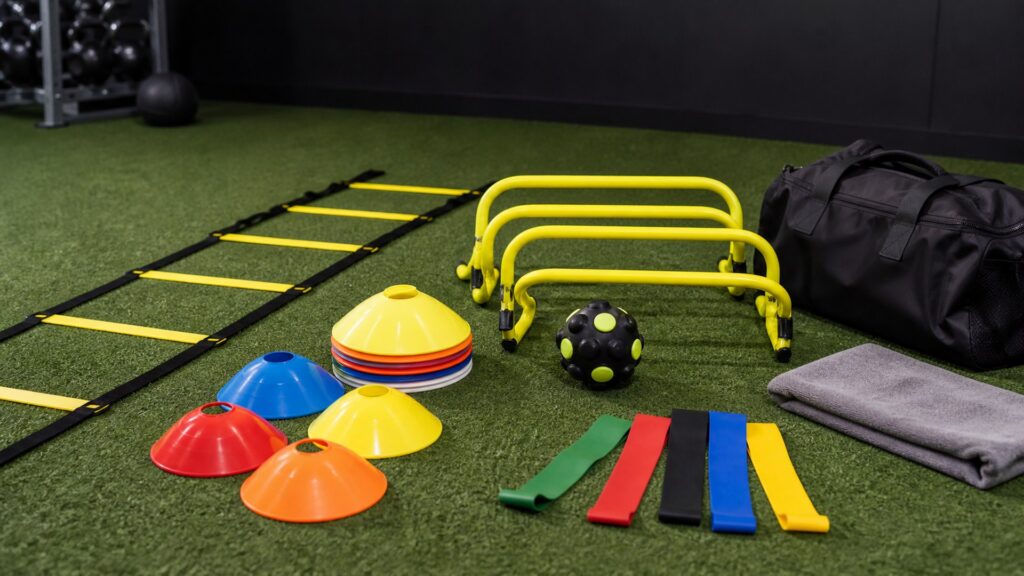
Cones and flat markers - best suited for planned layouts: Compare color, visibility, weight, softness, stackability, and surface grip. Drawbacks include movement in wind, tripping, inaccurate spacing, and overuse of memorized patterns.
Timing gates and stopwatches - best suited for standardized tests: Check start method, beam height, split layout, staff needs, batteries, and data recording. Timed routes can miss decision quality and become meaningless when setup changes.
Reactive lights or cue cards - best suited for perception decisions: Review visibility, randomization, battery life, mounting, app dependence, and athlete sight lines. Drawbacks include cost, distraction, lag, and poor transfer when cues are artificial.
Balls, partner tools, and sport objects - best suited for game-like cues: Inspect size, grip, bounce, durability, storage, and rules for the sport context. These tools demand more coaching and can create chaotic traffic in small spaces.
Ladders, bands, and mats - best suited for foot placement or warm-up constraints: Compare spacing, flatness, traction, resistance, anchor needs, and cleaning. Ladders do not automatically create agility, and bands can pull movement off task.
What to pay attention to
Translate agility specs into drill control
Useful details explain route accuracy, cue quality, traction, timing, or reset work.
Route geometry: Record cone distances, cut angles, entry speed, exit direction, and stopping area. A drill drawn online may not fit the athlete, surface, or available deceleration space.
Reactive cue design: Decide what the athlete sees or hears, when the cue appears, and what decision follows. Lights, colors, balls, and coach calls train different recognition problems.
Timing standardization: NSCA material distinguishes controlled speed and agility assessments from unpredictable open-skill settings. Use timing gates for repeatable routes, and avoid treating reactive chaos as the same test.
Surface and footwear: Check traction, sliding risk, seams, wet spots, cleat rules, court protection, and mat movement. Equipment cannot fix an unsuitable surface or unauthorized footwear.
Marker visibility and softness: Cones and markers should be visible without becoming dangerous obstacles. Low-profile discs reduce trip height but can slide, disappear in grass, or move during contact.
Group management: Measure waiting lanes, cue positions, return paths, water, and storage. Agility work often fails when athletes cross the active route to retrieve equipment.
Service and batteries: Reactive systems need charging, apps, mounts, cases, and replacement parts. Simple markers need counts, colors, cleaning, and a way to keep sets together.
Avoid these traps
Avoid agility-equipment misconceptions
The wrong kit confuses foot speed, memorized routes, or novelty cues with sport-relevant decisions.
Calling every ladder drill agility: A ladder may cue rhythm or warm-up foot placement, but agility includes changing direction in response to a task. Buy it only for the role it actually serves.
Timing a different route each day: Changing cone distance, start stance, surface, or finish line makes comparisons weak. Standardize the setup when measurement is the reason for buying equipment.
Adding lights without decisions: A flashing target can become a novelty if the athlete only runs to a color. Define the perception, choice, and movement response before buying reactive devices.
Ignoring deceleration demands: Cuts require braking and exit space. Crowded rooms, slippery floors, and hard obstacles can make an agility layout unsuitable no matter how visible the markers are.
Letting equipment dictate sport transfer: Cones and cues may support practice, but transfer depends on sport skill, coaching, opponent behavior, readiness, and schedule. Do not promise game outcomes from a purchase.
Decision guidance
Build one agility course with a cue plan
A rehearsal should prove whether the kit trains routes, reactions, or both.
Write the drill label: Name the drill as preplanned change-of-direction or reactive agility. Add sport, position, surface, footwear, start, route, cue, finish, and recovery notes.
Measure the route: Place cones, lines, gates, mats, or markers with tape or confirmed court markings. Photograph the setup and mark where athletes wait and return.
Test the cue: For reactive work, rehearse the card, light, ball, partner, or coach signal. Check sight lines, timing, randomization, and whether the athlete has a real decision.
Run the reset: Collect balls, replace markers, charge devices, clear sweat, and move athletes through the line. If reset crosses the active path, redesign the layout.
Decide what to record: Choose time, route completion, decision note, foot placement, or coaching observation. Avoid collecting data that nobody will review or can reproduce.
Ownership & compatibility
Maintain agility layouts and cue tools
Repeatable spacing and working cues matter more than a large pile of markers.
Keep layout records: Save distances, angles, photos, surface, footwear, cue rules, and timing method. Standardized agility tests need the same setup when compared later.
Inspect marker condition: Check cones, discs, ladders, mats, bands, and lines for cracks, curling, slick spots, or lost visibility. Replace pieces that move unpredictably or create trip points.
Manage electronics deliberately: Charge reactive lights, timing gates, remotes, phones, tablets, and speakers. Keep mounts and cases together so setup does not steal practice time.
Clean surface-contact pieces: Remove turf, dust, sweat, moisture, and adhesive residue from markers, mats, ladders, and balls. Dry equipment before it is stacked or zipped closed.
Reassess drill relevance: When sport phase, athlete age, position, or skill goal changes, revisit the equipment list. Remove cues that no longer create useful decisions.
FAQ
Agility training equipment FAQ
Nine answers distinguish planned routes from reactive decision drills.
What equipment is needed for agility training?
Is a ladder agility equipment?
What is preplanned change-of-direction training?
What makes agility reactive?
Are timing gates useful for agility?
Which surface is best for agility drills?
Can cones improve sport performance?
How should reactive lights be compared?
When should agility equipment be replaced?
Bottom line
Approve agility gear by drill type
The final choice should make routes, cues, surfaces, and resets easier to control.
Drill proof: Preplanned route or reactive decision is named.
Space proof: Approach, cut, exit, and waiting zones fit.
Cue proof: Signals are visible, meaningful, and documented.
Reset proof: Markers, electronics, balls, and mats can be restored.
Agility Equipment Route
Use these checks before comparing agility training product rankings.
Route and Reaction Boundaries
Four limits to keep visible when buying agility training equipment.
- Words matter: Change-of-direction and reactive drills differ.
- Surface leads: Traction and rules shape the kit.
- Cues need meaning: Lights alone do not create decisions.
- Layouts need records: Photos preserve spacing.
Agility Training Terms
Terms used in this agility training guide.
When an Agility Ranking Helps
Ranked lists help only after the agility training task map is complete.
- Best suited for: For agility training, filter each family by task, athlete, surface, space, coaching plan, and current constraints.
- Known drawback: For agility training, name the compromise in setup time, skill demand, storage, wear, surface needs, or transfer limits.
Research basis: agility equipment advice uses NSCA assessment guidance, manufacturer instructions, facility rules, and coaching context.
Compare Agility Setups
Compare agility training finalists as complete working setups, not isolated objects.
- Evidence check: For agility training, use maker specifications, official facility rules, and qualified coaching input when available; do not invent test results.
- Ownership check: Confirm agility training returns, parts, cleaning, inspection, storage, and documented replacement paths before buying.
This guide does not claim hands-on testing, certifications, or guaranteed sport transfer from cones, ladders, lights, gates, or bands.