
Ignition Components Buying Guide for Ignition Components Fitment and Compatibility
Ignition compatibility cannot be proven from a similar spark-plug shell or a coil connector that happens to latch. The part must match the exact engine's combustion interface, thermal requirement, primary control, high-voltage insulation, mounting, and service revision.
Resolve VIN, engine code, build date, and original numbers first. Then compare plug reach and seat, heat range and gap, coil pinout and dwell, boot or wire routing, and any supersession instructions before opening packaging or disturbing diagnostic evidence.
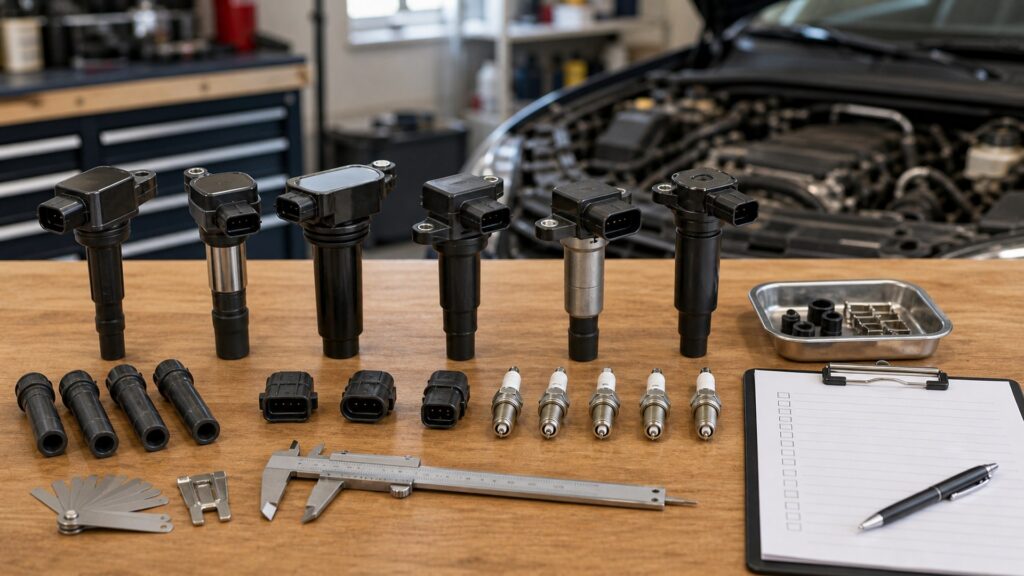
Buying framework
Prove every ignition interface before ordering
Ignition compatibility crosses the combustion chamber, high-voltage insulation, primary control circuit, connectors, mounting, and service calibration. A similar plug or coil can attach physically and still be wrong for the engine.
Decode the exact engine: Use VIN, engine code, production date, emissions or fuel configuration, cylinder numbering, and current service information. Preserve the original plug, coil, module, wire, and connector numbers until every catalog breakpoint is resolved.
Match spark-plug geometry as a set: Confirm thread diameter and pitch, reach, gasket or taper seat, hex, projection, resistor, heat range, electrode design, and gap instruction together. One matching dimension cannot compensate for a wrong chamber or heat-transfer interface.
Match coil electronics and packaging: Verify pinout, control and dwell strategy, internal driver arrangement, grounds, case profile, mounting, tower or boot length, spring, seal, and cylinder location. A connector that latches does not prove electrical compatibility.
Trace boots, wires, and modules: Check terminal style, conductor and suppression requirement, resistance where specified, length, routing, heat shields, clips, module integration, and firing order. Universal-looking leads can create crossfire, poor contact, or interference.
Plan installation and functional verification: Gather required plugs, boots, seals, pigtails, access gaskets, torque and gap instructions, scan data, relearns, and road-test conditions. Do not open packaging until the original interfaces and return path are documented.
Who this is for
Ignition architecture changes what compatibility means
Coil-on-plug, remote-coil, turbocharged, midyear-change, and superseded systems require different proof beyond year-make-model lookup.
Coil-on-plug engines: Match coil body, connector, pinout, mounting, boot depth, spring contact, well seal, and plug terminal. Inspect oil or water entry because contamination can mimic incompatibility or damage the replacement.
Remote coils and plug-wire systems: Confirm tower arrangement, firing order, wire length, terminal engagement, conductor specification, resistance guidance, routing, separators, and heat shields. A physically connected wire can still be routed or electrically wrong.
Turbocharged and high-load engines: Use the approved plug number, heat range, reach, seat, projection, gap, and coil design for the exact calibration. Do not substitute colder plugs or claimed high-output coils solely from generic performance advice.
Vehicles with production breakpoints: Build date, plant, engine serial, connector keying, coil revision, and service bulletins can split one model year. Compare the removed component with catalog notes rather than choosing the most common listing.
Engines using superseded components: Trace the old number to the current replacement and note any companion plug, boot, harness, module, quantity, or programming change. A valid supersession should explain what changed and how installation is completed.
What to pay attention to
Compatibility fields that control fit and function
The right ignition part must satisfy engine identity, plug geometry, thermal behavior, coil control, physical mounting, secondary insulation, and current service revisions.
Combustion compatibility
Thread, reach, seat, projection, heat range, electrodes, resistor, gap, and torque.
Electrical compatibility
Pinout, control, dwell, grounds, coil body, boot, wire, module, routing, and diagnostics.
VIN, engine code, and build date: Use all three when available because trim and model year may span several cylinder heads, coils, harnesses, or calibrations. Record the source that resolves any catalog overlap.
Spark-plug thread, reach, and seat: Match thread diameter and pitch, threaded length, gasket or taper seat, shell, and hex. Wrong reach can expose threads, change heat transfer, leak combustion, or create piston and valve clearance risk.
Heat range, projection, and electrodes: Use the engine-approved heat range, projected configuration, resistor, center and ground electrode design, and material. Heat range controls temperature behavior; it is not a ranking of spark strength.
Gap and installation instruction: Confirm preset gap, permitted adjustment, fine-wire handling, thread condition, torque or angle, head material, and seat style. A correct part number can still fail after unsupported regapping or tightening.
Coil control and connector: Verify connector key, terminal count, pinout, power, ground, trigger, dwell or module compatibility, and diagnostic behavior. Do not rely on nominal voltage or a connector shell alone.
Boot, wire, and mounting interfaces: Compare boot depth and angle, spring, terminal, well seal, wire length and routing, tower, brackets, bolts, grounds, heat shields, and clearance. Include every item needed to restore insulation and retention.
Supersessions and service information: Check current catalogs and bulletins for revised numbers, known water or oil entry, connector repairs, torque changes, calibration, and replacement strategy. Keep the old number in the service record.
Avoid these traps
Fitment shortcuts that create new ignition faults
Ignition errors often come from matching appearance, one catalog, one plug dimension, or one connector while ignoring the rest of the engine interface.
Buying by model year alone: A model year can contain several engines, production splits, connectors, and plug specifications. Use VIN, engine code, build date, original number, and footnotes before choosing.
Treating thread match as plug compatibility: Thread diameter says nothing about firing-end position, sealing style, thermal behavior, resistance, electrode layout, preset gap, or chamber clearance. Verify the complete approved plug specification.
Assuming any latching coil connector works: Identical shells can use different pinouts, control electronics, dwell, grounds, or module arrangements. Confirm circuit function and current application data before powering the replacement.
Mixing wire lengths and routing: Incorrect length, terminals, resistance, firing order, or clips can cause poor contact, heat damage, crossfire, and interference. Use the specified routed set and separators.
Forcing a supersession without companion changes: Some revised coils, plugs, boots, harnesses, or modules require related parts or updated procedures. Read the supersession note rather than installing only the most visible item.
Decision guidance
Resolve the specific compatibility conflict
Choose only when catalog data, original parts, measured interfaces, and service information point to the same ignition configuration.
If two plugs share most dimensions: Check the seat and threaded length first, then verify tip position, thermal specification, suppression, electrode construction, gap instruction, and formal approval. Reject any undocumented difference at the combustion boundary.
If two coils use the same connector: Verify pinout, control, dwell, grounds, body, mounting, boot, spring, seal, and module strategy. Physical connection is only one compatibility checkpoint.
If the build date sits near a breakpoint: Use the VIN, engine serial, original number, connector, and installed dimensions. Contact an accountable supplier when catalog sources remain ambiguous rather than guessing across the split.
If the original part is discontinued: Follow the documented supersession chain and include required companion pieces, wiring changes, or programming. Preserve packaging and return rights until the updated assembly is verified.
If the removed part does not match the catalog: Investigate previous repairs, engine swaps, regional equipment, and service revisions. Treat the discrepancy as evidence; do not automatically repeat an old mistake or overwrite valid updated hardware.
Ownership & compatibility
Keep an ignition configuration record
Exact numbers and cylinder positions make future fitment and misfire diagnosis far faster.
Archive original and replacement numbers: Record VIN, engine, build date, plug, coil, boot, wire, connector, module, and supersession numbers with packaging, seller, receipt, date, and mileage.
Label cylinder positions: Keep removed plugs, coils, boots, and wires identified until verification. Photograph deposits, tracking, oil, water, terminals, connectors, and mounting before cleaning.
Document installation controls: Save gap instruction, torque source, thread condition, access gaskets, pigtail repair, routing, grounds, codes, counters, relearns, and service bulletins used.
Verify the exact complaint: Recheck cold and hot start, idle, safe load, warning lamps, pending codes, and misfire counters under the original conditions. Record any remaining non-ignition evidence.
FAQ
Ignition fitment and compatibility FAQ
Answers about model-year listings, plug reach, heat range, coil connectors, wires, supersessions, and verification.
Can I choose ignition parts by year, make, and model?
Does the same spark-plug thread mean the plug fits?
Can two coils with matching connectors be interchangeable?
Why does spark-plug reach matter?
Is heat range comparable across every plug brand?
Do spark-plug wires need exact lengths?
What is a production breakpoint?
How should a superseded ignition part be verified?
When should fitment uncertainty go to a professional?
Bottom line
Compatibility means every ignition interface agrees
Use exact engine identity, complete plug geometry, correct coil electronics, secondary insulation, current supersessions, and post-installation evidence.
Identify the engine: Use VIN, code, build date, original numbers, and cylinder architecture.
Match combustion geometry: Confirm thread, reach, seat, projection, heat range, resistor, gap, and torque.
Match electrical architecture: Verify pinout, control, dwell, grounds, boots, wires, modules, and mounting.
Prove the supersession: Follow current notes, install companion parts, and retest the original condition.
Reading Shortcuts
Confirm application and condition first.
Decision Reminders
Checks to complete before committing.
- Confirm the exact application: Cross-check vehicle, engine, housing, and original part.
- Preserve removed-part clues: Contamination and damage can identify another fault.
- Keep the work clean: Keep downstream openings protected.
- Follow the procedure: Respect pressure, fluids, torque, priming, and resets.
- Inspect interfaces: Seals, caps, connectors, threads, and fittings must agree.
- Verify before release: Check leaks, warnings, starting, idle, and road behavior.
Glossary Snippets
Terms used in this decision.
When to Use a Top 10 Review
Use rankings after application and service scope are documented.
- Application confirmed: Filter with exact engine and interface evidence.
- Duty identified: Compare parts for the real interval and environment.
- Evidence published: Rank construction, testing, traceability, and support.
- Job scope complete: Include seals, fluids, tools, and verification.
Already down to 2–3 options? A Comparison is usually faster.
When to Use a Comparison
Compare finalists for the same verified application.
- Interfaces: Match dimensions, seals, valves, fittings, and connectors.
- Performance evidence: Compare documented efficiency, capacity, and service claims.
- Included content: List every seal, cap, sensor, boot, and fitting.
- Installed outcome: Price fluids, labor, priming, disposal, and downtime.
Still building a shortlist? Start with a Top 10.