
Ignition Components Buying Guide: How to Choose the Right One
Ignition parts should be chosen after the misfire is diagnosed, not from a trouble-code number alone. Spark plugs, coils, boots, wires, connectors, modules, fuel delivery, compression, wiring, and contamination can produce overlapping symptoms.
Capture the conditions and diagnostic data, identify the exact engine and ignition architecture, test the suspected circuit safely, and match every plug and coil interface. Finish with clean installation, specified gap handling and torque, and verification under the original operating conditions.
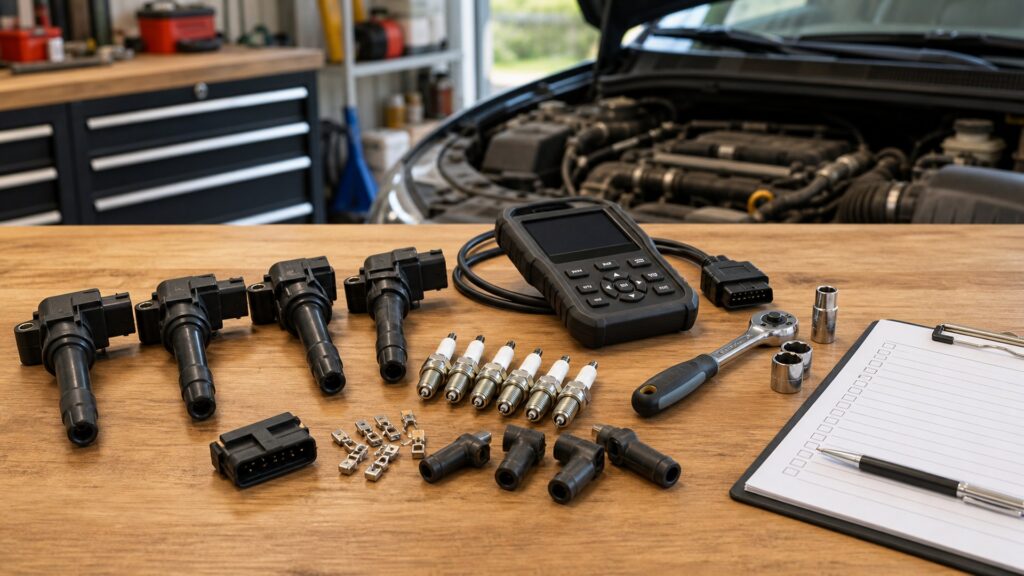
Buying framework
Diagnose the misfire before building the parts list
Ignition components should follow evidence from the exact cylinder and engine. A misfire code identifies a symptom location or pattern, not whether the plug, coil, boot, wire, connector, fuel, compression, or control system failed.
Define the complaint precisely: Record cold or hot start, idle, load, speed, moisture, temperature, fuel event, warning behavior, flashing lamp, noise, smell, and recent service. Avoid driving a severe active misfire that can damage the catalyst or reduce safe performance.
Retrieve complete diagnostic data: Read codes, freeze-frame, misfire counters, fuel trims, battery voltage, service bulletins, and relevant waveforms or measurements. Inspect for oil or coolant in plug wells, wiring damage, vacuum leaks, fuel issues, and mechanical condition.
Identify the exact ignition system: Confirm VIN, engine code, cylinder numbering, plug number and revision, coil or pack design, boot and wire routing, connector, module, ground, suppression requirements, and whether programming or relearn applies.
Test before replacing: Use approved swap, resistance, spark, current-ramp, scope, insulation, compression, leak-down, injector, or circuit tests as appropriate. Do not create open-spark, shock, fire, or catalyst risks with improvised testing.
Plan installation and verification: Gather exact plugs, coils, boots, seals, connectors, dielectric or anti-seize guidance, gap rules, torque, clean-well method, battery support, code clearing, road test, and post-repair misfire confirmation.
Who this is for
Ignition architecture changes the repair path
Coil-on-plug, waste-spark packs, plug wires, boosted engines, and oil-contaminated wells emphasize different interfaces and failure patterns.
Coil-on-plug engines: Inspect plug wells, boots, springs, coil cases, connector locks, harness strain, grounds, oil or water intrusion, and cylinder-specific data. A coil swap can help only when performed under an approved method and interpreted carefully.
Coil-pack and wire systems: Match tower arrangement, firing order, wire resistance and length, routing, heat shields, terminals, boots, clips, and pack mounting or grounds. Crossed or poorly routed wires can create immediate or load-dependent misfire.
Turbocharged or high-load engines: Correct plug number, reach, seat, heat range, gap, torque, coil energy, fuel quality, boost control, and calibration matter. Do not close gaps or install colder plugs solely from forum advice on an otherwise stock vehicle.
High-mileage engines: Oil consumption, compression variation, deposits, plug-well seals, brittle connectors, worn boots, charging voltage, and injector condition can mimic or contribute to ignition faults. Preserve plug position and appearance as diagnostic evidence.
Moisture-sensitive complaints: Inspect cracked coil cases, carbon tracking, boots, wires, plug wells, cowl or washer leaks, connector seals, and routing. Spraying water or chemicals on energized ignition is unsafe and can create misleading faults.
What to pay attention to
Ignition interfaces that must match exactly
Spark-plug geometry, thermal behavior, coil electronics, secondary insulation, and installation procedure determine whether a part belongs on the engine.
Combustion Interface
Plug number, thread, reach, seat, heat range, electrodes, resistor, gap, torque, and plug-well condition.
Electrical Interface
Coil control, connector, dwell, grounds, boot, wire resistance, routing, insulation, module, diagnostics, and verification.
Spark-plug thread, reach, and seat: Match thread diameter and pitch, reach, gasket or taper seat, hex, projected tip, shell and insulator clearance, indexing requirement if specified, and piston or valve clearance. Similar plugs can cause leakage, overheating, or mechanical contact.
Heat range and electrode design: Use the exact approved heat range, center and ground electrode material, resistor specification, and projected configuration. Heat range concerns heat transfer, not spark intensity, and an unsupported change can foul or overheat the plug.
Gap and handling: Follow vehicle and plug instructions for preset gap, inspection, permitted adjustment, and tool contact. Fine-wire precious-metal electrodes can be damaged by prying or abrasive cleaning; forced adjustment can alter alignment.
Coil electrical and mechanical interface: Match primary connector and keying, pinout, dwell or control compatibility, mounting, ground path, case, boot length, spring, seal, tower, and module integration. A connector that clips does not prove control compatibility.
Boots, wires, and suppression: Compare length, resistance specification, conductor design, terminal, boot angle and depth, heat shielding, routing, clips, and electromagnetic suppression. Keep secondary leads away from exhaust and from layouts that promote crossfire.
Installation torque and thread condition: Clean wells before removal, start plugs by hand with the approved socket, use the exact torque or angle for head material and seat, and follow lubricant guidance. Over- or under-torque can impair sealing and heat transfer or damage threads and insulators.
Verification data: Confirm codes, misfire counters, idle and load behavior, fuel trims, coil or circuit measurements, warning lamp, starting, and any relearn. A quiet idle alone does not prove the fault is corrected across the original conditions.
Avoid these traps
Ignition shortcuts that waste parts or damage the engine
Random coils and universal plug substitutions can hide fuel, mechanical, wiring, sealing, or calibration faults while adding new variables.
Replacing the coil named by a misfire code: A cylinder code can arise from plug, coil, injector, compression, vacuum, wiring, control, or contamination problems. Test and preserve freeze-frame evidence before deciding the component.
Changing heat range for more power: Heat range is selected to keep the firing end within a safe thermal window. Use the vehicle-approved plug unless a documented engine calibration and plug program specifies otherwise.
Applying anti-seize automatically: Many plated spark plugs have manufacturer-specific dry-thread torque guidance. Lubricant changes friction and clamp load; follow the exact vehicle and plug instructions rather than a universal habit.
Gapping fine-wire plugs aggressively: Prying against iridium or platinum electrodes can crack or misalign them. Verify whether adjustment is allowed and use the specified method; replace a damaged or out-of-range plug.
Clearing codes before capturing data: Freeze-frame, counters, pending codes, and readiness can identify when and how the fault occurs. Save them before clearing, and verify the repair under the original operating conditions.
Decision guidance
Match the repair to the tested failure pattern
The best ignition parts list corrects the measured fault without replacing healthy cylinders or ignoring a non-ignition cause.
If a misfire follows a coil during an approved swap: Confirm the move, connector and boot condition, plug and well, wiring, and the vehicle procedure. Replace the verified coil and any specified boot or seal, then retest the original conditions.
If plugs are due by schedule: Install the exact current approved number as a complete set when the procedure calls for it, inspect each removed plug by cylinder, and address abnormal oil, coolant, deposits, wear, or gap rather than discarding the pattern.
If one plug looks abnormal: Compare compression, injector behavior, oil or coolant entry, coil and boot, fuel trim, and cylinder data. A new plug may temporarily hide the cause, so diagnose before normalizing the appearance.
If wiring or connectors are damaged: Use supported terminals, pigtails, routing, strain relief, seals, and repair procedures. Twisted wires, generic crimping, stretched connectors, or defeated locks can create intermittent coil control faults.
If diagnosis requires energized testing: Use qualified equipment and training. Secondary ignition can injure, fuel vapors can ignite, and unsafe open-spark or back-probing methods can damage control modules or catalytic converters.
Ownership & compatibility
Keep cylinder-specific ignition records
Positioned evidence makes repeat misfires easier to separate from a new cylinder or operating condition.
Label every removed component: Keep plugs, coils, boots, and wires identified by cylinder or tower until verification. Photograph firing ends, insulators, wells, tracking, cracks, terminals, and connector condition before cleaning.
Record exact specifications: Save VIN, engine, plug and coil numbers, revisions, gap instruction, measured removed gaps where useful, torque source, lubricant guidance, wire routing, pigtails, seals, date, mileage, codes, and test results.
Monitor the repaired conditions: Recheck cold and hot start, idle, acceleration or load under safe legal conditions, warning lamp, counters, fuel trims, and catalyst concerns. Stop for a flashing lamp or severe misfire rather than driving through it.
Address the environment: Repair oil or coolant leaks, water entry, damaged cowl seals, heat shielding, harness strain, grounds, battery or charging problems, and maintenance causes that can shorten the next plug, boot, wire, or coil life.
FAQ
Ignition component selection FAQ
Answers about misfire codes, spark plugs, heat range, gap, coils, boots, torque, and verification.
Does a P0301 code prove cylinder one needs a coil?
Should all ignition coils be replaced together?
What does spark-plug heat range mean?
Can I change the gap on an iridium plug?
Should spark-plug threads receive anti-seize?
Why does spark-plug torque matter?
What causes carbon tracking on a plug or boot?
Can a bad spark plug damage a coil?
How is an ignition repair verified?
Bottom line
Buy the tested ignition correction
Diagnose the event, match every combustion and electrical interface, install with exact gap and torque guidance, and verify under the original conditions.
Preserve the data: Capture codes, freeze-frame, counters, symptoms, and cylinder position.
Match the exact engine: Verify plug geometry, heat range, coils, boots, wires, and connectors.
Install for heat and insulation: Use clean wells, correct gap handling, seating, torque, and routing.
Retest the complaint: Confirm counters, warnings, starting, idle, load, and related causes.
Reading Shortcuts
Confirm application and condition first.
Decision Reminders
Checks to complete before committing.
- Confirm the exact application: Cross-check vehicle, engine, housing, and original part.
- Preserve removed-part clues: Contamination and damage can identify another fault.
- Keep the work clean: Keep downstream openings protected.
- Follow the procedure: Respect pressure, fluids, torque, priming, and resets.
- Inspect interfaces: Seals, caps, connectors, threads, and fittings must agree.
- Verify before release: Check leaks, warnings, starting, idle, and road behavior.
Glossary Snippets
Terms used in this decision.
When to Use a Top 10 Review
Use rankings after application and service scope are documented.
- Application confirmed: Filter with exact engine and interface evidence.
- Duty identified: Compare parts for the real interval and environment.
- Evidence published: Rank construction, testing, traceability, and support.
- Job scope complete: Include seals, fluids, tools, and verification.
Already down to 2–3 options? A Comparison is usually faster.
When to Use a Comparison
Compare finalists for the same verified application.
- Interfaces: Match dimensions, seals, valves, fittings, and connectors.
- Performance evidence: Compare documented efficiency, capacity, and service claims.
- Included content: List every seal, cap, sensor, boot, and fitting.
- Installed outcome: Price fluids, labor, priming, disposal, and downtime.
Still building a shortlist? Start with a Top 10.