
Indoor Bike Trainers Buying Guide for Beginner Cyclists
A bike trainer holds or supports a bicycle for riding indoors and provides resistance while you pedal. The first buying decision is whether your own bike can use the proposed trainer correctly. After that, decide who should change the load: you, or a supported application commanding a controllable trainer. Those two questions make the category much easier to understand.
You do not need to start with the largest power rating, every accessory or a paid training app. You need an approved mount, the required parts and a setup you can explain and prepare. This guide introduces the main designs and connection roles so a first purchase leads to a workable indoor session rather than a box of unfamiliar interfaces.
Buying framework
Make the first setup understandable
Start with the bike connection and the intended session. Add complexity when it supplies a function you already want.
Check the bicycle before choosing the box: Tell the seller or maker the exact bicycle model and rear axle arrangement. Do not rely on the broad label road, hybrid or beginner bike; ask which approved parts and exclusions apply to that specific mount.
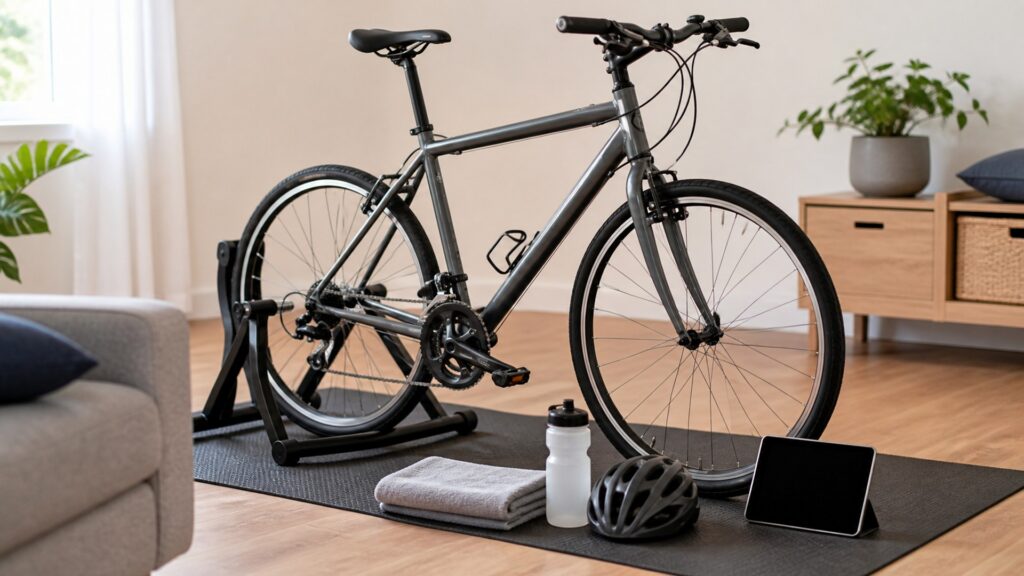
Learn the two main mounting jobs: A wheel-on trainer applies load at the rear tire while the wheel remains installed. Direct drive removes that wheel and connects the drivetrain to the trainer. They require different preparation, so choose a job you understand or arrange appropriate assembly help.
Decide who changes resistance: On a basic setup you regulate effort with the available manual controls and gearing. A controllable trainer can receive supported app commands; that automation adds connection work and does not make every indoor session require software.
Name each connection’s role: The app may receive speed, power or cadence while separately controlling resistance. Identify the required input for the activity you want. A successfully paired sensor is not proof that the trainer itself can accept load commands.
Build a first-session checklist: List included and required adapters, drivetrain parts and any specified front-wheel support. Add cooling, suitable device support and recording only as the planned arrangement needs them; do not assume a photograph includes everything supplied in the package.
Who this is for
Which starting point describes you?
Choose by intended activity and confidence with the installation, rather than treating beginner status as one fixed equipment tier. Starting goals and installation confidence lead to different first choices.
Trying indoor pedaling without a chosen app: An approved manual trainer may be enough to explore timed riding. You control the load and do not gain automatic route changes, but can postpone software spending until you know which interactive activity you actually want.
Already interested in a particular application: Use its supported hardware requirements to define the necessary data and control. A smart trainer may be appropriate, but compare the exact connection roles and the device running the app rather than buying by a wireless logo.
Unsure about axle or drivetrain parts: Get the actual bike interface identified before purchase. Correct adapters and cassette requirements matter more than a bargain; asking for installation help is a practical option when an unfamiliar mounting step is beyond your current confidence.
Able to assemble the mount but wanting few electronic steps: Choose a session arrangement with a clear manual control and recording plan. Fewer software dependencies can make the first ride easier to explain, while giving up automatic target or terrain loading.
Sharing the bike with outdoor rides: Rehearse how it returns to normal wheel and axle installation after trainer use. Wheel-on and direct-drive designs move different work into that routine; pick the complete process you can perform correctly rather than the one that looks simplest in a photo.
What to pay attention to
Read the specification sheet as a parts checklist
Two lenses cover the bicycle’s first installation and the connection roles needed for the chosen activity. Separate what is supplied from what must be added.
Mechanical first-session readiness
Check the bicycle connection, required parts and mounting steps. This turns unfamiliar specifications into an installation you can prepare.
Control and required connections
Identify who changes resistance and what supplies the ride data. Software and sensors should answer named functions rather than appear as compulsory extras.
Approved frame and axle parts: Find the instructions for the exact bicycle interface and trainer model. Confirm which adapters come with the package and which must be obtained separately; a part that physically tightens is not automatically the correct approved connection.
Wheel-on tire or wheel-off cassette: For wheel-on, check the permitted tire, wheel size and roller preparation. For direct drive, check the freehub and approved cassette for the bike’s drivetrain. These are alternative mounting jobs, not accessories to add indiscriminately to every trainer.
Manual versus controllable loading: Confirm whether the rider adjusts resistance or the trainer accepts software commands. A speed sensor added to a basic unit can supply data in a supported setup without turning that unit into an automatically controlled trainer.
Measured or estimated watts: Power can come from a measuring device or a supported estimate based on other inputs. Learn which source the setup uses before treating the display as an exact measurement; basic session needs and a detailed training record are different goals.
Supplied support and power: Read the box contents and operating instructions for electrical supply, front-wheel support and device requirements. Build the complete first-session cost from those facts rather than treating every advertised add-on as compulsory or every illustrated item as included.
Avoid these traps
Avoid paying for confusion
A beginner purchase should remove uncertainty about the first ride, not hide it behind a higher specification. A higher price does not resolve an unidentified bicycle interface.
Buying the largest numbers first: Peak resistance and gradient capability do not explain how to attach the bicycle or operate the session. Resolve the mounting and control requirements before deciding whether a performance ceiling has any relevance to the rides you want.
Assuming indoor riding always requires a subscription: A trainer can provide manual resistance without a paid interactive service. If an app is the reason you are buying, check its current terms and hardware requirements separately rather than turning every first setup into a subscription package.
Treating rollers as a clamped trainer: Traditional rollers create a different balancing arrangement from a rear-axle-mounted unit. Do not buy them as an interchangeable basic substitute without understanding the intended handling and the instructions for their use.
Learning compatibility after outdoor use: Return conditions may change after assembly or riding, and an incompatible part should not be tested by forcing it into place. Check the fit information and seller’s terms beforehand, asking for help where the interface remains unclear.
Decision guidance
Choose a first system you can prepare correctly
These branches connect the intended session with the practical work involved in owning the setup. Choose control for the activity you already understand.
For a first timed ride, consider approved manual resistance: Choose a basic unit when automatic commands are not part of the activity you want. You adjust the load yourself and may record only time; this keeps the electronic requirements modest without removing the physical mounting checks.
For chosen interactive rides, buy the supported control: Select a controllable trainer accepted by that service, with the required data and running device. The benefit is automated loading; the added work is power, pairing and software readiness that a manual setup does not demand.
For unfamiliar installation, include appropriate assistance: Have the bicycle interface and required parts confirmed and arrange suitable assembly support if needed. This adds service cost but can be more useful than buying an expensive trainer whose cassette or axle setup you cannot prepare correctly.
When the existing bike is unsupported, change the arrangement: Consider another explicitly approved bike or a separate stationary cycle. That changes space and spending, but is preferable to treating an improvised adapter as a beginner-friendly shortcut.
Ownership & compatibility
Keep the first successful installation repeatable
Once the setup works, retain the steps that made it work. Ongoing care depends on the chosen design.
Keep the instructions with the parts: Record the approved adapters and any cassette arrangement used for the bike. Store removed parts deliberately, so the next assembly follows the known installation rather than a guess about which spacer belongs where.
Repeat the required preparation: Use the model’s tire contact or calibration routine where specified. Automatic resistance does not mean automatic approval of physical setup; follow the particular instructions instead of adopting a routine from an unrelated tutorial.
Check after bike changeover: Inspect the mount when the bicycle returns from outdoor use and follow its installation sequence again. For a rear-wheel-off design, restore the road wheel according to the bike’s own requirements when changing back.
Care for the bike and trainer: Manage sweat and cleaning with the equipment guidance and inspect the drivetrain or tire interface. Keep the installation serviceable before buying more accessories; optional screens and apps cannot correct a damaged mounting part.
FAQ
First-purchase questions explained plainly
Clarify unfamiliar terms and optional equipment before assembling the first indoor ride.
Is a trainer the same as a stationary exercise bike?
What does direct drive mean?
Can I use ordinary pedals for indoor riding?
Do I have to buy a cadence sensor?
Will any phone run a training app?
Can I ride indoors without a home internet connection?
Where can I confirm an unfamiliar bicycle interface?
Does trainer speed equal outdoor road speed?
Can I return a trainer after trying it?
Bottom line
Approve a minimum workable first session
Use the bike interface, load control and complete parts list to make the initial purchase. Optional features belong after the first session is mechanically ready.
Confirm the actual bicycle: Require the exact frame and axle approval and any drivetrain requirements. Stop shopping that model if the interface is unsupported or unresolved.
Choose the load-control role: Decide whether you want to set effort yourself or use supported automatic commands. Do not buy a smart label without naming the activity it enables.
Count what the first ride needs: List required parts and support, then separate optional software and accessories. Include assembly help if unfamiliar work would otherwise remain unresolved.
Explain the start and changeover: Choose the arrangement whose installation, preparation and return to outdoor use you can follow. A modest setup that passes those checks can be a valid first purchase.
Reading Shortcuts
Start with the bike mount and who controls the load.
Decision Reminders
A first purchase needs clear answers to these checks.
- Bike interface: Approve the exact bicycle and mounting parts.
- Control role: Know who changes resistance.
- Required package: List everything needed for the first session.
Glossary Snippets
Basic trainer terms without a feature ranking.
When to Use a Top 10 Review
Browse models after confirming the first session and bicycle interface.
- Keep requirements visible: Filter by approved mounting and needed control.
- Separate optional extras: Compare the complete first-session package.
Already down to 2-3 options? A Comparison is usually faster than reading broad buying advice.
When to Use a Comparison
Compare finalists by the work required before the first ride.
- Inspect installation steps: Account for unfamiliar axle or drivetrain tasks.
- Verify application roles: Match data and control to the activity wanted.
Still exploring? Start with a Top 10 to identify the right category first.