
Indoor Bike Trainers Buying Guide: How to Choose the Right One
An indoor bike trainer lets you ride your own bicycle in a fixed indoor setup, but the main designs ask different things of the bike and rider. Wheel-on trainers keep the rear wheel attached, direct-drive models replace it with a trainer-mounted drivetrain, and rollers support the wheels while they turn. Those differences come before maximum resistance claims or app features.
First decide whether you want simple indoor pedaling, automatically controlled workouts or virtual route riding. Then check the exact bike interface, the data and control your software needs, and the room occupied during use. This guide helps you choose a complete working setup, including the adapters, drivetrain parts and recurring setup tasks a headline trainer price can leave out.
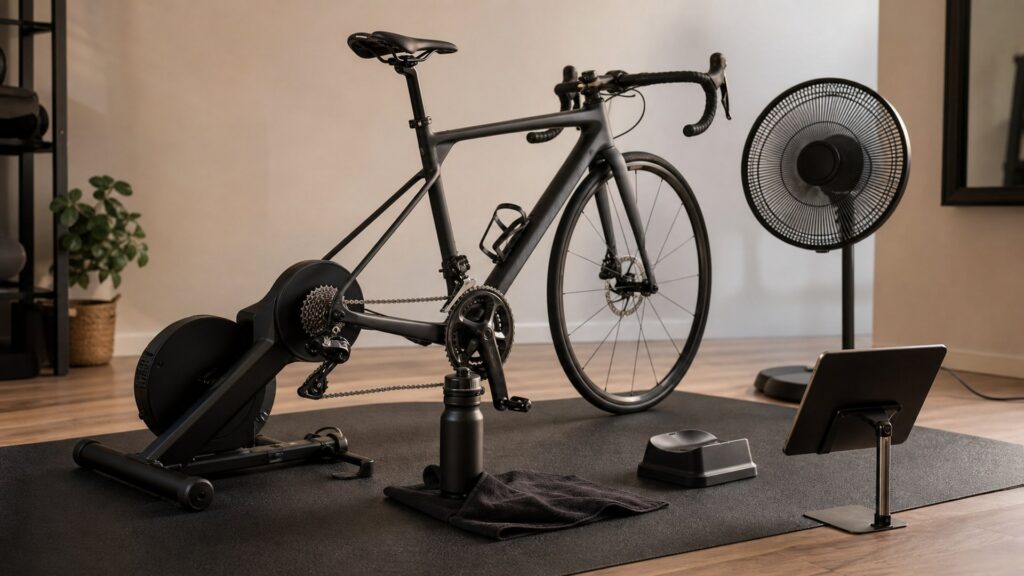
Buying framework
Choose the trainer architecture first
Order the purchase around your bicycle and intended riding, then compare convenience and performance within suitable designs.
Separate the main designs: A wheel-on trainer loads the rear tire through a roller; a direct-drive trainer mounts the bicycle without its rear wheel. Traditional rollers support both wheels without the same rear-axle clamp. Supported roller designs vary, so read the particular mounting arrangement.
Name the resistance job: Simple timed pedaling can use manually adjusted resistance. ERG workouts and virtual routes need supported automatic control if you want the software to change the load. A sensor that reports speed or power does not by itself provide that control.
Approve the exact bicycle: Check the trainer maker’s frame, axle and adapter instructions for your bike, including exclusions. A matching axle dimension is only part of the check; frame clearance and the prescribed contact hardware still matter before the bike can be mounted.
Price the complete installation: Include any approved adapters, required cassette or freehub changes and the accessories your chosen arrangement actually needs. Verify what comes in the box so a low trainer price does not conceal the parts required to make it usable.
Plan the household setup: Mark the riding footprint with the bike in position and space for access and cooling. Discuss noise and vibration in the intended room; folded dimensions and quiet marketing descriptions do not establish what the assembled system will be like at home.
Who this is for
Which indoor session are you buying for?
Use the activity to choose the level of control and the setup burden worth accepting.
Simple timed pedaling: A compatible basic wheel-on trainer can be sufficient when you are happy to adjust load yourself. You retain the rear wheel but accept tire-contact setup and its noise or wear considerations; interactive control is optional rather than the starting requirement.
Virtual route riders: Look for a controllable trainer supported by the selected software if automatic changes in resistance are part of the experience you want. Check both device control and data reporting, plus any power supply or subscription needed for that chosen service.
Target-power workout riders: Prioritize supported ERG control and a suitable power source over a dramatic gradient claim. Check how the model handles your intended workout range and follows its setup instructions; a quoted maximum does not describe easy recovery behavior or transitions.
Frequent indoor/outdoor switchers: A wheel-on design avoids removing the rear wheel but still needs its prescribed contact setup. Direct drive removes tire contact while adding wheel removal and drivetrain matching. Compare the actual changeover steps with the bike you intend to use.
Riders seeking roller practice: Traditional rollers require balance and an appropriate surrounding area; they are a distinct riding choice rather than a cheaper equivalent of a clamped trainer. Supported versions change that demand, so check exactly which parts of the bicycle they hold.
What to pay attention to
Read specifications as setup requirements
Two lenses keep mechanical approval separate from software behavior. Both must pass for an interactive setup.
Mechanical bike interface
Confirm the frame mount and axle hardware, then the cassette and freehub where the wheel is removed. Approval concerns the complete bicycle connection.
Data and resistance control
Separate what records the ride from what changes its load. Supported software, the selected power source and the model’s setup procedure determine the interactive function.
Frame, axle and adapters: Identify the exact frame and axle arrangement, then use the model’s approved adapter list and exclusions. Do not improvise spacers or assume a nominal hub width proves clearance around the trainer mount.
Cassette and freehub: For a rear-wheel-off trainer, confirm the cassette’s cog count, tooth range, freehub interface and compatibility with the bicycle’s chain and derailleur. Check whether the necessary cassette and freehub are included; speed count alone does not settle the drivetrain match.
Control and data protocols: Verify that the chosen app supports the exact trainer as a controllable device and accepts the intended power or speed data. A wireless connection logo does not guarantee every software function, so check the app and trainer documentation together.
Power measurement and calibration: Distinguish measured power from software estimates based on speed or resistance assumptions. Read the maker’s calibration routine, if any, and the conditions attached to accuracy claims; no advertised percentage excuses an incorrect mounting or wheel-on contact setup.
Operating and folded footprint: Compare the deployed trainer legs, bicycle length and access area separately from folded storage dimensions. Include a realistic position for cooling and cables; a trainer that stores behind a door may still require a different arrangement while ridden.
Avoid these traps
Avoid compatibility and control shortcuts
These buying errors can leave a technically impressive trainer unable to do the job you purchased it for.
Treating wireless data as smart control: A basic trainer with a speed sensor can feed data to some software without accepting resistance commands. Confirm automatic control explicitly when virtual gradients or ERG targets are the reason for buying.
Checking only cassette speed count: An apparently matching number of cogs does not prove the cassette fits the freehub or that its range suits the chain and derailleur. Follow the drivetrain approval process instead of assuming any cassette with the same count will work.
Ranking by peak resistance: Maximum power and gradient figures say little about your ordinary endurance session or lower-load recovery. Compare the operating behavior needed for your riding before paying for a ceiling you may never use.
Assuming direct drive is silent: Removing tire contact changes one noise source, but the drivetrain and trainer still operate in a household environment. Ask about the complete setup and return terms rather than promising neighbors silence from an architecture label.
Decision guidance
Choose a design and accept its setup cost
Resolve compatibility first. Among approved options, these branches identify the useful gain and its corresponding burden.
Choose basic wheel-on for manual indoor riding: This keeps the rear wheel installed and can meet simple pedaling needs without automatic software control. Accept the tire-contact routine and check which sensors, if any, are needed for the data you want to record.
Choose controllable wheel-on when control and wheel retention matter: A supported model can vary resistance automatically while leaving the wheel attached. Its extra convenience does not remove tire setup, calibration instructions or household noise checks; evaluate those alongside the app connection.
Choose direct drive for a rear-wheel-off controlled setup: This avoids loading the tire and may suit regular interactive sessions. The tradeoff is wheel removal plus cassette, freehub and frame approval; include those parts and steps before deciding that the installation is convenient enough.
Choose rollers for the riding task they actually provide: Traditional rollers suit riders deliberately wanting that balance-based arrangement and able to use it appropriately. A supported roller model may offer a different experience; check its mounting, control and fit rather than treating all rollers as interchangeable.
Ownership & compatibility
Maintain the architecture you bought
Wheel-on contact, a trainer drivetrain and electronic control create different recurring jobs. Follow the exact model’s routine.
Reset wheel-on contact consistently: Use the prescribed tire pressure, roller engagement and calibration procedure where applicable. Tire choice and wear can affect the setup, so repeat the maker’s checks when those parts change rather than relying on yesterday’s knob position.
Keep the drivetrain serviceable: On direct drive, attend to the cassette, chain and shifting as instructed for the bike and trainer combination. A separate indoor cassette is still part of a working drivetrain, not a maintenance-free substitute for the outdoor wheel.
Manage sweat and cooling: Use suitable cooling and wipe and dry exposed surfaces after riding, following the equipment instructions. Check the bike as well as the trainer; indoor sweat exposure can reach components that the trainer’s own casing does not protect.
Maintain electronic readiness: For connected models, follow supported firmware and calibration guidance and check the power supply and pairing before a planned session. Keep the instructions accessible so a software change does not turn into an improvised mechanical adjustment.
FAQ
Questions about assembling and using the setup
Resolve tire, cassette, power and household details before placing the trainer order.
Can a basic trainer work with a virtual cycling app?
Do I need a trainer-specific tire?
Can I use the same cassette as my outdoor wheel?
Does every smart trainer need mains power?
Will one trainer work for two bikes?
Does a mat eliminate noise for downstairs neighbors?
Do I have to calibrate before every session?
Can I leave the bicycle mounted between rides?
Will rollers teach every outdoor riding skill?
Bottom line
Approve the full indoor setup
A useful trainer purchase clears the bike interface, riding function and household constraints in that order.
Veto an unapproved bike mount: Confirm the exact frame, axle and hardware before comparing premium features. A resistance specification cannot rescue a bicycle that the maker does not approve for the mounting arrangement.
Choose the required control: Decide whether manual resistance, ERG targets or route-controlled loading is the actual job. Match the app and data source to that function rather than purchasing a smart label without checking its support.
Count the installation burden: Add required drivetrain parts and adapters, then rehearse the wheel-on or rear-wheel-off changeover steps. Compare total cost and effort using the same intended bicycle.
Check the room in use: Approve deployed space, access, cooling and the household noise expectation. Treat folded storage as a separate benefit after the riding arrangement works.
Reading Shortcuts
Choose architecture before comparing electronic features.
Decision Reminders
A usable setup passes all of these checks.
- Bike approval: Check the exact frame and adapter instructions.
- Required control: Confirm automatic resistance support where needed.
- Complete price: Include required drivetrain and mounting parts.
Glossary Snippets
Trainer terms that describe different functions.
When to Use a Top 10 Review
Shortlist trainers within the architecture your bike and riding task support.
- Keep compatibility visible: Exclude unapproved mounting arrangements first.
- Compare actual operation: Check control, setup and deployed footprint together.
Already down to 2-3 options? A Comparison is usually faster than reading broad buying advice.
When to Use a Comparison
Compare the complete installation rather than isolated trainer prices.
- Match supplied parts: List cassette, freehub and adapter requirements.
- Separate data from control: Check both roles in the selected software.
Still exploring? Start with a Top 10 to identify the right category first.