
Interior Comfort Buying Guide for Cabin Comfort Upgrades
A cabin upgrade rarely lives alone. A lumbar pad changes how a cushion supports the thighs; a seat cover can alter heater or ventilation performance; a fan competes for vent space; a shade changes reflected light; and several powered devices can share one socket and a tangle of controllers. Interaction is the real specification.
Start with factory adjustments, then add one reversible change and repeat the same route. Record pressure, temperature, glare, airflow, reach, and fatigue while confirming belt geometry, head restraint, airbags, passenger sensing, visibility, and power remain normal. Keep an upgrade only when its benefit survives the full combined setup and it can be removed without damage.
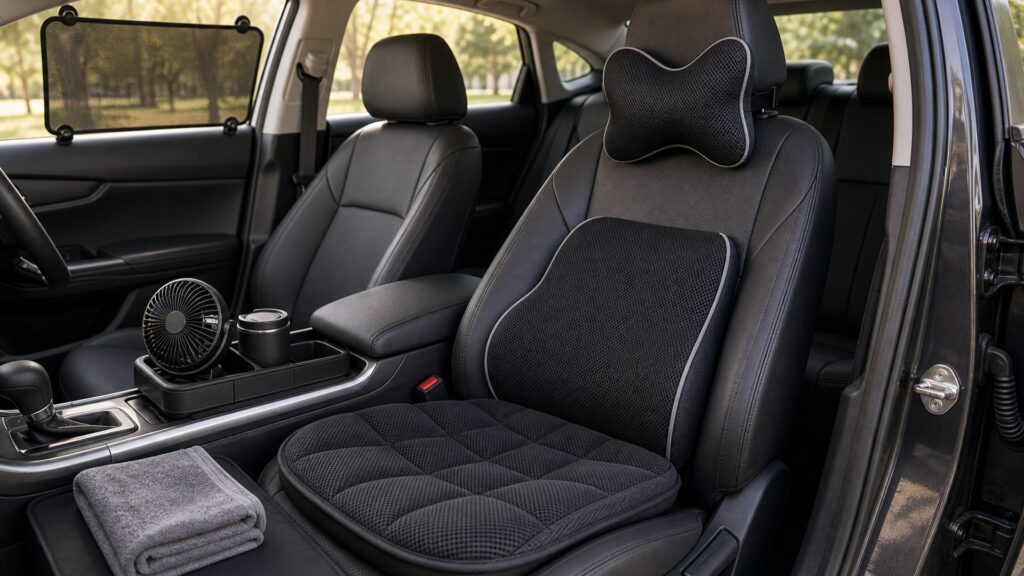
Buying framework
Set the cabin comfort upgrade baseline before buying
Convert the desired cabin comfort upgrade improvement into physical, functional, and maintenance requirements.
Rank the discomforts: Order pressure, posture, heat, cold, glare, draft, noise, reach, and clutter by severity, trip length, occupant, and season.
Map shared resources: List seat surfaces, airbag seams, occupant sensors, vents, windows, mirrors, dashboard, sockets, USB power, cable paths, and storage locations.
Create an upgrade sequence: Test factory settings first, then support, thermal, light, noise, and convenience changes one at a time with a stable route.
Set a stop rule: End additions when the priority discomfort improves without new restraint, control, visibility, airflow, heat, power, or storage problems.
Who this is for
Match the solution to the cabin comfort upgrade user
Different bodies, occupants, routes, climates, and cabin layouts justify different cabin comfort upgrade priorities.
Driver needing modest support: A small correctly placed lumbar aid may be preferable to a thick full-seat layer when reach and restraint geometry already fit.
Hot-climate parked-car owner: Exterior parking choices, factory ventilation, removable parked shades, and breathable surfaces may outperform powered pads.
Cold-weather commuter: Factory heaters, warm-up strategy, material feel, gloves, and a properly rated removable pad require coordinated power and burn-risk checks.
Multi-accessory road tripper: Long duration exposes socket overload, cord tangles, pressure migration, glare at changing sun angles, and storage problems that short tests miss.
What to pay attention to
Evidence that predicts cabin comfort upgrade performance
Specifications matter only when translated into what changes inside the exact vehicle during cabin comfort upgrade use.
Upgrade Interaction
Check combined thickness, restraint geometry, airbag zones, sensor loading, vent flow, reflections, cords, sockets, and storage rather than reviewing each item alone.
Observable Benefit
Measure pressure comfort, surface temperature, glare, airflow, noise, fatigue, adjustment time, and removal effort during representative trips.
Combined seating geometry: Measure total cushion and backrest addition, knee angle, headroom, wheel distance, pedal reach, belt path, and head-restraint relationship with all retained layers.
Seat-system constraints: Review owner-manual warnings for side airbags, occupant classification, integrated belts, heaters, ventilation, massage, memory, and folding operation.
Thermal performance: Compare surface temperature, warm-up, cooling airflow, breathability, sweat retention, hot spots, controller accessibility, and automatic shutoff.
Light management: Assess parked versus driving use, legal visibility, mirror coverage, reflections, attachment security, removal speed, storage, and material heat exposure.
Electrical coexistence: Add rated loads, inspect adapters and splitters, confirm fuse and socket limits, monitor plug temperature, and keep cables outside rails and pedals.
Package reversibility: Each item should detach, clean, dry, store, and leave the seat, trim, glass, vent, socket, and upholstery in acceptable condition.
Avoid these traps
Mistakes that compromise cabin comfort upgrade
Convenience becomes a defect when an add-on alters controls, restraints, airbags, visibility, airflow, or secure storage.
Buying every upgrade before testing any: Simultaneous changes hide which item helped and which introduced pressure, heat, glare, or reach problems.
Using a socket splitter as extra capacity: A splitter adds outlets but not circuit capability; total load, fuse rating, connector condition, and heat still govern.
Leaving opaque shades mounted while driving: Parked heat-control products can obstruct required views or detach; remove and secure them before motion unless specifically approved for driving.
Covering ventilated upholstery with dense material: An added layer may reduce airflow and hold moisture, undermining the factory feature it was meant to improve.
Decision guidance
Choose a defensible cabin comfort upgrade path
Select the least intrusive option that proves the required cabin comfort upgrade outcome under representative conditions.
For pressure discomfort: Adjust the factory seat and lumbar first, then test the thinnest targeted support that preserves reach and restraint alignment.
For thermal discomfort: Sequence shade, ventilation, surface material, clothing, and powered heat or cooling according to season and vehicle-system compatibility.
For glare and light: Use legal, stable, view-preserving solutions in motion and removable opaque protection only while parked.
For several unresolved problems: Choose the single change with the broadest measured benefit, then reassess before adding another shared-seat or powered accessory.
Ownership & compatibility
Maintain the cabin comfort upgrade result
Inspection, cleaning, adjustment, records, and replacement keep the original cabin comfort upgrade decision valid.
Maintain an upgrade inventory: Record location, purpose, dimensions, power rating, cleaning method, restrictions, test date, observed benefit, and storage position for each retained item.
Inspect combined stress points: Check seat seams, straps, buckles, vents, sockets, adapters, cords, trim contact, glass mounts, and controller heat after long trips.
Return to baseline periodically: Remove the complete stack, inspect the cabin, restore factory settings, and confirm every accessory still earns its space and upkeep.
FAQ
Questions to resolve for cabin comfort upgrade
Use exact vehicle documentation and product instructions to settle these points.
Should lumbar support go behind a seat cover?
Can a cooling pad work on ventilated seats?
How many powered comfort accessories can share one socket?
Do windshield shades help while the car is moving?
Can a thick seat cushion improve long-trip comfort?
How can I compare two comfort upgrades fairly?
Should comfort accessories stay installed for every driver?
What if a new accessory causes an airbag warning?
How should unused shades and cushions be stored?
Bottom line
Preserve safety while improving cabin comfort upgrade
A successful upgrade remains compatible, removable, understandable, and safe throughout ownership.
Sequence upgrades: Solve the highest-priority discomfort with one reversible change before adding another item to shared cabin resources.
Test the complete stack: Measure geometry, restraint compatibility, airflow, visibility, power, heat, movement, and storage with every retained accessory installed.
Keep only proven value: Inspect stress points, maintain records, return to baseline, and remove products whose benefit no longer exceeds their burden.
Reading Shortcuts
Move through the coordinated comfort upgrades decision in order.
Decision Reminders
The combined cabin matters more than any single accessory.
- Rank the discomforts: Verify and record this requirement.
- Map shared resources: Verify and record this requirement.
- Create an upgrade sequence: Verify and record this requirement.
- Maintain an upgrade inventory: Verify and record this requirement.
- Inspect combined stress points: Verify and record this requirement.
- Return to baseline periodically: Verify and record this requirement.
Glossary Snippets
Terms used in this comfort accessory plan.
When to Use a Top 10 Review
Use rankings only after the requirements are fixed.
- Sequence upgrades: Use this as a shortlist filter.
- Test the complete stack: Use this as a shortlist filter.
- Keep only proven value: Use this as a shortlist filter.
- Exclude: Use this as a shortlist filter.
Already down to 2–3 options? A Comparison is usually the faster next step.
When to Use a Comparison
Compare finalists through the seating, belt, airbag, sensor, control-reach, visibility, airflow, securement, power, and removal trial; make lumbar support an explicit recorded result.
- Rank the discomforts: Check both candidates against this requirement.
- Map shared resources: Record the result for each shortlisted option.
- Create an upgrade sequence: Use the same operating conditions for both tests.
- Set a stop rule: Keep the evidence with the final decision.
Still exploring? Start with a Top 10 to build a shortlist first.