
Lighting & Visibility Buying Guide for OEM Replacement Decisions
A replacement lamp is not necessarily one part. Depending on the vehicle, the visible assembly may contain replaceable bulbs, LED boards, drivers, a ballast, a leveling motor, adaptive mechanisms, vents, harnesses, and coded modules. Some arrive complete; others are bare housings.
Diagnose the failed layer before ordering. Use the VIN, market, trim, option codes, existing part numbers, connector views, and official supersession information—not outer shape alone. Compare what transfers, what must be programmed, and how the beam will be aimed. A used OEM assembly can preserve original optics but carry broken tabs or water history; a new equivalent can be complete yet omit an adaptive function. Price the finished repair, not the box.
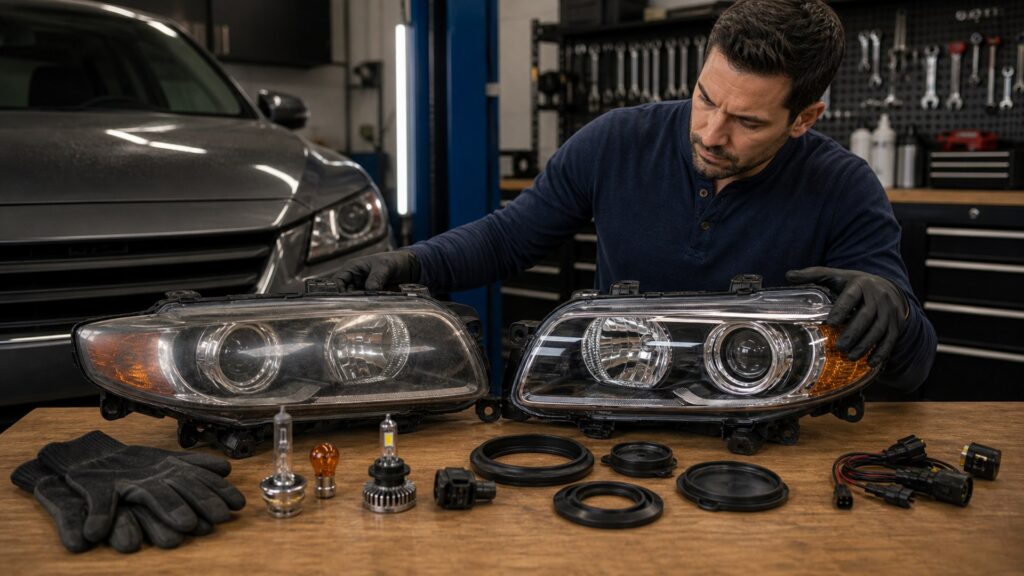
Buying framework
Replace the failed layer, not the silhouette
Start with diagnosis and exact configuration, then decide whether the source, module, service part, or full assembly should move.
Identify the failed layer: Test source, power, ground, connector, module communication, seals, adjusters, mounts, and optical damage before condemning the housing.
Decode the existing configuration: Record VIN, build market, trim, lamp option, side, source technology, adaptive features, markings, and every readable part number.
Map included and transferred parts: Confirm whether bulbs, drivers, ballasts, motors, caps, harnesses, brackets, and modules arrive installed, transfer from the old unit, or require separate purchase.
Plan completion work: Add bumper labor, one-time clips, coding, initialization, leveling, calibration, aim, leak checks, and required-function tests to the repair order.
Who this is for
Choose a replacement tier by risk tolerance
New OEM, compliant equivalent, remanufactured, and used assemblies trade price against traceability, completeness, condition evidence, and support.
Safety-critical daily drivers: Favor exact application, strong traceability, clear warranty, predictable optics, and local support when downtime or repeat removal is costly.
Collision-repair buyers: Check structural tabs, lens, beam pattern, certification, included modules, insurer requirements, and sensor or bumper calibration dependencies.
Older vehicles with scarce parts: Used or remanufactured units may be practical, but demand detailed condition images, return rights, repair disclosure, and availability of seals and adjusters.
Source-only repairs: Use the specified light-source designation and seating procedure; confirm caps, connectors, and aim rather than converting technology inside the original optic.
What to pay attention to
Replacement details hidden behind one part photo
A listing must resolve application, optics, modules, physical condition, and commissioning—not merely left or right side.
Application Identity
VIN, market, trim, option, side, beam pattern, markings, source technology, and supersession.
Repair Completion
Included modules, transferred parts, condition, warranty, coding, aiming, calibration, and labor access.
Part-number chain: Match current and superseded numbers through a reliable catalog, including suffixes that distinguish market, finish, adaptive function, or production break.
Optical and regulatory identity: Check left- or right-hand traffic pattern where relevant, DOT or other required markings, beam function, lens color, and signal visibility.
Module completeness: Determine whether electronic drivers are married to the vehicle, programmable, reusable, heat-damaged, water-exposed, or sold separately.
Housing condition: Inspect every tab, adjuster, vent, cap, lens edge, seal, connector pin, reflector, projector, and prior plastic repair on used units.
Warranty and return mechanics: Confirm whether opened, installed, coded, or damaged-in-shipping lamps remain returnable and who pays repeated removal, aim, or calibration labor.
Avoid these traps
Replacement choices that create a second repair
Most errors come from shallow fitment, missing modules, transferred damage, or commissioning work that was never budgeted.
Ordering from appearance: Two housings can share a lens shape while using different beams, connectors, signatures, adaptive functions, or modules.
Assuming an assembly is complete: Listings may exclude bulbs, caps, drivers, ballasts, leveling motors, or brackets; transferring a water-damaged module can repeat the failure.
Ignoring supersession conditions: A newer number may require paired parts, adapters, software, or a production-date break. Verify the official application rather than assuming newer means interchangeable.
Skipping aim and fault checks: Correct bolt holes do not prove beam direction, leveling response, coding, signal operation, or leak-free installation.
Decision guidance
Buy the replacement with the lowest completed-repair risk
Balance component price against repeat labor, uncertainty, programming, optical consistency, and downtime.
If the serviceable source failed: Replace the specified source, inspect its connector and cap, seat it correctly, and verify function and aim.
If a separate module failed: Confirm root cause, software and part-number compatibility, cooling interface, sealing, coding, and whether the old module damaged the lamp or vice versa.
If the housing is physically damaged: Choose an exact assembly whose mounts, optics, vents, seals, connectors, and included components can be verified before installation.
If only used parts are available: Prefer undamaged originals with documented donor configuration, clear interior and exterior photographs, repair disclosure, and practical return rights.
Ownership & compatibility
Protect the completed repair from repeat failure
The old part contains evidence. Preserve it until the new assembly passes water, electrical, optical, and software checks.
Document the handoff: Photograph original labels and connectors, mark transferred modules, save coding and aim records, and retain invoices and warranty terms.
Inspect after weather exposure: Look for condensation patterns, water tracks, loose caps, connector heat, warning messages, dead segments, or color mismatch before the return window closes.
Keep service parts available: Record source, cap, seal, driver, ballast, and module numbers so the next failure does not force replacement of a sound complete housing.
FAQ
OEM lighting replacement questions
These answers cover exact fit, component scope, used parts, programming, and verification.
Is an OEM headlamp always sold with every module installed?
Can I choose a replacement headlamp using the vehicle year alone?
Is a used OEM lamp better than a new aftermarket lamp?
What does a DOT marking on a headlamp mean?
Do replacement LED headlamps require programming?
Can I transfer the old ballast or driver to a new housing?
Should both headlamp assemblies be replaced together?
What should I inspect on a salvage lamp?
How do I verify a replacement lamp after installation?
Bottom line
The right replacement restores the complete factory function
Trace the failed component, match the exact optical and electronic application, and judge value by the completed verified repair rather than the purchase price.
Diagnose the layer: Do not replace an assembly to solve an untested source, ground, or module fault.
Match the configuration: Use VIN, options, labels, markings, modules, and supersession evidence.
Commission the repair: Verify sealing, every lamp state, diagnostics, programming, leveling, calibration, and aim.
Reading Shortcuts
Move from the OEM lighting replacement problem to a vehicle-compatible plan that can be installed and verified.
Decision Reminders
Keep the complete OEM lighting replacement system in view while comparing parts.
- VIN: Confirm market, trim, and option.
- Layer: Source, module, housing, or harness.
- Contents: List everything included or transferred.
- Condition: Inspect tabs, optics, vents, and seals.
- Software: Budget coding and calibration.
- Aim: Finish with verified beam placement.
Glossary Snippets
Terms that separate useful performance from apparent compatibility.
When to Use a Top 10 Review
Use a OEM lighting replacement roundup only after the required function, vehicle interface, and operating limits are known.
- Problem defined: The visibility or mobility failure is specific.
- Vehicle mapped: Interfaces and limits are documented.
- Format chosen: The correct product family is settled.
- Evidence available: Finalists can be compared on relevant tests.
Have finalists already? Open a Comparison for a closer tradeoff.
When to Use a Comparison
Compare OEM lighting replacement finalists that solve the same defined problem on the same vehicle configuration.
- Application: Both match the exact vehicle and function.
- Performance: Evidence addresses the operating problem.
- Integration: Mounting and system effects are understood.
- Ownership: Inspection and service demands are acceptable.
Need a broader field? Use a Top 10 to form a shortlist.