
Nail Care Products Buying Guide for Gel Nails
A gel manicure is a system purchase, even when the base, color, lamp, and remover are sold separately. The coating maker's compatible-lamp guidance and cure schedule belong at the center of the shortlist. Wattage, a familiar bottle shape, or the word LED cannot establish that two unrelated components work together.
Application and removal matter just as much as color. Gel must be laid down in controlled layers, kept off surrounding skin before curing, stored away from stray light, and removed by the method specified for that material. Choose the complete path now—from preparation through final removal—so a missing wipe, wrap, or instruction does not invite improvisation later.
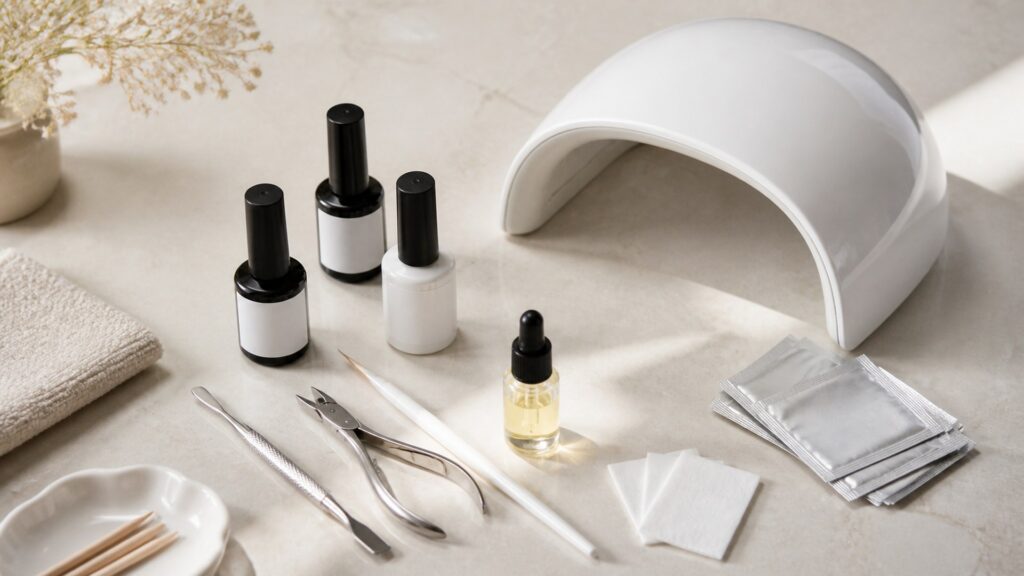
Buying framework
Buy the documented system, not a collection of bottles
Gel is workable at home when every stage has clear, mutually consistent directions. Start with the coating-to-lamp relationship, then confirm that application control and removal fit your skill and schedule.
Anchor the lamp to the gel: Use the coating maker's current lamp specifications and cure schedule. Do not infer compatibility from connector type, lamp label, or wattage alone.
Plan thin, controllable layers: Brush shape and gel viscosity should let you cover the nail without flooding the sidewalls. Opaque color belongs in multiple directed coats, not one improvised thick coat.
Keep uncured gel off skin: Choose a workspace and cleanup method that allow accidental contact to be removed before the hand enters the lamp. A wide brush is useful only when you can control its edges.
Know what happens after curing: Some systems retain a tacky inhibition layer that is overcoated or wiped as directed; others use a no-wipe finish. Buy the specified wipe and cleanser only when the procedure calls for them.
Start with the removal route: Confirm whether the material is soak-off, file-off, or uses another stated method, and buy the necessary supplies first. Removal tolerance can rule out a system before shade selection begins.
Who this is for
Match the system to your tolerance for process
Gel wearers differ most in how precisely they can apply thin coats and how much removal work they accept. Those constraints matter more than the number of colors in a kit.
The first complete-system buyer: You want the fewest compatibility decisions. Favor a documented kit in which lamp, base, color, top, cure times, wipes, and removal instructions are clearly identified rather than merely bundled.
The confident color changer: You already own a compatible lamp and can control several thin coats. Verify each new color against that exact system, paying particular attention to instructions for dark, highly pigmented, or effect shades.
The long-wear planner: You value a durable finish but can schedule deliberate removal. Compare what is required to break the seal, wrap, soak, or file; long wear is a poor bargain if you will peel it off.
The low-process wearer: Lamp positioning, skin cleanup, multiple cure steps, and planned removal feel disproportionate to the result you want. Conventional air-dry polish or press-on formats may provide color with a more suitable workflow.
What to pay attention to
Translate system labels into bench-top behavior
Useful gel specifications describe relationships: which lamp, which layer, how thick, how long, and how the material eventually comes off. A single impressive number rarely answers those questions.
Cure system and application control
Connect lamp guidance, cure schedule, pigmentation, viscosity, and brush reach to each individual layer.
Removal method and kit completeness
Account for every wipe, wrap, file, solvent, storage step, and instruction needed to finish the cycle.
Named lamp compatibility: Look for lamp guidance from the gel manufacturer, including any required model or output characteristics and a layer-specific schedule. Generic UV/LED wording gives less assurance than an identified system.
Cure schedule: Base, color, builder, and top layers may have different instructions. A clear schedule should state times and any relevant hand or thumb positioning without asking the buyer to invent adjustments.
Viscosity and self-leveling: Thicker gel may stay where placed yet form bulk; thinner gel can level quickly but reach skin sooner. Choose behavior that lets you maintain a narrow margin around nail folds.
Pigment opacity: Dark, white, and strongly opaque shades can block light differently from translucent color. Follow their specified coat thickness and cure directions instead of compensating with a longer guess.
Brush and neck control: A flat, even brush helps spread a thin coat, while bottle-neck wiping controls how much reaches the nail. Bulky stems and overloaded bristles increase cleanup around small nail plates.
Top-gel finish: No-wipe and inhibition-layer finishes end differently. Verify whether the cured surface needs a specified cleanser and lint-free wipe, and whether the top coat is compatible with the color system.
Removal designation: Soak-off wording should come with an actual procedure; file-off material requires skill, tools, and stopping control. Treat removal classification as a major specification, not fine print.
Avoid these traps
Gel shortcuts usually remove the guardrails
Compatibility, coat control, and removal directions are part of the product. These mistakes replace documented relationships with guesses.
Shopping by lamp wattage: Wattage is an electrical input measure, not a universal cure guarantee. Match the coating to the lamp the manufacturer specifies rather than assuming a larger number cures every formula.
Mixing systems casually: A base, color, and top may look interchangeable while their cure and removal instructions differ. Cross-brand mixing without explicit compatibility information leaves the buyer responsible for unsupported assumptions.
Curing a flooded cuticle line: Do not place a hand in the lamp while uncured gel remains on surrounding skin. Stop, clean the contact using the stated method, and restore a controlled margin first.
Making one thick color coat: Bulk does not replace the prescribed number of thin layers. Heavy opaque application can cure or wear unpredictably, while also creating raised sidewalls that are tempting to pick.
Peeling instead of removing: Once gel lifts, pulling it away may remove surface material from the nail. Use the specified soak-off or file-off process and allow enough time to complete it without prying.
Decision guidance
Choose by system completeness and exit route
The best format is the one whose whole procedure you can execute without substitutions. Use these branches before comparing finishes.
If this is your first gel kit: Choose an integrated system with an identified lamp, compatible coatings, explicit cure times, skin-contact instructions, and a complete removal list. A bundle without coherent directions is not beginner-friendly.
If you already own a lamp: Start with its exact model and supported coating guidance, then shortlist colors accordingly. Do not buy a shade first and treat a similar-looking lamp as automatically acceptable.
If dark color is the priority: Look for shade-specific directions, a brush you can keep thin, and enough cure information to avoid compensating for opacity. Test application control with a practice surface if the maker permits.
If easy removal matters most: Favor a documented soak-off color system and verify every required prep, wrap, solvent, and timing step. Soak-off is a procedure, not a promise that the coating will slide away instantly.
If you dislike precise cleanup or removal: Choose an air-dry lacquer or another lower-process format instead of forcing gel into the routine. The alternative may offer less wear while better matching your patience and workspace.
Ownership & compatibility
Protect light-sensitive products and the procedure
After purchase, storage and equipment condition affect whether familiar materials remain controllable. Keep the system identifiable and ready before each manicure begins.
Shield bottles from curing light: Keep gel bottles closed and away from direct sunlight and lamp spill. Wipe the neck as directed so residue does not compromise the cap seal or expose fresh product to stray light.
Maintain the lamp as specified: Keep the interior clean according to the maker's instructions, inspect its cable and controls, and observe any component replacement guidance. Do not improvise reflective liners or modify the enclosure.
Restock the exit supplies: Before applying another set, confirm that the specified remover, wraps, files, wipes, and cleanup materials are available. Removal should never depend on whatever substitute happens to be nearby.
Stop when skin or nails object: Discontinue use after a reaction or persistent nail change and seek qualified advice as appropriate. Do not diagnose the cause yourself or test additional uncured products on affected skin.
FAQ
Gel-system questions before checkout
These answers clarify the compatibility and process details most likely to be hidden by color selection.
Can any LED nail lamp cure any gel polish?
Does a higher-wattage lamp cure gel better?
Why are thin gel coats important?
What should I do if uncured gel touches skin?
What is the sticky layer after curing gel?
Are no-wipe gel top coats easier to use?
How can I tell whether gel is soak-off?
Can I peel off gel once it starts lifting?
When should I replace a gel nail lamp?
Bottom line
Compatibility matters more than color count
A workable gel purchase identifies the lamp, coating sequence, thin-layer procedure, skin-contact cleanup, and removal route before the first bottle opens. If any of those steps depends on guessing, the system is not complete enough.
Verify the cure relationship: Match every gel layer to the lamp and schedule named by its manufacturer.
Control uncured product: Choose viscosity, brushes, and workspace tools that keep gel on the nail and allow cleanup before curing.
Buy the exit plan: Know whether the material soaks or files off and have every required removal supply ready.
Reading Shortcuts
Move from lamp choice to removal planning.
Decision Reminders
Keep the entire gel cycle visible.
- Lamp: Use the coating maker's compatibility guidance.
- Layers: Apply the specified number of controlled thin coats.
- Skin: Remove uncured contact before the hand enters the lamp.
- Finish: Know whether the inhibition layer remains or is wiped.
- Removal: Stock the soak-off or file-off supplies in advance.
- Storage: Protect closed bottles from sunlight and lamp spill.
Glossary Snippets
Terms used in gel-system directions.
When to Use a Top 10 Review
Use rankings only after the compatible system and removal type are settled.
- Lamp is known: Exclude gels without compatible-lamp guidance.
- Removal is known: Keep only the soak-off or file-off route you accept.
- Application is manageable: Compare viscosity, brush width, and pigmentation.
- Supplies are complete: Confirm wipes, cleanup, and removal materials.
Already choosing between two systems? A Comparison can focus on their cure and removal differences.
When to Use a Comparison
Compare complete gel systems rather than isolated shade counts.
- Lamp guidance: Compare how specifically each coating identifies compatible equipment.
- Layer control: Weigh brush geometry, viscosity, and opaque-color directions.
- Finishing step: Check inhibition-layer cleanup and top-gel requirements.
- Exit workload: Compare soaking, filing, wrapping, and supply costs.
Still exploring? A Top 10 can help identify coherent systems before a head-to-head review.