
Nail Tools Buying Guide for Beginner Kits
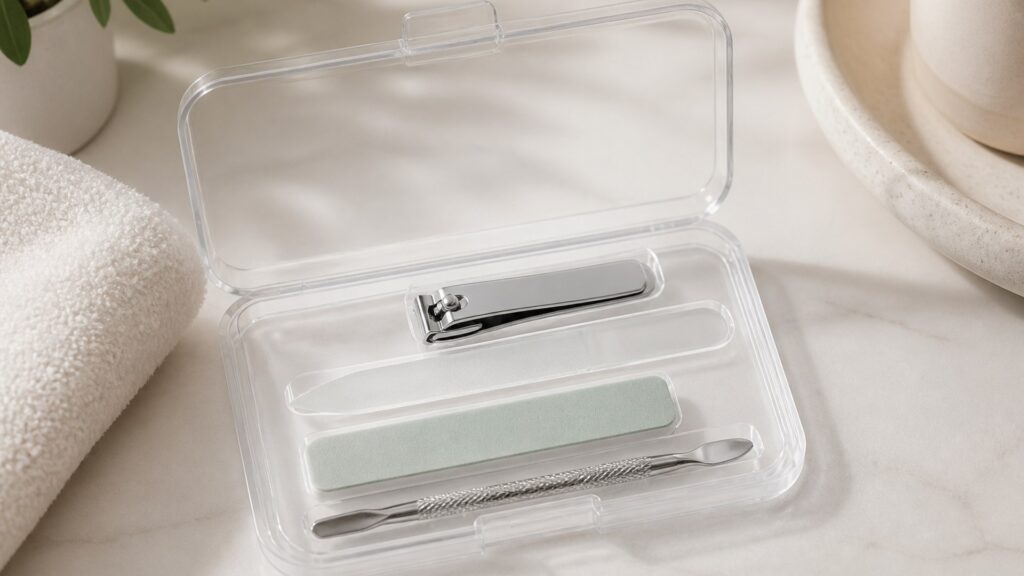
A beginner nail kit should make trimming and shaping understandable without introducing a case full of sharp specialty implements. Start with a well-aligned clipper, a file suited to natural nails, and a soft cleaning brush; add another tool only for a learned technique.
Inspect cutting alignment, file grit, edge finishing, handle control, protective storage, and cleaning directions. Avoid kits that treat nippers, metal pushers, drills, or coarse buffers as casual essentials without explaining their limited use and risks.
Starter framework
Learn three basic jobs before expanding
Shortening, smoothing, and gentle cleaning cover the foundation of home nail maintenance.
Observe before cutting: Look at nail thickness, shape, surrounding skin, and existing splits under good light. Do not use tools on painful, inflamed, bleeding, or possibly infected areas.
Practice one function: Learn controlled clipping or filing separately instead of changing length, buffing, and handling cuticles in the same first session.
Set conservative limits: Leave a comfortable free edge, use low pressure, and stop when smooth. More removal is not evidence of better grooming.
New-user profiles
Match the starter kit to hands and habits
Dexterity, nail thickness, supervision, and routine frequency shape the safest first purchase.
The independent learner: Choose large understandable controls, visible jaw alignment, and a file with clearly identified grit and intended nail type.
The supervised teen: Favor a small personal set with covered sharp edges and a permanent storage location beyond younger children’s reach.
The occasional groomer: A clipper and gentle file may be enough. Specialty pieces should not enter the kit merely to fill molded compartments.
Beginner details
Look for predictable feedback and clean finishing
A starter tool should reveal what it is doing before excessive pressure or material removal occurs.
What practice material reveals
If suitable guidance permits, observing the clipper and file away from living tissue helps a learner understand pressure, angle, and material removal before nail contact.
What the first session reveals
One hand is enough to assess grip, visibility, edge smoothness, fatigue, and whether the instructions support controlled correction rather than repeated cutting.
Clipper jaws: Close the clipper slowly and inspect an even meeting line. Loose levers, rough corners, and offset blades make controlled first attempts harder.
Appropriate file: Choose grit labeled for natural nails and fine edge finishing. Extremely coarse abrasives can remove material too quickly for a learner.
Protective case: Every cutting or pointed surface needs a fitted cover or secure slot, while cleaned tools must dry fully before the case closes.
Beginner errors
Avoid advanced tools without an advanced reason
Sharp precision implements can cause harm when a new user has not learned anatomy, control, and sanitation.
Cutting attached cuticle: Do not treat living protective tissue as material that must be removed. Pain, bleeding, or redness means the action has gone too far.
Sawing aggressively: Heavy back-and-forth pressure with a coarse file can roughen or split natural edges. Use the maker’s technique and a suitable finishing surface.
Sharing the starter kit: Personal tools are simpler to manage hygienically. Never share implements contaminated by blood or suspected infection.
Kit decision
Buy a small core with room to learn
Beginner value comes from dependable essentials, clear instructions, and replaceable individual pieces.
Choose three essentials: A good clipper, suitable file, and soft nail-cleaning brush support common maintenance without overwhelming the learner.
Add slowly: Purchase a buffer or other specialist only after identifying its exact job, safe frequency, care needs, and signs that use should stop.
Reject mystery bundles: Skip sets with unnamed metals, unexplained shapes, duplicate tools, rough hinges, or no sanitation and storage guidance.
Starter upkeep
Make cleanup part of the lesson
A first kit should teach that grooming ends only after tools are cleaned, dried, inspected, and protected.
Remove residue: Follow material-specific directions to clear nail dust and debris from files, brushes, blades, and joints after the session.
Allow complete drying: Leave cleaned items in an open safe location until moisture is gone, then return sharp pieces to covered assigned slots.
Notice wear: Replace cracked files, corroded metal, bent tips, loose hinges, or blades that demand repeated squeezing. Do not improvise home repairs.
FAQ
Beginner nail-tool questions
These answers keep the first kit small, understandable, and safe to maintain.
Which tools should a beginner nail kit include?
Should beginners buy cuticle nippers or metal pushers?
How can a beginner test nail clippers safely?
Final check
Let confidence grow before the tool count
A successful starter set teaches gentle control and reliable cleanup without encouraging unnecessary intervention.
Explain each piece: The learner can name every tool’s job, intended contact area, cleaning method, and stopping rule before use.
Complete a restrained session: Trimming and filing produce smooth comfortable edges without pain, bleeding, excessive thinning, or repeated correction.
Reset independently: The learner can clean, dry, inspect, and protect every item, then store the kit in its safe permanent location.
Reading Shortcuts
Move directly to the beginner use decision stage you need.
Decision Reminders
Keep the evidence for beginner use visible while comparing.
- Role: The nail tool serves the named task.
- Proof: The trial observes clean cuts, controlled filing, comfortable leverage, and intact surrounding skin.
- Care: Remove filings, disinfect compatible surfaces, and dry metal hinges before storage.
Glossary Snippets
Useful language for comparing nail tools.
When a Top 10 List Helps
Use rankings to discover credible nail tools, then screen them for beginner use.
- The format is undecided: A broad list reveals plausible forms and price levels.
- A shortlist is needed: Rankings narrow discovery but do not replace fit testing.
Have finalists already? Open the comparison section.
When a Direct Comparison Helps
Compare finalists after establishing their suitability for beginner use.
- Two candidates remain: Side-by-side evidence exposes meaningful tradeoffs.
- An upgrade is uncertain: Compare whether added cost corrects the original weakness.
Still exploring? Start with the Top 10 section.