
Off-Road & Overlanding Buying Guide for Rock, Mud, and Sand Terrain
Rock, mud, and sand are not difficulty labels; they load the vehicle differently. Rock concentrates force at tire sidewalls and underbody contact points. Mud fills tread, deepens ruts, blocks cooling surfaces, and adds suction. Sand rewards flotation but builds heat and punishes unnecessary mass.
Choose for the dominant terrain and build a deliberate compromise for the rest. Match tire carcass and tread, then establish a pressure range using load, speed, heat, wheel, and manufacturer guidance. Protect the contact zones the route actually exposes. Carry recovery tools that work with available anchors and land rules. Technique remains part of the system: uncontrolled wheelspin, excessive momentum, or pressure without bead and heat awareness can defeat good equipment.
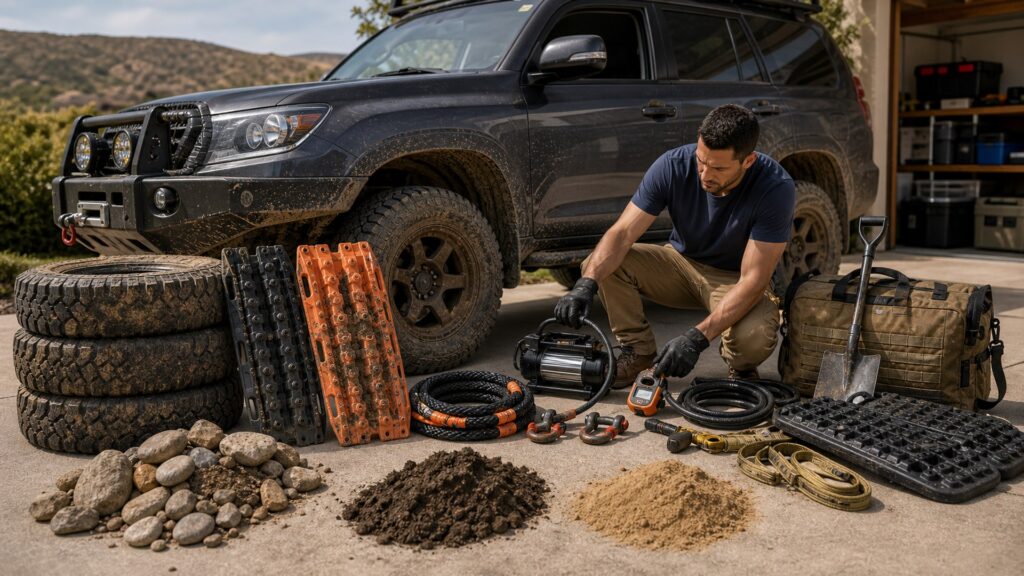
Buying framework
Choose equipment from how the terrain resists motion
Identify cutting, deformation, suction, rutting, flotation, contamination, and heat before selecting tires or recovery tools.
Read the terrain structure: Note edge sharpness, rock spacing, mud depth and base, sand grain and slope, water, temperature, escape routes, and anchor availability.
Set a tire-pressure plan: Use measured load, tire and wheel guidance, speed, heat, bead security, and terrain; include reinflation before higher-speed travel.
Reduce resistance before force: Stack or avoid rocks where permitted, clear mud and chassis drag, dig sand ramps, and use boards before escalating recovery energy.
Protect secondary systems: Manage radiator blockage, air filtration, brakes, bearings, breathers, electrical connectors, and underbody inspection after exposure.
Who this is for
Prioritize the dominant terrain without losing mixed-route safety
Frequent rock crawlers, mud users, dune travelers, and long-distance mixed routes need different specialization.
Rock-focused drivers: Favor sidewall and tread durability, compliant footprint, precise control, contact-zone protection, low gearing, and recovery direction.
Mud-focused drivers: Prioritize appropriate voids, clearance, recovery reach, radiator access, sealed service points, and restraint with wheelspin.
Sand-focused travelers: Control mass, footprint, heat, momentum, cooling, compressor capacity, and digging while avoiding abrupt steering or throttle.
Mixed-route overlanders: Choose a robust all-around tire and moderate protection, then rely on pressure management, route judgment, and adaptable recovery rather than extreme specialization.
What to pay attention to
Terrain specifications that change the outcome
Tire labels matter less than carcass behavior, real tread, load, pressure, clearance, and system temperature.
Terrain Contact
Footprint, carcass, sidewall, tread void, compound, clearance, protection, and underbody shape.
System Survival
Cooling, filtration, seals, bearings, brakes, driveline, recovery reach, anchors, and post-terrain service.
Carcass and sidewall: Compare ply material, construction, load range, sidewall features, tread depth, mass, repairability, and behavior at intended pressure.
Tread-to-terrain match: Rock benefits from controlled conformity and edge grip; mud needs suitable void evacuation; sand often favors flotation over aggressive digging.
Clearance under load: Measure differential, arms, belly, and bumpers with real weight and pressure because soft surfaces and articulation change effective margins.
Thermal operating window: Lower pressure, high speed, heavy load, hot sand, wheelspin, and slow airflow increase tire, transmission, engine, and brake heat.
Recovery ecosystem: Match boards, shovel, winch, anchors, straps, points, compressor, gauge, repair tools, and communication to terrain and vehicle.
Avoid these traps
Terrain myths that damage equipment or deepen the stuck
One pressure, one tire stereotype, and more wheelspin are poor substitutes for reading resistance and heat.
Airing down without a complete plan: Reduced pressure can improve footprint but increases heat, sidewall deflection, pinch risk, and bead concerns; speed and load limits change.
Using maximum wheelspin in mud: Spinning can clear some tread but also digs deeper, heats components, loses steering, and fills cooling surfaces.
Choosing aggressive tread for sand: A digging pattern and abrupt throttle can bury the vehicle; footprint, mass, smooth momentum, and temperature control may matter more.
Armoring after every scrape: Heavy protection can worsen sinking and clearance; use contact evidence, driving line, and localized smooth protection.
Decision guidance
Match the intervention to the resistance you can reduce
Change pressure, line, digging, and load before buying more traction hardware or applying more force.
If rock cuts or pinches tires: Choose stronger suitable construction, precise pressure control, wheel protection, spotters, and line selection while avoiding excessive speed.
If mud packs the tread: Use an appropriate self-cleaning pattern, maintain safe momentum, preserve steering, manage clearance, and stop before rut and suction overwhelm recovery.
If sand causes sinking: Reduce mass where possible, establish an approved lower-pressure plan, use smooth inputs, dig ramps, and deploy boards early.
If routes mix all three: Select the best compromise for the most consequential segment and carry pressure, repair, recovery, and cooling capability for the others.
Ownership & compatibility
Service the terrain out of the vehicle
Mud, sand, and rock damage remain active after leaving the trail through trapped grit, heat, imbalance, and corrosion.
Clean critical systems: Clear radiators, brakes, wheels, drains, skids, frame pockets, seals, steps, and recovery gear without forcing contamination deeper.
Inspect tires methodically: Check tread, sidewalls, beads, valves, wheels, pressure loss, embedded rock, cuts, bulges, heat evidence, and repair condition.
Review temperature and contact: Record overheating, fluid smells, warning messages, scrape locations, wheelspin, pressure, and recovery so the next setup addresses evidence.
FAQ
Rock, mud, and sand questions
These answers cover pressure, tires, heat, wheelspin, clearance, and recovery.
What tire pressure should I use off road?
Are mud-terrain tires best on every difficult trail?
Why does airing down help in sand?
What tire features matter most on sharp rock?
How can I avoid overheating in deep mud?
Are traction boards useful on all three terrains?
Should I add more ground clearance for mud?
What recovery method works best in sand?
What inspections should follow mixed-terrain travel?
Bottom line
Terrain capability begins with controlling resistance
Choose tire behavior and protection for the dominant mechanism, then use pressure, technique, cooling, and recovery to cover mixed conditions.
Read the medium: Separate cutting rock, dragging mud, and sinking sand.
Manage the tire: Match carcass and tread, control pressure, speed, load, and heat.
Reduce before recovering: Change line, dig, clear drag, and use traction aids before higher-energy force.
Reading Shortcuts
Move from the operating problem to a vehicle-compatible terrain-specific setup that can be installed and verified.
Decision Reminders
Keep the complete terrain-specific setup in view while comparing parts.
- Rock: Cuts, pinch, articulation, contact.
- Mud: Void clearing, rut, suction, cooling.
- Sand: Flotation, mass, heat, momentum.
- Pressure: Load and speed change safe limits.
- Recovery: Match anchors and terrain.
- Service: Remove contamination and inspect.
Glossary Snippets
Terms that separate useful performance from apparent compatibility.
When to Use a Top 10 Review
Use a product roundup only after the required function and terrain-specific setup limits are known.
- Problem defined: The visibility or mobility failure is specific.
- Vehicle mapped: Interfaces and limits are documented.
- Format chosen: The correct product family is settled.
- Evidence available: Finalists can be compared on relevant tests.
Have finalists already? Open a Comparison for a closer tradeoff.
When to Use a Comparison
Compare finalists that solve the same defined terrain-specific setup problem on the same vehicle.
- Application: Both match the exact vehicle and function.
- Performance: Evidence addresses the operating problem.
- Integration: Mounting and system effects are understood.
- Ownership: Inspection and service demands are acceptable.
Need a broader field? Use a Top 10 to form a shortlist.